- Welcome to the Kancolle Wiki!
- If you have any questions regarding site content, account registration, etc., please visit the KanColle Wiki Discord
Difference between revisions of "User:Minhfongboy/KC Phase 2 Ranking"
Minhfongboy (talk | contribs) |
Minhfongboy (talk | contribs) |
||
| (163 intermediate revisions by 4 users not shown) | |||
| Line 1: | Line 1: | ||
| + | <font color = "red">'''VERSION 3.1'''</font> | ||
==General== | ==General== | ||
[[File:MFB_Ranking_Meme.png|thumb|center]] | [[File:MFB_Ranking_Meme.png|thumb|center]] | ||
| − | Looking for a ranking | + | Looking for a ranking comp that is efficient? I guess this blog can help you pick one.<br/> |
| − | <br/> | ||
| − | |||
| − | |||
| − | |||
| − | |||
| − | + | ==Efficiency Summary== | |
| − | + | To judge whether the comp is good for ranking, and to measure the efficiency, the KC simulator will be used to gauge the value and put in the following table as reference data. While '''it is true that the simulator code is not 100% correct as the game code, simulator code might miss some modifier here and there, this is still the closest data to the game that we players can reference to'''. After all, having some close numbers that we can base our comps on is still better than measuring a comp efficiency without any numbers to back it up. | |
| − | + | *Due to this reason, some of the numbers down here might not reflect the true rate in the game, but since they are the closest rate to the game we can get, it is still a good reference that we can use to estimate the true reality rate around the expected range in the table below. | |
| − | + | All the simulations are done with 50K samples. Probability variance might cause the rate to be a little off, but eventually they will end up at the expected value in the table with more samples. | |
| − | + | *To test the comp in the simulator yourself, please do as the following: | |
| − | + | **Step 1. Download the kcsim file provided in the external link of any comp in the [[File:SortieButtonOn.png|170px]] column. | |
| − | + | **Step 2. Go to KC simulator site [https://kc3kai.github.io/kancolle-replay/simulator.html], select '''Save/Load Simulator Backup'''. | |
| − | + | **Step 3. A dialog box will pop up, select '''Choose File''', navigate to the kcsim file you just downloaded and open it. | |
| − | + | **Step 4. Select '''Import All (Refresh page)''' to load it up. | |
| − | + | *To see the details of equipment setup without downloading the file, please check out the second tab, '''Comp setup, routing and Misc. Notes'''. | |
| − | |||
| − | |||
| − | |||
| − | |||
| − | |||
| − | |||
| − | |||
| − | |||
| − | |||
| − | |||
| − | |||
| − | |||
| − | |||
| − | |||
| − | |||
| − | |||
| − | |||
| − | |||
| − | |||
| − | |||
| − | |||
| − | |||
| − | |||
| − | |||
| − | |||
| − | |||
| − | |||
| − | |||
| − | |||
| − | |||
| − | |||
| − | |||
| − | |||
| − | |||
| − | |||
| − | |||
| − | |||
| − | |||
| − | |||
| − | |||
| − | * | ||
| − | |||
| − | |||
| − | |||
| − | |||
| − | |||
| − | |||
| − | |||
| − | |||
| − | |||
| − | |||
| − | |||
| − | |||
| − | |||
| − | |||
| − | |||
| − | |||
| − | |||
| − | |||
| − | |||
| − | |||
| − | |||
| − | |||
| − | |||
| − | |||
| − | |||
| − | |||
| − | |||
| − | |||
| − | |||
| − | |||
| − | |||
| − | |||
| − | |||
| − | |||
| − | |||
| − | |||
| − | |||
| − | |||
| − | |||
| − | |||
| − | |||
| − | |||
| − | |||
| − | |||
| − | |||
| − | |||
| − | |||
| − | |||
| − | |||
| − | |||
| − | |||
| − | |||
| − | |||
| − | |||
| − | |||
| − | |||
| − | |||
| − | * | ||
| − | |||
| − | |||
| − | |||
| − | |||
| − | |||
| − | |||
| − | |||
| − | |||
| − | |||
| − | |||
| − | |||
| − | ** | ||
| − | |||
| − | |||
| − | |||
| − | |||
| − | |||
| − | |||
| − | |||
| − | |||
| − | |||
| − | |||
| − | |||
| − | |||
| − | |||
| − | |||
| − | |||
| − | |||
| − | |||
| − | |||
| − | |||
| − | [[File: | ||
| − | * | ||
| − | * | ||
| − | |||
| − | |||
| − | |||
| − | |||
| − | |||
| − | |||
| − | |||
| − | |||
| − | |||
| − | |||
| − | |||
| − | |||
| − | |||
| − | |||
| − | |||
| − | * | ||
| − | * | ||
| − | |||
| − | |||
| − | |||
| − | |||
| − | |||
| − | |||
| − | |||
| − | |||
| − | |||
| − | |||
| − | |||
| − | |||
| − | |||
| − | |||
| − | |||
| − | |||
| − | |||
| − | |||
| − | |||
| − | |||
| − | |||
| − | ** | ||
| − | |||
| − | |||
| − | |||
| − | |||
| − | |||
| − | |||
| − | |||
| − | |||
| − | |||
| − | |||
| − | |||
| − | |||
| − | |||
| − | |||
| − | * | ||
| − | |||
| − | |||
| − | |||
| − | |||
| − | |||
| − | |||
| − | |||
| − | |||
| − | |||
<br/> | <br/> | ||
| − | + | <tabber> | |
| − | < | + | |-|Compositions and Stats= |
| − | + | {| class = "wikitable sortable" style="text-align: center;" | |
| − | + | !colspan="12"style="background-color: #AAAAAA"|'''Color code: <font color="lime">Outstanding</font> > <font color="yellow">Good</font> > Average > <font color="red">Bad</font>''' <br/> | |
| − | |||
| − | |||
| − | |||
| − | |||
| − | |||
| − | |||
| − | |||
| − | |||
| − | |||
| − | |||
| − | |||
| − | |||
| − | |||
| − | |||
| − | |||
| − | |||
| − | |||
| − | |||
| − | |||
| − | |||
| − | |||
| − | |||
| − | |||
| − | |||
| − | |||
| − | |||
| − | |||
| − | |||
| − | |||
| − | |||
| − | |||
| − | |||
| − | |||
| − | |||
| − | |||
| − | |||
| − | |||
| − | |||
| − | |||
| − | |||
| − | |||
| − | |||
| − | |||
| − | |||
| − | |||
| − | |||
| − | |||
| − | |||
| − | |||
| − | |||
| − | |||
| − | |||
| − | |||
| − | |||
| − | |||
| − | |||
| − | |||
| − | |||
| − | |||
| − | |||
| − | |||
| − | |||
| − | |||
| − | |||
| − | |||
| − | |||
| − | |||
| − | |||
| − | |||
| − | |||
| − | |||
| − | |||
| − | |||
| − | |||
| − | |||
| − | |||
| − | - | ||
| − | |||
| − | |||
| − | |||
| − | |||
| − | |||
| − | |||
| − | |||
| − | |||
| − | |||
| − | |||
| − | |||
| − | |||
| − | |||
| − | |||
| − | |||
| − | |||
| − | |||
| − | |||
| − | |||
| − | |||
| − | |||
| − | |||
| − | |||
| − | |||
| − | |||
| − | |||
| − | |||
| − | |||
| − | |||
| − | |||
| − | |||
| − | |||
| − | |||
| − | |||
| − | |||
| − | |||
| − | |||
| − | |||
| − | |||
| − | |||
| − | |||
| − | |||
| − | |||
| − | <font color=" | ||
| − | |||
| − | |||
| − | |||
| − | |||
| − | |||
| − | |||
| − | |||
| − | |||
| − | |||
| − | |||
| − | |||
| − | |||
| − | |||
| − | |||
| − | |||
| − | |||
| − | |||
| − | |||
| − | |||
| − | |||
| − | |||
| − | |||
| − | |||
| − | <br/> | ||
| − | |||
| − | |||
| − | |||
| − | |||
| − | |||
| − | |||
| − | |||
|- | |- | ||
| − | | | + | !style="width:200px;" rowspan=2|[[File:SortieButtonOn.png|170px]] |
| − | |< | + | !rowspan=2|[[File:Battle Card Status Medium Fatigue Face.png|17px]] |
| + | !rowspan=2|Victory Rate <ref name="Boss Sunk">Victory rate is based on scenario where all the shipgirls are full HP & 49 morale, unless stated otherwise.</ref><ref name="Resource Consumption">The rate, average resource and bucket cost might vary depending on the player. This is a rough estimation based on the status of my shipgirl level and equipment. In most cases, this won't make much difference however.</ref> | ||
| + | !rowspan=2|Retreat Rate <ref name="Resource Consumption"/> | ||
| + | !colspan=4|Average Resource per run <ref name="Resource Consumption"/> | ||
| + | !rowspan=2|Average {{IR}} per run <ref name="Resource Consumption"/> | ||
| + | !rowspan=2|{{Item/Icon|Ranking Point Reward|size=20px}} per run (per 100 runs) <ref name="S-Rank">Assuming S rank all nodes. Also, this is point gained per run (or 100 runs), not per hour, it might not reflect the real amount of point that can be earned in an hour.</ref> <ref name="100 Runs">Ranking point gained per 100 runs (shown in the parentheses) is calculated as '''ranking point gained per run X victory rate X 100'''. This also includes retreat, where the ranking point gained is considered lost as they are insignificant (i.e for map 6-3, it's 2.18 x 95.6% x 100 = 208.41 points per 100 runs).</ref> | ||
| + | !rowspan=2|{{Item/Icon|Ranking Point Reward|size=20px}} gained per resource used ratio (Efficiency Index) <ref name="rptprsr">This is calculated as '''ranking point gained per run / sum of fuel ammo steel and bauxite used per run'''. This column also displays number in '''10E-3''' unit to avoid leading zeroes. To get the correct value, you need to multiply it with 10<sup>-3</sup>.</ref> | ||
| + | !rowspan=2|Notes | ||
|- | |- | ||
| − | + | !{{Fuel}} | |
| − | + | !{{Ammo}} | |
| + | !{{Steel}} | ||
| + | !{{Bauxite}} | ||
|- | |- | ||
| − | | | + | |'''[[3-2]] <br> 1CL 5DD'''<br>Fast+ fleet, 4 radars [https://drive.google.com/file/d/1afnaPX2DpS9TDSt4eSAoJT4_MTC7OG9J/view?usp=sharing] |
| − | |<font color="red">''' | + | |style="background-color: #FF0000"|<font color="white">High</font> |
| + | |style="background-color: #00FF00"|99.5% | ||
| + | |style="background-color: #00FF00"|0.5% | ||
| + | |style="background-color: #FFFF00"|55 <ref name="Maelstrom"/> | ||
| + | |style="background-color: #FFFF00"|60 | ||
| + | |style="background-color: #FFFF00"|12 | ||
| + | |style="background-color: #FFFF00"|0 | ||
| + | |style="background-color: #00FF00"|0.1 | ||
| + | |style="background-color: #FF0000"|<font color="white">1.3 ('''128.31''')</font> | ||
| + | |style="background-color: #FFFF00"|10.236 | ||
| + | |style="text-align: left"| | ||
| + | #<font color="green">'''One of the fastest ways to get ranking point.'''</font> | ||
| + | # Boss node always contains transport ship to hunt so this map can be a great way to do <font color="green">'''weekly transport'''</font>. The tradeoff is you can't really spam it much due to the high morale draining rate, so either you have to wait for a while to do it again or prepare a lot of this kind of fleet to do transport kill. | ||
| + | # The simulator assumes you will always lose fuel due to a maelstrom on the way. See <font color = "red">'''Note''' <ref name="Maelstrom">The simulator assumes 100% you will hit the maelstrom, therefore you will always lose fuel supply upon reaching the boss node. This doesn't affect the rate, however. The only thing it changes is the slight difference in fuel consumption which is around 10 fuel. | ||
| + | *The amount of fuel loss is based on the number of radar carriers your fleet has. The comp provided here has 4 radars on 4 ships, which only causes you to lose 12.6% fuel. For details of how much fuel you will lose, it is calculated as the following: '''電探0:-28%, 電探1:-21%, 電探2:-16.8%, 電探3:-14%, 電探4:-12.6%, 電探5:-11.76%, 電探6:-11.2%'''. The kanji means radar carrier and the number represents how many radar carriers you have. For example, if you have 3, you will lose only 14%, likewise, if you have 4, you will lose 12.6%.</ref></font> below for details.''<br/><br/> | ||
|- | |- | ||
| − | |3-2 | + | |'''[[3-4]] <br> 2CL 1CAV 3DD''' [https://drive.google.com/file/d/1W98AjithecpTo2J8W9Rt0f8pT9vXpMgQ/view?usp=sharing] |
| − | |<font color=" | + | |style="background-color: #FF0000"|<font color="white">High</font> |
| + | |97% <ref name="Note63BRank"/> | ||
| + | |3% | ||
| + | |126 <ref name="noteFuel34">3-4 node D causes fuel loss as of following: '''電探0:-30%, 電探1:-22.5%, 電探2:-18%, 電探3:-15%, 電探4:-13.5%, 電探5:-12.6%, 電探6:-12%'''</ref> | ||
| + | |78 | ||
| + | |94 | ||
| + | |9 | ||
| + | |style="background-color: #FF0000"|<font color="white">1.37</font> <ref name="Note63BRank"/> | ||
| + | |style="background-color: #00FF00"|2.43 ('''235.71''') | ||
| + | |7.915 | ||
| + | |style="text-align: left"| | ||
| + | # '''<font color="green">Alternative option for 3-4 ranking, one of the best and fastest ways to gain a large amount of point.</font>''' | ||
| + | # CAV flagship is set to be '''85 morale''' as she is likely to score MVP throughout the run. You can even achieve better result by swapping the flagship between CAV and CL, keeping the sparkle for them. | ||
| + | # Bringing 4 radars on 4 ships will cause your fleet to lose only '''13.5%''' fuel. For more details of how much fuel you will lose, see <font color="red">'''Note''' <ref name="noteFuel34"/></font>.<br/><br/> | ||
|- | |- | ||
| − | | | + | |'''[[4-4]] <br> 3CVL 1CL 2DE''' <br> 5 OASW, 2 '''non-Kai''' DE [https://drive.google.com/file/d/12B5rpeVLs2OfIJRatBlRR0IY1F-DUI7z/view?usp=sharing] |
| − | |<font color="blue">''' | + | |Medium |
| + | |style="background-color: #FFFF00"|98.2% <ref name="Note63BRank"/> | ||
| + | |style="background-color: #FFFF00"|1.8% | ||
| + | |157 | ||
| + | |121 | ||
| + | |45 | ||
| + | |45 | ||
| + | |style="background-color: #FFFF00"|0.19 <ref name="Note63BRank"/> <ref name="44dock">Assumes you will '''never''' bucket DEs. The simulator also ignores any bucket usage if the damaged (less than 50% HP) shipgirl has less than 1 hour of repairing (only possible for DEs in this case).</ref> | ||
| + | |1.99 ('''195.41''') | ||
| + | |5.407 | ||
| + | |style="text-align: left"| | ||
| + | # <font color="red">'''DE must be non-Kai (Have less than 10 HP and have at least 2 equipment slots)'''</font> to abuse the overkill protection mechanic. Such DE <font color="blue">'''has the highest chance to trigger it'''</font> with the <font color="blue">'''least chance'''</font> of ending up at <font color="red">'''heavily damaged'''</font> state, which helps increase passing rate. | ||
| + | # When using such DE, you don't need to bucket them. Just repair them in the dock and swap them for another DEs if they are damaged. Assuming '''DE lv is less than 99, she would always have less than an hour of repairing'''. This helps reduce bucket usage. <ref name="44dock"/> | ||
| + | # CVL with slot equals or less than 17 is preferred as they can't be shot down under AS+ fighter phase. | ||
| + | # <font color="green">'''Great map for leveling ship due to new ship EXP boost at the boss node.'''</font>''<br/><br/> | ||
|- | |- | ||
| − | |4-4 | + | |'''[[4-5]] <br> 2 SS''' <br> Fast+ fleet [https://drive.google.com/file/d/1KMWJg_SsOYnBu8QyVhoIQ1DgmLfGIlrO/view?usp=sharing] |
| − | |<font color=" | + | |style="background-color: #FF0000"|<font color="white">High</font> |
| + | |style="background-color: #FF0000"|<font color="white">70.5%</font><ref name="Note45B">Can only get B rank at best.</ref> | ||
| + | |style="background-color: #FF0000"|<font color="white">22.4%</font> | ||
| + | |style="background-color: #00FF00"|24 | ||
| + | |style="background-color: #00FF00"|14 | ||
| + | |style="background-color: #00FF00"|16 | ||
| + | |style="background-color: #00FF00"|0 | ||
| + | |1.31 | ||
| + | |1.91<ref name="Note45RP">Assumes D rank preboss and B rank at the boss node, which gives '''2900 - 200 x 0.8 = 2740 HQ EXP''', or '''1.91''' ranking point.</ref> ('''134.65''') | ||
| + | |style="background-color: #00FF00"|'''35.37''' | ||
| + | |style="text-align: left"| | ||
| + | #<font color="red">'''Requires Fast+ submarine-only fleet'''.</font> As of January 2024, {{ShipLink|I-201/Kai}} and {{ShipLink|I-203/Kai}} are the only ones who can achieve '''Fast+'''. | ||
| + | # <font color="green">'''Cheapest map to do weekly world 4 quest.'''</font> | ||
| + | # <font color="red">'''However, the map MUST BE LOCKED in the FINAL FORM to make enemy DDs disappear at the boss node, which will lock you out of {{ShipLink|Maruyu}} farming</font>'''. But on the bright side, without enemy DD presence, the enemy ASWs are very weak, where they have little to no chance to sink your <font color="red">'''heavily damaged'''</font> non-flagship submarine, so you can advance after node H with <font color="red">'''heavily damaged'''</font> non-flagship submarine and no harm will be done to them. | ||
| + | #Keep in mind they have <font color="red">'''LITTLE TO NO CHANCE'''</font> to sink your submarine, '''NOT''' impossible. There is an actually '''0.2%''' chance your submarine can die, or 2 out of 1000 runs. | ||
| + | #For practical purposes, it is recommended that this comp/strategy is to be used in parallel with other ranking maps. As an example, one may run [[7-1]] as their main ranking map and occasionally sortie this composition as soon as the submarines are repaired, effectively making this strategy '''bucket-free'''.<br/><br/> | ||
| + | <!--|- style="border: 3px solid red" | ||
| + | |'''[[5-4]] <br/> 1CL 3DD 2CLT''' <br/> ETSCF fleet [https://drive.google.com/file/d/1_W8LV-O6rE08E_rNTWPHAiVgDxAfp98N/view?usp=sharing] | ||
| + | |Medium | ||
| + | |style="background-color: #FFFF00"|98.2% | ||
| + | |style="background-color: #FFFF00"|1.8% | ||
| + | |126 | ||
| + | |116 | ||
| + | |96 | ||
| + | |6 | ||
| + | |style="background-color: #FF0000"|<font color="white">1.53 </font> | ||
| + | |style="background-color: #00FF00"|2.55 ('''250.41''') | ||
| + | |7.412 | ||
| + | |style="text-align: left"| | ||
| + | #{{Ship/Link|Yahagi Kai Ni B|text=Yahagi}} (The CL with {{Night SPB}}) is set to be '''85 morale''' as she is likely to score MVP throughout the run. | ||
| + | #You should alway sortie this fleet at 49 morale as '''if you manage to S-rank all preboss nodes, the entire fleet will be sparkled by the time you reached the boss node''', which helps reduce bucket usage. | ||
| + | #<font color="green">'''Best map to kill transport ships as you will meet 4 of them in one sortie.'''</font> | ||
| + | #Like Phase 1, boss node still <font color="green">'''contains a lot of old {{Ship/Link|Naganami|Zuikaku|Shoukaku|Mutsu|Agano|Ariake|text=rare ships}}, making it ideal to farm for their equipment'''</font> if the player desires. | ||
| + | #However, the <font color="red">{{EquipmentLink|Elite Torpedo Squadron Command Facility}} '''is the absolutely minimum requirement'''</font> for this fleet to work, and '''possibly the {{EquipmentLink|Prototype Night Zuiun (Attack Equipment)}}''' as well to maintain the high pass rate. | ||
| + | #Due to the possibility of using FCF, it is possible that LoS may drop below the requirement. Only continue if your fleet still <font color="red">'''have above Cn2 45 LoS'''</font>. | ||
| + | #Each run in average supposed to consume '''174''' ammo, but 5-4 south route also consists of one ammo node that will alway give you '''60 ammo''' (No DLC equipped). Assuming 98% of the time you will not retreat and go through this node, you will gain back the ammo you used, which is around '''60 x 98% = 58 ammo''', hence the ammo usage became '''174 - 58 = 116'''. | ||
| + | #If you managed to tweak the fleet setup to allow 3-slot CL or weaker DD with low luck while maintaining reasonable pass rate, <font color="green">'''this map can be one of the best options for leveling. A ship that is in non-flagship position and never get MVP will gain at least 1700 - 1850 EXP per boss runs (2500 - 2800 if flagship, more with MVP)'''</font>. Theoretically, if the flagship always becomes MVP and you finished the boss battle, she can gain up to '''4500 EXP''' per runs. | ||
| + | #Keep in mind that due to being in a slot with very low capacity, the {{EquipmentLink|Prototype Night Zuiun (Attack Equipment)}} will <font color="red">'''almost always be completely shot down'''</font>, thus losing the proficiency. | ||
| + | #For some reasons, if you approach the boss node from south route once the map is cleared, {{Enemy/Link|Heavy Cruiser Ne-Class/Elite|text='''CA Ne-Class'''}} comp will never appear (Dev oversight or historical reference?)<br/><br/> | ||
| + | --> | ||
|- | |- | ||
| − | |7- | + | |'''[[6-3]] <br> 1CL 4DD 1AV''' <br> [https://drive.google.com/file/d/1MV_kEXOJYWTrSHElR25J9dlhM8d9WuCh/view?usp=sharing] |
| − | |''' | + | |Medium |
| + | |97.5% <ref name="Note63BRank">The simulator assumes you would only advance to night battle if you '''DID NOT''' get at least a '''B Rank''' at the end of the day battle. If you '''DID''', you would just stop fighting and go home. This explains the lower bucket usage. In general, unless you are looking for rare drops, it's not worth getting the S rank, B rank is enough.</ref> | ||
| + | |2.4% | ||
| + | |112 | ||
| + | |75 <ref name="Note63ResNode">The air recon resource node can give a small amount of ammo and bauxite depending on the player luck. If they managed to roll those, the amount of resource spent will be less. Therefore, in practice, the efficiency index of map 6-3 on average can be higher than the number shown here, as this number assumes you never gained any ammo or bauxite during the sortie.</ref> | ||
| + | |100 | ||
| + | |3 <ref name="Note63ResNode"/> | ||
| + | |style="background-color: #FF0000"|<font color="white">1.38</font> <ref name="Note63BRank"/> | ||
| + | |style="background-color: #FFFF00"|2.18 ('''212.55''') | ||
| + | |7.517 <ref name="Note63ResNode"/> | ||
| + | |style="text-align: left"| | ||
| + | #{{ShipLink|Mikuma Kai Ni Toku|text=Mikuma}} is set to be '''85 morale''' as she is likely to score MVP throughout the run.'' | ||
| + | #If the player prefers farming {{DM}} via the air recon node, {{ShipLink|Nisshin A|text=Nisshin}} can be used as an AV with full SPB loadout. This will secure GS for air recon node G and H, and <font color="green">'''both of these nodes combined can yield up to 8 {{DM}}'''</font> if the player is lucky (Still requires at least a victory at the boss node to obtain though). | ||
| + | #Keep in mind that without a proper combat-oriented AV like {{ShipLink|Mikuma Kai Ni Toku|text=Mikuma}}, the victory rate may decrease.''<br/><br/> | ||
|- | |- | ||
| − | |7- | + | |'''[[7-1]] <br> 1CL 4DD''' <br> Damegami RE [https://drive.google.com/file/d/1DnPGwy7-8ux4sDKAAXvI3NLXP6eizdA2/view?usp=sharing] |
| − | |''' | + | |Medium |
| − | |- | + | |style="background-color: #00FF00"|99.8% |
| − | | | + | |style="background-color: #00FF00"|0.2% |
| − | |''' | + | |style="background-color: #00FF00"|32 <ref name="71fuel">Node E gives 10-20 fuel (average 15), hence 47 - 15 = '''32'''.</ref> |
| + | |style="background-color: #00FF00"|46 | ||
| + | |style="background-color: #00FF00"|7 | ||
| + | |style="background-color: #00FF00"|0 | ||
| + | |style="background-color: #00FF00"|0.08 | ||
| + | |1.47 ('''146.7''') | ||
| + | |style="background-color: #00FF00"|14.7 | ||
| + | |style="text-align: left"| | ||
| + | # Standard ranking fleet, '''<font color="green">default chosen by most of the players</font>'''. {{Ship/Link|Yahagi Kai Ni B|text=Yahagi}} (The CL) will maintain the sparkle overtime due to MVP control hence she is set to be '''85 morale''' in the simulator. On another hand, the flagship and the CL should have the weakest ASW while 3 other DDs should have strong ASW to keep the sparkle up throughout the run. | ||
| + | # Despite damegami in the RE, they will never be used ('''Please also see <font color="red">Note</font> <ref name="damegami71">There is actually an extremely small chance (around 0.01%, or 1 out of 10000 runs) that you will use it, the simulator rounded it down to 0.</ref> below'''). They are there to allow you to advance to the boss node with no harm done.''<br/><br/> | ||
|} | |} | ||
| − | {| class = "wikitable" style="text-align: center;" | + | <references/> |
| + | |-|Comp Setup, Routing & Misc. Notes= | ||
| + | <div align="center">'''Map information''' | ||
| + | {| class = "wikitable" style="text-align: center; width: auto" | ||
!Map | !Map | ||
| − | ! | + | !Image |
| + | !Comp Setup | ||
| + | !style="auto;"|Route | ||
| + | !style="width:250px;"|Air Power | ||
| + | !style="width:75px;"|LoS | ||
| + | !Recommended <br> Formations | ||
| + | !Notes | ||
|- | |- | ||
| − | |3- | + | |[[3-2]] |
| − | |< | + | |[[File:World 3 3-2 Map.png|300px|thumb]] |
| + | |[[File:MFB_RC32.png|300px|thumb]] | ||
| + | |{{MapRoute|C|red|G|violet|L|red}}<br>Surface: 1<br>Boss: 1<br>Maelstrom: 0-1 | ||
| + | ! | ||
| + | ! | ||
| + | |style="text-align: left"|{{LineAhead}} | ||
| + | ! | ||
|- | |- | ||
| − | |4- | + | |[[3-4]] |
| − | |< | + | |[[File:World 3 3-4 Map.png|300px|thumb]] |
| + | |[[File:MFB_RC34_2N.png|300px|thumb]] | ||
| + | |{{MapRoute|D|violet|H|red|P|red}}<br>Surface: 1<br>Boss: 1<br>Maelstrom: 1 | ||
| + | |84 for AS | ||
| + | ! | ||
| + | |style="text-align: left"|{{LineAhead}} | ||
| + | ! | ||
|- | |- | ||
| − | | | + | |[[4-4]] |
| − | |< | + | |[[File:World 4 4-4 Map.png|300px|thumb]] |
| + | |[[File:MFB_RC44.png|300px|thumb]] | ||
| + | |{{MapRoute|A|red|E|red|I|red|K|red}}<br>Surface: 2<br>Submarine: 1<br>Boss: 1 | ||
| + | |144 for AS+ | ||
| + | ! | ||
| + | |style="text-align: left"|{{LineAbreast}} E <br> {{LineAhead}} Other | ||
| + | ! | ||
|- | |- | ||
| − | | | + | |[[4-5]] |
| − | |< | + | |[[File:World 4 4-5 Map.png|300px|thumb]] |
| + | |[[File:MFB 45 sub.png|300px|thumb]] | ||
| + | |{{MapRoute|D|red|H|red|T|red}}<br>Surface: 1<br>Submarine: 1<br>Boss: 1 | ||
| + | ! | ||
| + | ! | ||
| + | ! | ||
| + | |style="text-align: left"|<font color="red">'''FINAL FORM ONLY'''</font> | ||
|- | |- | ||
| − | | | + | <!--|[[5-4]] |
| − | |<font color=" | + | |[[File:World 5 5-4 Map.png|300px|thumb]] |
| + | |[[File:MFB_RC54.png|300px|thumb]] | ||
| + | |{{MapRoute|E|red|H|purple|J|purple|P|red}}<br>Surface: 1<br>Night: 2<br>Boss: 1 | ||
| + | ! | ||
| + | |Cn2 45 | ||
| + | |style="text-align: left"|{{Echelon}} H <br> {{LineAhead}} Other | ||
| + | |style="text-align: left"|<font color="red">Boss node is fixed to the comp consisting of {{Enemy/Link|Light Cruiser Tsu-Class Elite|text='''CL Tsu-Class'''}} and {{Enemy/Link|Destroyer Ro-Class Late Model|text='''DD Ro-Class'''}} once the map is cleared and you approach the boss node from south route.</font> | ||
| + | |- --> | ||
| + | |[[6-3]] | ||
| + | |[[File:World 6 6-3 Map.png|300px|thumb]] | ||
| + | |[[File:MFB_RC63.png|300px|thumb]] | ||
| + | |{{MapRoute|C|red|E|red|G|green|H|green|J|red}}<br>Surface: 1<br>Submarine: 1<br>Boss: 1<br>Resource: 2 | ||
| + | ! | ||
| + | |Cn3 38 | ||
| + | |style="text-align: left"|{{LineAbreast}} C <br> {{LineAhead}} Other | ||
| + | |style="text-align: left"|Air recon nodes G and H give one of the following resources each: | ||
| + | *Normal Success: | ||
| + | **50/60/80 {{Ammo}} | ||
| + | **30/40/50 {{Bauxite}} | ||
| + | **1 {{DM}} | ||
| + | *Great Success: | ||
| + | **100/150/200 {{Ammo}} | ||
| + | **80/100/150 {{Bauxite}} | ||
| + | ** 2/3/4 {{DM}} | ||
| + | <br/><br/><font color="red">{{Enemy/Link|Destroyer Princess|text='''Destroyer Princess II (115 Armor)'''}} comp will disappear once the map is cleared.</font><br/><br/> | ||
|- | |- | ||
| − | |7- | + | |[[7-1]] |
| − | | | + | |[[File:World 7 7-1 Map.png|300px|thumb]] |
| − | | | + | |[[File:MFB RC71.png|300px|thumb]] |
| − | | | + | |{{MapRoute|D|red|E|green|G|red|H|red|K|red}}<br>Surface: 1<br>Submarine: 2<br>Boss: 1<br>Resource: 1 |
| − | |< | + | ! |
| − | + | ! | |
| − | + | |style="text-align: left"|{{LineAhead}} G <br> {{LineAbreast}} Other | |
| − | | | + | |style="text-align: left"|Node E gives 10-20 {{Fuel}} (random amount between every 5 increment). |
| − | |- | + | *Drum +2 |
| − | | | + | *DLC +3. |
| − | |||
|} | |} | ||
| − | + | </div> | |
| − | + | |-|Extra Note, Explanation= | |
| − | < | + | |
| − | + | </tabber> | |
| − | + | </div> | |
| − | < | + | <div align="center">''Special thanks to '''Savara''' for providing the comp and '''Divinity_123''' for adjusting the setup and verifying the numbers.''<br/> |
| + | </div> | ||
---- | ---- | ||
| − | |||
| − | |||
| − | |||
==Managing quarterly sortie quests ranking points== | ==Managing quarterly sortie quests ranking points== | ||
| − | Credit to ''' | + | Credit to '''Savara, Ink20'''. This is one of the recommended strategies to shoot ranking cannons. |
<br/><br/>As of current, there are 7 quarterly quests giving ranking points, known as cannon. A total of '''2050''' point can be obtained by completing all of those. | <br/><br/>As of current, there are 7 quarterly quests giving ranking points, known as cannon. A total of '''2050''' point can be obtained by completing all of those. | ||
<br/>The following is the list of quarterly sortie quests. '''Bold''' indicates cannon quests | <br/>The following is the list of quarterly sortie quests. '''Bold''' indicates cannon quests | ||
| Line 475: | Line 288: | ||
*8. Clear all EOs and farm ranking points as usual | *8. Clear all EOs and farm ranking points as usual | ||
*9. When the end of the month is close, calculate how many rpt you need to reach your desired position and fire the cannons you need. | *9. When the end of the month is close, calculate how many rpt you need to reach your desired position and fire the cannons you need. | ||
| + | |||
| + | |||
| + | Alternatively, if you want to try ranking all 3 months: | ||
| + | *Month 1. Do Bm1, Bm5, Bm8, Bq2, Bq8, 7-2-2 run of Bq10 (so you don't have to open it again) and everything but one run of Bq7, Bq11 and Bq13 (350+300 rpt with 200+80+390 rpt ready in case of need) | ||
| + | *Month 2. Do Bq7, Bq10 and Bq11 (200+400+80 rpt) | ||
| + | *Month 3. Do Bq12 and Bq13 (330+390 rpt) | ||
| + | Also, remember that some requirement of these quests are shared with other quests and can be done together like 5-4 of Bq7 and Bq13 with 2CL, 3CA, 1CV or 1BBV (north or south route), 6-4 of Bq2 and Bq13, 6-3 of Bq2 and Bq4, etc. | ||
==Trivia== | ==Trivia== | ||
| + | ===Tools that help you with ranking=== | ||
| + | ====Savara's ranking cutoff - planning tool==== | ||
| + | Website: [https://bonodere.famluro.es] | ||
| + | <br/>This is a ranking supportive tool that calculates the amount of point you need to farm in order to reach a selected goal. It also includes features using ranking data from [https://senka.su senka.su] such as automatic score input, other players tracking system, and a filter for players potentially going for high ranking. For more information, please visit the site.<br/><br/> | ||
| + | |||
| + | ====Senka.su==== | ||
| + | Website: [https://senka.su] | ||
| + | <br/>A database site that shows the top 500 record of every server, which can be helpful if you wanna check where you are at compared to the other players in the top 500.<br/><br/> | ||
===Ranking plan=== | ===Ranking plan=== | ||
*As of September 2020, many quarterly quests that give ranking points have been released. This has directly affected the ranking pressure across all servers as nowaday T500 may requires as much effort as Phase 1 T100. However, this can also be a good thing as if you do all those quarterlies and EO in one single month, you can stack up to 3000 points pretty easily. With a couple of more sortie, you are guaranteed to hit T500 as well. So my advice is '''If your life is very busy, just focus all quarterlies in one month and clear all the EO that month too, this way, at least you will get ranking rewards every 3 months''' | *As of September 2020, many quarterly quests that give ranking points have been released. This has directly affected the ranking pressure across all servers as nowaday T500 may requires as much effort as Phase 1 T100. However, this can also be a good thing as if you do all those quarterlies and EO in one single month, you can stack up to 3000 points pretty easily. With a couple of more sortie, you are guaranteed to hit T500 as well. So my advice is '''If your life is very busy, just focus all quarterlies in one month and clear all the EO that month too, this way, at least you will get ranking rewards every 3 months''' | ||
| − | **Of course it is still possible to rank every month and spread out quarterlies to get enough point buff (i.e each month you only do 2-3 quarterlies for around 600 points), but will require much more points from daily sortie for T500 nowaday if you wanna catch up. Plan your schedule accordingly to your server if you spam daily. You are gonna need like | + | **Of course it is still possible to rank every month and spread out quarterlies to get enough point buff (i.e each month you only do 2-3 quarterlies for around 600 points), but will require much more points from daily sortie for T500 nowaday if you wanna catch up. Plan your schedule accordingly to your server if you spam daily. You are gonna need like 3700 for T500 (Hashi will need more obviously) |
===Regarding the EO and Quest cannon=== | ===Regarding the EO and Quest cannon=== | ||
*For EO cannon, you can shoot anytime in a month to gain rpt, but '''note that if you shoot in the last day of the month, between 22:00 - 00:00 JST of the next month, it will not be counted for anything !''' | *For EO cannon, you can shoot anytime in a month to gain rpt, but '''note that if you shoot in the last day of the month, between 22:00 - 00:00 JST of the next month, it will not be counted for anything !''' | ||
| − | *For quest cannon | + | *For quarterly quest cannon: |
| − | **Shooting it anytime before 14:00 JST of the last day of any month will give rpt to that month | + | **Shooting it anytime before 14:00 JST of the last day of any month will give rpt to that month. |
| − | **Shooting it after 14:00 JST of the last day of any month, <u>as long as that month is '''NOT''' the last month of the quarter</u>, will give rpt to the following month | + | **Shooting it after 14:00 JST of the last day of any month, <u>as long as that month is '''NOT''' the last month of the quarter</u>, will give rpt to the following month. |
| − | **Shooting it after 14:00 JST of the last day of the last month in a quarter <u>will just simply waste it, not counted for anything</u> | + | **Shooting it after 14:00 JST of the last day of the last month in a quarter <u>will just simply waste it, not counted for anything.</u> |
**For reference, 4 quarters in KC are month 12-1-2 / 3-4-5 / 6-7-8 / 9-10-11 | **For reference, 4 quarters in KC are month 12-1-2 / 3-4-5 / 6-7-8 / 9-10-11 | ||
Example: | Example: | ||
*Right now it's July, it belongs to quarter 6-7-8. I have the Z cannon available giving 350 points. | *Right now it's July, it belongs to quarter 6-7-8. I have the Z cannon available giving 350 points. | ||
| − | **If I shoot it anytime in July before 7/31 14:00 JST, I will have 350 points for July | + | **If I shoot it anytime in July before 7/31 14:00 JST, I will have 350 points for July. |
| − | **If I shoot it after 7/31 14:00 JST, but before August coming, I will have 350 points for August | + | **If I shoot it after 7/31 14:00 JST, but before August coming, I will have 350 points for August. |
| − | **If I shoot it after 8/31 14:00 JST, I will get nothing out of it, as August is already the last month of the quarter | + | **If I shoot it after 8/31 14:00 JST, I will get nothing out of it, as August is already the last month of the quarter. |
| + | *For limited seasonal quest cannon (Rainy Season 2023 - Terubozu, Setsubun, etc...), let's say the current month is '''May''' and it currently has a seasonal quest cannon: | ||
| + | **Shooting it anytime before 14:00 JST of the last day of '''May''' will give rpt to May. | ||
| + | **Shooting it after 14:00 JST of the last day of '''May''' will give rpt to the following month, '''June'''. | ||
| + | The last note regarding the seasonal quest cannon are '''VERY IMPORTANT''' to know about especially <font color="red">if the said cannon is a '''MONTHLY''' quest. As the points are '''given''' to the next month if the cannon is shot '''AFTER 14:00 JST of the current month''', <u>''it is possible to stack the point gained from that particular quest '''TWICE''' in the following month.''</u></font> The seasonal quest cannon will start giving the point to the next month as soon as 14:00 JST of the current month has been passed, but '''the monthly quest reset will not occur yet''', so there is a small time window of 15 hours where you can finish the said monthly seasonal quest before it resets itself, allowing you to do it again, doubling the point gained from the said quest in the following month.<br/><br/> | ||
| + | The entire quest cannon can be summed up using this table: | ||
| + | {| class = "wikitable" style="text-align: center; width: auto" | ||
| + | !rowspan=2| | ||
| + | |colspan=2|'''May 31st''' | ||
| + | |colspan=2|'''June 1st''' | ||
| + | |- | ||
| + | |'''13:59 JST of May 31st and before''' | ||
| + | |colspan=2|'''14:00 JST of May 31st - 04:59 JST of June 1st''' | ||
| + | |'''05:00 of June 1st and later''' | ||
| + | |- | ||
| + | |Quarterly quest | ||
| + | |Accounted for May | ||
| + | |colspan=2|<font color="red">'''LOST'''</font> | ||
| + | |Accounted for June | ||
| + | |- | ||
| + | |Seasonal quest '''BEFORE''' June quest reset | ||
| + | |Accounted for May | ||
| + | |colspan=2|'''Accounted for June''' | ||
| + | | | ||
| + | |- | ||
| + | |Seasonal quest '''AFTER''' June quest reset | ||
| + | |colspan=3| | ||
| + | |Accounted for June | ||
| + | |} | ||
| + | |||
| + | ===What is considered as a good ranking comp to be listed on the table?=== | ||
| + | A comp is considered to be good for ranking if it meets all of the following conditions when testing on the simulator: | ||
| + | *Victory rate > 95%. | ||
| + | *Fuel and ammo used per run < 300. | ||
| + | *Bauxite used per run < 50. | ||
| + | *Bucket used per run < 2. | ||
| + | *4 battles maximum, including boss. | ||
| + | *Efficiency higher than map 3-4 heavy comp. | ||
| + | |||
| + | ===How to decide the best comp for a map if there are many variants?=== | ||
| + | If there are multiple comps that can do the ranking well in a map, a tiebreaker system will be used to determine the best comp to display on the table. Tiebreaker rules are as the following: | ||
| + | # Victory rate | ||
| + | # Fuel and ammo used | ||
| + | # Bauxite used | ||
| + | # Bucket used | ||
| + | # Whether the fleet detecting enemy using seaplane, or having air power. | ||
Revision as of 08:06, 30 June 2024
VERSION 3.1
General
Looking for a ranking comp that is efficient? I guess this blog can help you pick one.
Efficiency Summary
To judge whether the comp is good for ranking, and to measure the efficiency, the KC simulator will be used to gauge the value and put in the following table as reference data. While it is true that the simulator code is not 100% correct as the game code, simulator code might miss some modifier here and there, this is still the closest data to the game that we players can reference to. After all, having some close numbers that we can base our comps on is still better than measuring a comp efficiency without any numbers to back it up.
- Due to this reason, some of the numbers down here might not reflect the true rate in the game, but since they are the closest rate to the game we can get, it is still a good reference that we can use to estimate the true reality rate around the expected range in the table below.
All the simulations are done with 50K samples. Probability variance might cause the rate to be a little off, but eventually they will end up at the expected value in the table with more samples.
- To test the comp in the simulator yourself, please do as the following:
- Step 1. Download the kcsim file provided in the external link of any comp in the
 column.
 - Step 2. Go to KC simulator site [7], select Save/Load Simulator Backup.
- Step 3. A dialog box will pop up, select Choose File, navigate to the kcsim file you just downloaded and open it.
- Step 4. Select Import All (Refresh page) to load it up.
- Step 1. Download the kcsim file provided in the external link of any comp in the
- To see the details of equipment setup without downloading the file, please check out the second tab, Comp setup, routing and Misc. Notes.
| Color code: Outstanding > Good > Average > Bad | |||||||||||
|---|---|---|---|---|---|---|---|---|---|---|---|

|
Victory Rate [1][2] | Retreat Rate [2] | Average Resource per run [2] | Average |
Notes | ||||||
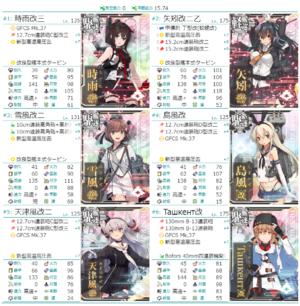
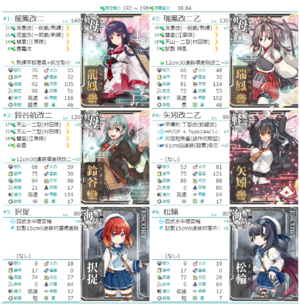
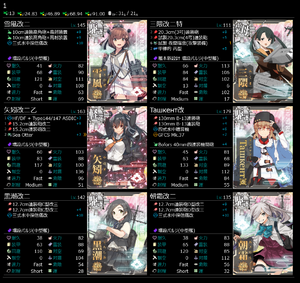
| 3-2 1CL 5DD Fast+ fleet, 4 radars [1] |
High | 99.5% | 0.5% | 55 [6] | 60 | 12 | 0 | 0.1 | 1.3 (128.31) | 10.236 |
|
| 3-4 2CL 1CAV 3DD [2] |
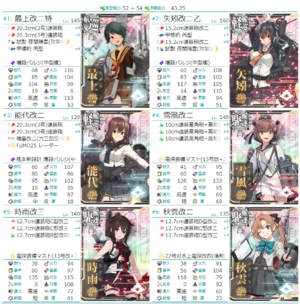
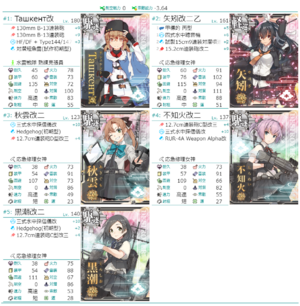
High | 97% [7] | 3% | 126 [8] | 78 | 94 | 9 | 1.37 [7] | 2.43 (235.71) | 7.915 |
|
| 4-4 3CVL 1CL 2DE 5 OASW, 2 non-Kai DE [3] |
Medium | 98.2% [7] | 1.8% | 157 | 121 | 45 | 45 | 0.19 [7] [9] | 1.99 (195.41) | 5.407 |
|
| 4-5 2 SS Fast+ fleet [4] |
High | 70.5%[10] | 22.4% | 24 | 14 | 16 | 0 | 1.31 | 1.91[11] (134.65) | 35.37 |
|
| 6-3 1CL 4DD 1AV [5] |
Medium | 97.5% [7] | 2.4% | 112 | 75 [12] | 100 | 3 [12] | 1.38 [7] | 2.18 (212.55) | 7.517 [12] |
|
| 7-1 1CL 4DD Damegami RE [6] |
Medium | 99.8% | 0.2% | 32 [13] | 46 | 7 | 0 | 0.08 | 1.47 (146.7) | 14.7 |
|
- ↑ Victory rate is based on scenario where all the shipgirls are full HP & 49 morale, unless stated otherwise.
- ↑ 2.0 2.1 2.2 2.3 The rate, average resource and bucket cost might vary depending on the player. This is a rough estimation based on the status of my shipgirl level and equipment. In most cases, this won't make much difference however.
- ↑ Assuming S rank all nodes. Also, this is point gained per run (or 100 runs), not per hour, it might not reflect the real amount of point that can be earned in an hour.
- ↑ Ranking point gained per 100 runs (shown in the parentheses) is calculated as ranking point gained per run X victory rate X 100. This also includes retreat, where the ranking point gained is considered lost as they are insignificant (i.e for map 6-3, it's 2.18 x 95.6% x 100 = 208.41 points per 100 runs).
- ↑ This is calculated as ranking point gained per run / sum of fuel ammo steel and bauxite used per run. This column also displays number in 10E-3 unit to avoid leading zeroes. To get the correct value, you need to multiply it with 10-3.
- ↑ 6.0 6.1 The simulator assumes 100% you will hit the maelstrom, therefore you will always lose fuel supply upon reaching the boss node. This doesn't affect the rate, however. The only thing it changes is the slight difference in fuel consumption which is around 10 fuel.
- The amount of fuel loss is based on the number of radar carriers your fleet has. The comp provided here has 4 radars on 4 ships, which only causes you to lose 12.6% fuel. For details of how much fuel you will lose, it is calculated as the following: 電探0:-28%, 電探1:-21%, 電探2:-16.8%, 電探3:-14%, 電探4:-12.6%, 電探5:-11.76%, 電探6:-11.2%. The kanji means radar carrier and the number represents how many radar carriers you have. For example, if you have 3, you will lose only 14%, likewise, if you have 4, you will lose 12.6%.
- ↑ 7.0 7.1 7.2 7.3 7.4 7.5 The simulator assumes you would only advance to night battle if you DID NOT get at least a B Rank at the end of the day battle. If you DID, you would just stop fighting and go home. This explains the lower bucket usage. In general, unless you are looking for rare drops, it's not worth getting the S rank, B rank is enough.
- ↑ 8.0 8.1 3-4 node D causes fuel loss as of following: 電探0:-30%, 電探1:-22.5%, 電探2:-18%, 電探3:-15%, 電探4:-13.5%, 電探5:-12.6%, 電探6:-12%
- ↑ 9.0 9.1 Assumes you will never bucket DEs. The simulator also ignores any bucket usage if the damaged (less than 50% HP) shipgirl has less than 1 hour of repairing (only possible for DEs in this case).
- ↑ Can only get B rank at best.
- ↑ Assumes D rank preboss and B rank at the boss node, which gives 2900 - 200 x 0.8 = 2740 HQ EXP, or 1.91 ranking point.
- ↑ 12.0 12.1 12.2 The air recon resource node can give a small amount of ammo and bauxite depending on the player luck. If they managed to roll those, the amount of resource spent will be less. Therefore, in practice, the efficiency index of map 6-3 on average can be higher than the number shown here, as this number assumes you never gained any ammo or bauxite during the sortie.
- ↑ Node E gives 10-20 fuel (average 15), hence 47 - 15 = 32.
- ↑ There is actually an extremely small chance (around 0.01%, or 1 out of 10000 runs) that you will use it, the simulator rounded it down to 0.
| Map | Image | Comp Setup | Route | Air Power | LoS | Recommended Formations |
Notes |
|---|---|---|---|---|---|---|---|
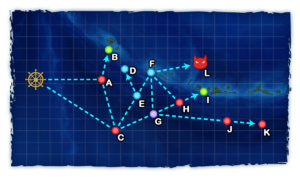
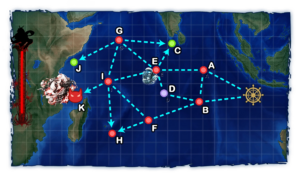
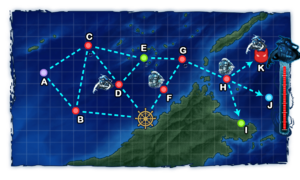
| 3-2 | C G L Surface: 1 Boss: 1 Maelstrom: 0-1 |
||||||
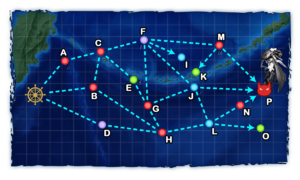
| 3-4 | D H P Surface: 1 Boss: 1 Maelstrom: 1 |
84 for AS | |||||
| 4-4 | A E I K Surface: 2 Submarine: 1 Boss: 1 |
144 for AS+ | |||||
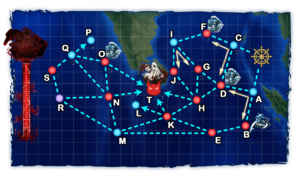
| 4-5 | D H T Surface: 1 Submarine: 1 Boss: 1 |
FINAL FORM ONLY | |||||
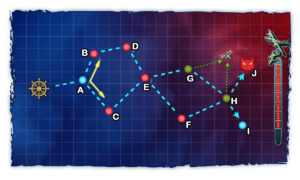
| 6-3 | C E G H J Surface: 1 Submarine: 1 Boss: 1 Resource: 2 |
Cn3 38 | Air recon nodes G and H give one of the following resources each:
| ||||
| 7-1 | D E G H K Surface: 1 Submarine: 2 Boss: 1 Resource: 1 |
Node E gives 10-20
|
Managing quarterly sortie quests ranking points
Credit to Savara, Ink20. This is one of the recommended strategies to shoot ranking cannons.
As of current, there are 7 quarterly quests giving ranking points, known as cannon. A total of 2050 point can be obtained by completing all of those.
The following is the list of quarterly sortie quests. Bold indicates cannon quests
- At the beginning of the quarterly (unlocked by default): Bq3 and Bq13
- Unlocked by weekly or monthly quests:
- Bq1 needs Bm6 (Monthly 4-2)
- Bq2 needs Bw2 (Weekly carriers)
- Bq5 needs D11 (Tokyo Express 2)
- Bq7 needs Bw9: (Weekly 5-2)
- Bq8 needs D11 (Tokyo Express 2)
- Bq9 needs D11: (Tokyo Express 2)
- Bq11 needs Bm8 (Monthly supply lines)
- Unlocked by other quarterlies:
- Bq4 needs Bq3
- Bq6 needs Bq5
- Bq10 needs Bq2
- Bq12 needs Bq11
Recommended course of actions
- 1. Do all weeklies
- 2. Do Bm1: “Monthly Myoukou 2-5”
- 3. Do Bm5: “Monthly 1-5”
- 4. Do Bm8: “Monthly supply lines”
- 5. Do Bq11: “Newbie cannon” (80 rpt must be “sacrificed”)
- 6. At this point 5 big cannons are unlocked
- 6.1. Bq2 do everything but 6-3 run
- 6.2. Bq7 do everything but 5-4 run
- 6.3. Bq8 do everything but one 1-5 run
- 6.4. Bq12 do everything but 4-2 run
- 6.5. Bq13 do everything but 5-4 run
- 7. Bq10 remains locked until Bq2 is done
- 8. Clear all EOs and farm ranking points as usual
- 9. When the end of the month is close, calculate how many rpt you need to reach your desired position and fire the cannons you need.
Alternatively, if you want to try ranking all 3 months:
- Month 1. Do Bm1, Bm5, Bm8, Bq2, Bq8, 7-2-2 run of Bq10 (so you don't have to open it again) and everything but one run of Bq7, Bq11 and Bq13 (350+300 rpt with 200+80+390 rpt ready in case of need)
- Month 2. Do Bq7, Bq10 and Bq11 (200+400+80 rpt)
- Month 3. Do Bq12 and Bq13 (330+390 rpt)
Also, remember that some requirement of these quests are shared with other quests and can be done together like 5-4 of Bq7 and Bq13 with 2CL, 3CA, 1CV or 1BBV (north or south route), 6-4 of Bq2 and Bq13, 6-3 of Bq2 and Bq4, etc.
Trivia
Tools that help you with ranking
Savara's ranking cutoff - planning tool
Website: [8]
This is a ranking supportive tool that calculates the amount of point you need to farm in order to reach a selected goal. It also includes features using ranking data from senka.su such as automatic score input, other players tracking system, and a filter for players potentially going for high ranking. For more information, please visit the site.
Senka.su
Website: [9]
A database site that shows the top 500 record of every server, which can be helpful if you wanna check where you are at compared to the other players in the top 500.
Ranking plan
- As of September 2020, many quarterly quests that give ranking points have been released. This has directly affected the ranking pressure across all servers as nowaday T500 may requires as much effort as Phase 1 T100. However, this can also be a good thing as if you do all those quarterlies and EO in one single month, you can stack up to 3000 points pretty easily. With a couple of more sortie, you are guaranteed to hit T500 as well. So my advice is If your life is very busy, just focus all quarterlies in one month and clear all the EO that month too, this way, at least you will get ranking rewards every 3 months
- Of course it is still possible to rank every month and spread out quarterlies to get enough point buff (i.e each month you only do 2-3 quarterlies for around 600 points), but will require much more points from daily sortie for T500 nowaday if you wanna catch up. Plan your schedule accordingly to your server if you spam daily. You are gonna need like 3700 for T500 (Hashi will need more obviously)
Regarding the EO and Quest cannon
- For EO cannon, you can shoot anytime in a month to gain rpt, but note that if you shoot in the last day of the month, between 22:00 - 00:00 JST of the next month, it will not be counted for anything !
- For quarterly quest cannon:
- Shooting it anytime before 14:00 JST of the last day of any month will give rpt to that month.
- Shooting it after 14:00 JST of the last day of any month, as long as that month is NOT the last month of the quarter, will give rpt to the following month.
- Shooting it after 14:00 JST of the last day of the last month in a quarter will just simply waste it, not counted for anything.
- For reference, 4 quarters in KC are month 12-1-2 / 3-4-5 / 6-7-8 / 9-10-11
Example:
- Right now it's July, it belongs to quarter 6-7-8. I have the Z cannon available giving 350 points.
- If I shoot it anytime in July before 7/31 14:00 JST, I will have 350 points for July.
- If I shoot it after 7/31 14:00 JST, but before August coming, I will have 350 points for August.
- If I shoot it after 8/31 14:00 JST, I will get nothing out of it, as August is already the last month of the quarter.
- For limited seasonal quest cannon (Rainy Season 2023 - Terubozu, Setsubun, etc...), let's say the current month is May and it currently has a seasonal quest cannon:
- Shooting it anytime before 14:00 JST of the last day of May will give rpt to May.
- Shooting it after 14:00 JST of the last day of May will give rpt to the following month, June.
The last note regarding the seasonal quest cannon are VERY IMPORTANT to know about especially if the said cannon is a MONTHLY quest. As the points are given to the next month if the cannon is shot AFTER 14:00 JST of the current month, it is possible to stack the point gained from that particular quest TWICE in the following month. The seasonal quest cannon will start giving the point to the next month as soon as 14:00 JST of the current month has been passed, but the monthly quest reset will not occur yet, so there is a small time window of 15 hours where you can finish the said monthly seasonal quest before it resets itself, allowing you to do it again, doubling the point gained from the said quest in the following month.
The entire quest cannon can be summed up using this table:
| May 31st | June 1st | |||
| 13:59 JST of May 31st and before | 14:00 JST of May 31st - 04:59 JST of June 1st | 05:00 of June 1st and later | ||
| Quarterly quest | Accounted for May | LOST | Accounted for June | |
| Seasonal quest BEFORE June quest reset | Accounted for May | Accounted for June | ||
| Seasonal quest AFTER June quest reset | Accounted for June | |||
What is considered as a good ranking comp to be listed on the table?
A comp is considered to be good for ranking if it meets all of the following conditions when testing on the simulator:
- Victory rate > 95%.
- Fuel and ammo used per run < 300.
- Bauxite used per run < 50.
- Bucket used per run < 2.
- 4 battles maximum, including boss.
- Efficiency higher than map 3-4 heavy comp.
How to decide the best comp for a map if there are many variants?
If there are multiple comps that can do the ranking well in a map, a tiebreaker system will be used to determine the best comp to display on the table. Tiebreaker rules are as the following:
- Victory rate
- Fuel and ammo used
- Bauxite used
- Bucket used
- Whether the fleet detecting enemy using seaplane, or having air power.
