- Welcome to the Kancolle Wiki!
- If you have any questions regarding site content, account registration, etc., please visit the KanColle Wiki Discord
Difference between revisions of "Spring 2022 Event/E-2/Sandbox"
| (17 intermediate revisions by 7 users not shown) | |||
| Line 21: | Line 21: | ||
All guides outside of the approved version will be removed and work will begin from the approved version to make it better for the next version until the finalized version is made. | All guides outside of the approved version will be removed and work will begin from the approved version to make it better for the next version until the finalized version is made. | ||
| + | |||
| + | ==Branch Rules TL Attempt by Memetails (Feel free to edit)== | ||
| + | {{MapBranchingTable | ||
| + | |title = E-2 Branching Rules Phase 1 | ||
| + | |id = 54-2a | ||
| + | |order = 0,1,2,A,C,D,G,H,J,M | ||
| + | |0 -> 1 = Single Fleet | ||
| + | |0 -> 2 = Striking Force Fleet | ||
| + | |A/empty -> B = * Meet '''ANY''' of the following requirements: | ||
| + | ** Amount of ships in fleet ≤ 3 | ||
| + | ** Fleet contains only SS(V) or AS Flaghip + SS(V) | ||
| + | ** Meet '''ALL''' of the following requirements: | ||
| + | *** Amount of CA(V) ≤ 1 | ||
| + | *** Amount of DD+DE ≥ 2 | ||
| + | *** If AV ≥ 1 & CA(V) ≥ 1, amount of CL ≥ 1 | ||
| + | *** If Slow & CA(V) ≥ 1, amount of CL ≥ 1 & DD+DE ≥ 3 | ||
| + | |A/empty -> G = * '''Force G''' if fleet contains (F)BB(V) | ||
| + | |C -> D = * Does not meet the requirements to go to F | ||
| + | |C -> F = * Meet '''ANY''' of the following requirements: | ||
| + | ** Amount of DD = 6 | ||
| + | ** Amount of LHA+AV = 1, DD = 5, & fleet is Fast | ||
| + | |D -> E = * Does not meet the requirements to go to F | ||
| + | |D -> F = * Meet '''ANY''' of the following requirements: | ||
| + | ** Fleet is Fast | ||
| + | ** Amount of SS(V) ≤ 5 | ||
| + | ** Amount of DD = 5 | ||
| + | |G -> H = * Meet '''ANY''' of the following requirements: | ||
| + | ** Fleet is Slow | ||
| + | ** Amount of (F)BB(V) ≥ 2 | ||
| + | ** Amount of DD ≤ 1 | ||
| + | ** Amount of CL+DD ≤ 2 | ||
| + | |G -> J = * Does not meet the requirements to go to H | ||
| + | |H -> I = * Meet '''ANY''' of the following requirements: | ||
| + | ** Amount of (F)BB(V) ≥ 3 | ||
| + | ** Amount of CA(V) ≥ 3 | ||
| + | ** Amount of DD = 0 | ||
| + | |H -> J = * Does not meet the requirements to go to I | ||
| + | |J -> K = * Does not meet the requirements to go to L | ||
| + | * '''Force K''' if fleet contains SS(V) (?) | ||
| + | |J -> L = * Meet '''ANY''' of the following requirements: | ||
| + | ** Fleet is Fast | ||
| + | ** Amount of AS+CA(V)+AV+CL(T) ≥ 1 & DD+DE ≥ 3 | ||
| + | |M/resource -> N/empty = Fail the LoS check to go to O | ||
| + | |M/resource -> O = Pass the LoS check (Cn4 = 64 on Hard) | ||
| + | }} | ||
| + | |||
| + | {{MapBranchingTable | ||
| + | |title = E-2 Branching Rules Phase 3 | ||
| + | |id = 54-2b | ||
| + | |order = 0,1,2,Q,S1,T,U,W | ||
| + | |0 -> 1 = Single Fleet | ||
| + | |0 -> 2 = Striking Force Fleet | ||
| + | |Q/empty -> R,S = Choose your own adventure! | ||
| + | |S1 -> S2 = * Meet '''ALL''' of the following requirements: | ||
| + | ** Fleet is Slow | ||
| + | ** Amount of (F)BB(V) ≥ 2 | ||
| + | |S1 -> S3 = * Meet '''ANY''' of the following requirements: | ||
| + | ** Does not meet the requirements to go to S2 or T | ||
| + | ** Fleet is Fast '''AND''' amount of (F)BB(V) ≥ 2 | ||
| + | |S1 -> T/resource = * Meet '''ANY''' of the following requirements: | ||
| + | ** Meet '''ALL''' of the following requirements: | ||
| + | *** Fleet is Fast | ||
| + | *** Amount of (F)BB(V) = 1 | ||
| + | *** Amount of AV ≥ 1, CL ≥ 1, DD ≥ 3 | ||
| + | ** Meet '''ALL''' of the following requirements: | ||
| + | *** Fleet is Fast | ||
| + | *** Amount of (F)BB(V) = 0 | ||
| + | *** Amount of AV ≥ 1, CL ≥ 1 '''OR''' AV+CL ≥ 1, DD ≥ 5 | ||
| + | |T/resource -> T1/empty = Fail the LoS check to go to T2 | ||
| + | |T/resource -> T2 = Pass the LoS check (Cn4 = 68 on Hard) | ||
| + | |U -> V = * Does not meet the requirements to go to W | ||
| + | |U -> W = * Meet '''ALL''' of the following requirements: | ||
| + | ** Fleet is Fast | ||
| + | ** Amount of DD ≥ 3 | ||
| + | ** Amount of CL ≥ 1 | ||
| + | |W -> W1/empty = Fail the LoS check to go to W2 | ||
| + | |W -> W2 = Pass the LoS check (Cn4 = 75 on Hard) | ||
| + | }} | ||
==Map Overview== | ==Map Overview== | ||
| Line 57: | Line 135: | ||
==Phase 2.5: Unlocking the Boss Node == | ==Phase 2.5: Unlocking the Boss Node == | ||
| − | To unlock the Path to the Boss, Node {{MapRoute|R|red}} has to be S-Ranked. For the fleet used refer to | + | To unlock the Path to the Boss, Node {{MapRoute|R|red}} has to be S-Ranked. For the fleet used refer to Phase 3 below as it is the same fleet. |
==Phase 3: Fight against the Crab Rave Princess== | ==Phase 3: Fight against the Crab Rave Princess== | ||
| Line 84: | Line 162: | ||
==Map Overview== | ==Map Overview== | ||
| − | E2 is a three-phase | + | E2 is a three-phase map using both Single Fleets and [[Striking Force Fleet]]s (7 ships fleet). |
| + | * This map uses two locks: | ||
| + | ** [[File:Spring_2022_Event_Tag_2.png]] '''Advance 1st Batch''' Tag is applied to single fleets sorteing to this map from starting point 1. | ||
| + | ** [[File:Spring_2022_Event_Tag_3.png]] '''Advance 2nd Batch''' Tag is applied to Strike Forces sorteing to this map from starting point 2. | ||
| + | * 1 [[LBAS]] is available to sortie, a second base is only able to be used in defense. | ||
| + | ** Air raids will occur on this map. | ||
| − | '''CV(L/B) cannot be sortied | + | '''CV(L/B) cannot be sortied on this map.''' |
| − | |||
| − | |||
| − | |||
| − | |||
| − | |||
| − | |||
==Phase 1: Transporting Supplies to Shortland== | ==Phase 1: Transporting Supplies to Shortland== | ||
| − | * ''' | + | * '''0-1AV, 5-6DD (FAST)''' |
| − | * | + | * Route: {{MapRoute|1|grey|A|blue|B|pink|C|red|F|red|M|green|O|red}} |
| − | * | + | * LBAS: Range 5 to {{MapRoute|O|red}}, 0 Airpower. |
| − | |||
** There is an LoS-Check at {{MapRoute|M|green}} (14 Cn1 for Hard Mode) | ** There is an LoS-Check at {{MapRoute|M|green}} (14 Cn1 for Hard Mode) | ||
| − | ** Going for S | + | ** Going for S ranks on this Boss Node is not recommended as the Boss is very tanky, but the escorts are rather fragile and can be dispatched by two ships with Night Battle DA |
| − | ** Sending LBAS to the preboss node or airstrike node and relying on Boss Support | + | ** Sending LBAS to the preboss node or airstrike node and relying on Boss Support is an option |
| − | ** A 6DD Fleet forgoes Air Power for the possibility of Utilizing the | + | ** A 6DD Fleet forgoes Air Power for the possibility of Utilizing the {{CommandFacility}} {{Equipment/Link|Elite Torpedo Squadron Command Facility}}. |
| − | ** Using AACI is highly recommended | + | ** Using [[AACI]] is highly recommended. |
| − | |||
==Phase 2: Transporting Supplies to Rekata== | ==Phase 2: Transporting Supplies to Rekata== | ||
| − | * ''' | + | * '''1AV, 1CL, 0-1FBB, 4-5DD, (FAST Strike Force)''' |
| − | * | + | * Route: {{MapRoute|2|grey|P|red|Q|blue|S|red|S1|red|T|green|T2|red}} |
| − | * | + | * LBAS: Range 6 to {{MapRoute|T2|red}}, 68/136 AD/AP on Hard. |
| − | |||
** There is an LoS-Check at {{MapRoute|T|green}} (14 Cn1 for Hard Mode) | ** There is an LoS-Check at {{MapRoute|T|green}} (14 Cn1 for Hard Mode) | ||
| − | ** A slow fleet would take an additional | + | ** A '''slow''' fleet would take an additional Air Node at {{MapRoute|S3|pink}} |
| − | ==Phase 2.5: Unlocking the Boss Node == | + | ==Phase 2.5: Unlocking the Boss Node== |
| − | To unlock the Path to the Boss, Node {{MapRoute|R|red}} has to be S-Ranked. For the fleet used refer to | + | To unlock the Path to the Boss, Node {{MapRoute|R|red}} has to be S-Ranked. For the fleet used refer to Phase 3 below as it is the same fleet. |
==Phase 3: Fight against the Crab Rave Princess== | ==Phase 3: Fight against the Crab Rave Princess== | ||
| − | * ''' | + | * '''2FBB, 1CL, 3DD, 1XX (FAST Strike Force)''' |
| − | ** XX may be CA(V), AV, CLT | + | ** XX may be a CA(V), AV, or CLT. |
| − | * | + | * Route: {{MapRoute|2|grey|P|red|Q|blue|R|red|U|pink|W|red|W2|red}} |
| − | * | + | * LBAS: Range 8 to {{MapRoute|W2|red}}, 71/159 AP/AS on Hard. |
| − | + | ** It may be preferrable to equip a second '''{{Equipment/Link|Type 0 Observation Seaplane}} instead of an AP shell on the Battleships. | |
| − | ** It may be preferrable to equip a second | + | ** [[Special Attacks#Kongou-Class_Touch|''Kongou''-Class Touch]] (in this case [[Hiei Kai Ni C]] + [[Kirishima]]) may be used here to great effect. |
| − | ** Kongou-Class | + | ** Boss support is recommended. |
| − | ** Debuffing this boss is optional | + | ** Depending on the CL/AV/CAV choice, one of them should be [[SPF|fighter]] muled. |
| + | ** Debuffing this boss is optional. | ||
==Phase 4: Debuff Phase== | ==Phase 4: Debuff Phase== | ||
| − | Once Last Dance is reached, the following steps can be performed to debuff the boss on Hard mode: | + | Once '''Last Dance''' is reached, the following steps can be performed to debuff the boss on Hard mode: |
* {{MapRoute|W2|red}} on LD (A rank) OR {{MapRoute|W|red}} (S rank) | * {{MapRoute|W2|red}} on LD (A rank) OR {{MapRoute|W|red}} (S rank) | ||
Latest revision as of 00:28, 26 June 2022
Sandbox Rules
This sandbox is to be used to construct an event guide for the above-mentioned event map. These guides are to all of the following requirements:
- An overview of the map, including ship/equipment bonuses, Ship Locks, and special mechanics,
- List of branching unlocking requirements (if there are multiple requirements, compositions for each path along with the below requirements will be needed to discuss the unlocking requirements in question),
- A list of working compositions that work: (T=these must have possible alternatives for players who may or may not have all ships needed for a specific path),
- The Paths said compositions will take (to explain each path the composition will/can take),
- A summary or description of what kind of obstacles a composition will face.
- A description of the boss node: what it consists of, and a descriptive guide on what the player should consider for a course of action to successfully win the battle,
- Optional: Tips/guides to farm certain ships and/or resources (this can also require compositions, paths, and possible descriptions).
Editors are to construct their own version of the guide/part of the guide, and complete it in a timely fashion.
No editor is allowed to edit over other editors' work without the consent of the editor and his approval to do so.
Several versions will be constructed through this page and will be reviewed and approved by the staff/collaboration committee before being moved for the Spring 2022 Event, being reviewed and updated once more before it can be released.
Overall there should be 3 versions of the guide that have to be constructed, including: Preliminary > Polished > Finalized Guides
With each approval of each version of the guide, the said guide will be updated to the main page, and construction of the next version will begin.
All guides outside of the approved version will be removed and work will begin from the approved version to make it better for the next version until the finalized version is made.
Branch Rules TL Attempt by Memetails (Feel free to edit)
| E-2 Branching Rules Phase 1 | ||
|---|---|---|
| Nodes | Rules | |
| Start | 1 |
Single Fleet |
2 |
Striking Force Fleet | |
A |
B |
|
G |
| |
C |
D |
|
F |
| |
D |
E |
|
F |
| |
G |
H |
|
J |
| |
H |
I |
|
J |
| |
J |
K |
|
L |
| |
M |
N |
Fail the LoS check to go to O |
O |
Pass the LoS check (Cn4 = 64 on Hard) | |
| E-2 Branching Rules Phase 3 | ||
|---|---|---|
| Nodes | Rules | |
| Start | 1 |
Single Fleet |
2 |
Striking Force Fleet | |
Q |
R |
Choose your own adventure! |
S | ||
S1 |
S2 |
|
S3 |
| |
T |
| |
T |
T1 |
Fail the LoS check to go to T2 |
T2 |
Pass the LoS check (Cn4 = 68 on Hard) | |
U |
V |
|
W |
| |
W |
W1 |
Fail the LoS check to go to W2 |
W2 |
Pass the LoS check (Cn4 = 75 on Hard) | |
Map Overview
E2 is a three-phase singlefleet and strikeforce map.
CV(L/B) cannot be sortied to this map.
The ![]() Advance 1st Batch Tag is applied to single Fleets sorteing to this map, starting at startpoint 1
Advance 1st Batch Tag is applied to single Fleets sorteing to this map, starting at startpoint 1
The ![]() Advance 2nd Batch Tag is applied to Strikeforces sorteing to this map, starting at startpoint 2
Advance 2nd Batch Tag is applied to Strikeforces sorteing to this map, starting at startpoint 2
1 LBAS is available to sortie, 1 LBAS is available for LBAS Defense
Phase 1: Transporting Supplies to Shortland
- Fleet: 0-1AV 5-6DD (FAST)
- Route: 1 A B C F M O
- LBAS: Range 5 to O, 0 Airpower
- Notes:
- There is an LoS-Check at M (14 Cn1 for Hard Mode)
- Going for S-Ranks on this Boss Node is not recommended as the Boss is very tanky, but the escorts are rather fragile and can be dispatched by two ships with Night Battle DA
- Sending LBAS to the preboss node or airstrike node and relying on Boss Support instead is also an option
- A 6DD Fleet forgoes Air Power for the possibility of Utilizing the Elite Torpedo Squadron Command Facility
- Using AACI is highly recommended.
Phase 2: Transporting Supplies to Rekata
- Fleet: AV CL 0-1FBB 4-5DD (FAST Strike Force (7 Ships))
- Route: 2 P Q S S1 T T2
- LBAS: Range 6 to T2, 68/136 AD/AP on Hard
- Notes:
- There is an LoS-Check at T (14 Cn1 for Hard Mode)
- A slow fleet would take an additional Airstrike S3
Phase 2.5: Unlocking the Boss Node
To unlock the Path to the Boss, Node R has to be S-Ranked. For the fleet used refer to Phase 3 below as it is the same fleet.
Phase 3: Fight against the Crab Rave Princess
- Fleet: 2FBB XX CL 3DD (FAST Strike Force)
- XX may be CA(V), AV, CLT
- Route: 2 P Q R U W W2
- LBAS: Range 8 to W2, 71/159 AP/AS on Hard
- Notes:
- It may be preferrable to equip a second Type 0 Observation Seaplanes instead of an AP shell on the Battleships
- Kongou-Class Special Attacks (In this case Hiei + Kirishima) may be used here to great effect
- Debuffing this boss is optional
Phase 4: Debuff Phase
Once Last Dance is reached, the following steps can be performed to debuff the boss on Hard mode:
- W2 on LD (A rank) OR W (S rank)
- B, D, H, K - AS
- O - A rank
- T2 - A rank
- LBAS - AS (?)
Totaku's rendition, piggybacking off Grun
Map Overview
E2 is a three-phase map using both Single Fleets and Striking Force Fleets (7 ships fleet).
- This map uses two locks:
 Advance 1st Batch Tag is applied to single fleets sorteing to this map from starting point 1.
 Advance 2nd Batch Tag is applied to Strike Forces sorteing to this map from starting point 2.
- 1 LBAS is available to sortie, a second base is only able to be used in defense.
- Air raids will occur on this map.
CV(L/B) cannot be sortied on this map.
Phase 1: Transporting Supplies to Shortland
- 0-1AV, 5-6DD (FAST)
- Route: 1 A B C F M O
- LBAS: Range 5 to O, 0 Airpower.
- There is an LoS-Check at M (14 Cn1 for Hard Mode)
- Going for S ranks on this Boss Node is not recommended as the Boss is very tanky, but the escorts are rather fragile and can be dispatched by two ships with Night Battle DA
- Sending LBAS to the preboss node or airstrike node and relying on Boss Support is an option
- A 6DD Fleet forgoes Air Power for the possibility of Utilizing the
 Elite Torpedo Squadron Command Facility
 .
. - Using AACI is highly recommended.
Phase 2: Transporting Supplies to Rekata
- 1AV, 1CL, 0-1FBB, 4-5DD, (FAST Strike Force)
- Route: 2 P Q S S1 T T2
- LBAS: Range 6 to T2, 68/136 AD/AP on Hard.
- There is an LoS-Check at T (14 Cn1 for Hard Mode)
- A slow fleet would take an additional Air Node at S3
Phase 2.5: Unlocking the Boss Node
To unlock the Path to the Boss, Node R has to be S-Ranked. For the fleet used refer to Phase 3 below as it is the same fleet.
Phase 3: Fight against the Crab Rave Princess
- 2FBB, 1CL, 3DD, 1XX (FAST Strike Force)
- XX may be a CA(V), AV, or CLT.
- Route: 2 P Q R U W W2
- LBAS: Range 8 to W2, 71/159 AP/AS on Hard.
- It may be preferrable to equip a second Type 0 Observation Seaplane
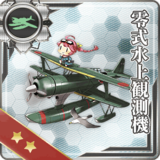 instead of an AP shell on the Battleships.
 - Kongou-Class Touch (in this case Hiei Kai Ni C + Kirishima) may be used here to great effect.
- Boss support is recommended.
- Depending on the CL/AV/CAV choice, one of them should be fighter muled.
- Debuffing this boss is optional.
- It may be preferrable to equip a second Type 0 Observation Seaplane
Phase 4: Debuff Phase
Once Last Dance is reached, the following steps can be performed to debuff the boss on Hard mode:
- W2 on LD (A rank) OR W (S rank)
- B, D, H, K - AS
- O - A rank
- T2 - A rank
- LBAS - AS (?)