• Welcome to the Kancolle Wiki!
  • If you have any questions regarding site content, account registration, etc., please visit the KanColle Wiki Discord

World 5/5-3

From Kancolle Wiki
Jump to navigation Jump to search

World 5-3: サブ島沖海域 Sav Island

Strategy Name
第一次サーモン沖海戦
(First Battle of the Solomon Sea)
Difficulty
☆ ☆ ☆ ☆ ☆ ☆ ☆ ☆ ☆
Item
Fuel Ammunition
Strategy Content
敵泊地に対して水上打撃部隊による夜戦突撃を敢行し、艦隊後方の敵輸送艦を叩け!
Engage in a daring night raid against the enemy fleet. Your goal is to destroy the transport they are escorting!
5-3
Fleet 1CL, 5CA(V) (Mikawa Fleet)
1FBB, 1CL, 2CA(V), 2DD
Route D G I O K E Q
Other Notes Air Power for boss node only. Transport node P is optional.
AP AS AS+
63 140 280

Stage Guide

5-3 Branching Rules
Nodes Rules
Start
C
  • Go to D if Fast+ fleet
  • Meet ANY of the following to go to C
    • (F)BB(V)+CV(L/B) ≥ 3
    • (F)BB(V)+CV(L/B) ≥ 2 AND Slow Fleet
  • Random between C and D if fleet contains SS(V)
  • Otherwise, D
D
B
A
  • Random (65% A)
F
E
B
  • FORCE random routing if meeting ANY of the following
    • Fleet contains SS(V)
    • Fleet contains (F)BB(V) and DD ≤ 1
  • Meet ANY of the following to go to Q:
    • Fleet contains CL and DD ≥ 2
    • CA(V) ≥ 4 and CL+CA+DD = 6
    • DD ≥ 4
  • Otherwise, random routing
Q
G
I
  • Do not meet the requirement to go to J
J
  • Fleet contains BBV, CV(B) or SS(V)
  • Amount of slow BB ≥ 2
  • Fleet contains exactly 1 CVL
I
J
  • FORCE node J if fleet contains CVL or (F)BB(V) ≥ 3
  • Meet ANY of the following to go to O
    • DD ≥ 3
    • (F)BB(V) ≤ 1 and DD ≥ 2
    • Fleet contains CL and DD ≥ 2
    • Fleet contains CL, CA(V) ≥ 4 and CA+CL+DD = 6
  • Go to J if (F)BB(V) = 2
  • Otherwise, random routing
O
J
L
  • Meet ANY of the following to FORCE M
    • Fleet contains CV(B)
    • (F)BB(V) ≥ 3
    • CVL ≥ 2
  • Random between L, M, and N if fleet contains SS(V)
  • Random between L and N if fleet contains BBV
  • Meet ALL of the following to go to L
    • CVL = 1
    • FBB ≤ 2
    • CL+DD ≥ 3
    • DD ≥ 2
    • No BB(V)
  • Otherwise, random between L and N
    • The more DD you have in the fleet, the higher chance you will go to L
M
N
K
E
  • Meet ANY of the following to go to H:
    • DD ≥ 4
    • CL = 1 AND DD ≥ 3
    • Fast+ fleet AND DD ≥ 2
    • BBV = 1 AND DD ≥ 2
    • DD ≥ 2 AND 2 ships carrying 2 Drums or 2 DLCs total in the fleet
  • Otherwise go to E
H
O
K
  • Active Branching
P


Tips

You must sink the Boss 5 times to clear the map.

  • Unlike the previous maps, all of 5-3 pre-boss nodes feature Night Nodes, where only the night battle is played, and so triggering all night cut-ins from your fleet and the enemy fleet, which can cause some difficulties.
    • The use of Support Expeditions is highly recommended for both pre-boss and boss fights.
      • With normal support expedition help, you can minimize the risk of your ships getting heavily damaged and subsequently increase the chances of your fleet arriving to the boss node in good conditions.
      • The use of Support Shelling is highly recommended, as Aerial Support will not trigger on pre-boss nodes, while Long Range Torpedo Attacks may activate but will cause negligible amounts of damage.
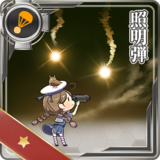
    • Using night battle equipment (Star ShellsStar Shell, Skilled LookoutsSkilled Lookouts
      Torpedo Squadron Skilled Lookouts
      , and a Type 98 Reconnaissance Seaplane (Night Recon)Type 98 Reconnaissance Seaplane (Night Recon)
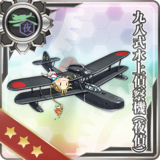
) is highly recommended.
      • Sparkling your ships is advised.
      • Usage of the SearchlightsSearchlight
        Type 96 150cm Searchlight
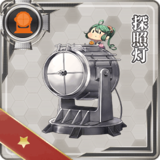
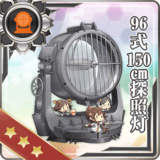
        , however, is discouraged due to the drastic evasion reduction the equipped ship suffers in night battle.
  • Regarding boss node, the boss is Southern War Princess who has tough armor and firepower that can potentially wreck any of your ships.
    • There is a little chance that 2 Light Carrier Nu-Class Flagships show up at the boss, AACI can shoot down enemy bombers and protect your light ships.
    • CAV can carry SPF in order to obtain AS at the boss node (71+ air for the comp with Southern War Princess alone), or at least force AP for the comp with dual Light Carrier Nu-Class Flagship (requires 140+ air for AS otherwise).
    • It's unlikely that you will finish the boss off at day so do expect the battle to last till night.


Recommended Fleet

  • 1 (F)BB 1 CL 2 CA(V) 2 DD (Fast)
  • 2 FBB 1 CL 2 DD 1 CAV (Fast) (Fast)
  • 5 CA(V) 1 CL (Fast)
  • 3 CA(V) 1 CL 2 DD (Fast)
  • Route = D G I O K E Q
    • Skipping resource Node H for more firepower at the boss node.

  • 2 CAV 1 CL 3 DD (Fast)
  • Route = D G I O K H E Q
    • CAVs can trigger Artillery Spotting as long as you have AS at boss, helping to take out enemy escorts easier.


Nodes and Enemy Encounters

Show/Hide Nodes and Enemy Encounters
Nodes and Enemy Encounters
NodePatternXpNode InfoFormAir
A
Battle Avoided
Pattern 1"Must be my imagination" (battle avoided)
B
Battle Avoided
Pattern 1"Must be my imagination" (battle avoided)
C
敵鉄底海峡任務部隊 哨戒隊
Pattern 1 Light Cruiser He-Class flagshipLight Cruiser Tsu-Class eliteDestroyer Ro-Class Late ModelDestroyer Ro-Class Late ModelDestroyer Ro-Class Late ModelDestroyer Ro-Class Late Model
Formation 1: Line Ahead
Formation 2: Double Line
Pattern 2 Light Cruiser Ho-Class flagshipLight Cruiser Tsu-Class eliteDestroyer Ro-Class Late ModelDestroyer Ro-Class Late ModelDestroyer Ro-Class Late ModelDestroyer Ro-Class Late Model
Formation 2: Double Line
Formation 1: Line Ahead
Pattern 3 Light Cruiser Ho-Class flagshipLight Cruiser Tsu-ClassDestroyer Ro-Class Late ModelDestroyer Ro-Class Late ModelDestroyer Ro-Class Late ModelDestroyer Ro-Class Late Model
Formation 1: Line Ahead
Pattern 4 Light Cruiser He-Class flagshipLight Cruiser Tsu-ClassDestroyer Ro-Class Late ModelDestroyer Ro-Class Late ModelDestroyer Ro-Class Late ModelDestroyer Ro-Class Late Model
Formation 2: Double Line
D
Battle Avoided
Pattern 1"Must be my imagination" (battle avoided)
E
Battle Avoided
Pattern 1"Must be my imagination" (battle avoided)
F
Resource Node
Pattern 1Ammo + ?
G
Battle Avoided
Pattern 1"Must be my imagination" (battle avoided)
H
Resource Node
Pattern 1Steel + ?
I
敵鉄底海峡任務部隊 重巡戦隊
Night Battle Node
Pattern 1 Heavy Cruiser Ri-Class flagshipHeavy Cruiser Ri-Class flagshipHeavy Cruiser Ri-Class flagshipLight Cruiser Ho-Class eliteDestroyer Ro-Class Late ModelDestroyer Ro-Class Late Model
Formation 1: Line Ahead
Formation 2: Double Line
Pattern 2 Heavy Cruiser Ri-Class flagshipHeavy Cruiser Ri-Class flagshipHeavy Cruiser Ri-Class eliteLight Cruiser Ho-Class eliteDestroyer Ro-Class Late ModelDestroyer Ro-Class Late Model
Formation 2: Double Line
Formation 1: Line Ahead
Pattern 3 Heavy Cruiser Ri-Class flagshipHeavy Cruiser Ri-Class eliteHeavy Cruiser Ri-Class eliteLight Cruiser Ho-Class eliteDestroyer Ro-Class Late ModelDestroyer Ro-Class Late Model
Formation 2: Double Line
Formation 1: Line Ahead
J
敵任務部隊 前衛哨戒隊
Night Battle Node
Pattern 1 Light Cruiser He-Class flagshipHeavy Cruiser Ne-Class eliteLight Cruiser Tsu-Class eliteDestroyer Ha-Class Late ModelDestroyer Ha-Class Late ModelDestroyer Ha-Class Late Model
Formation 4: Echelon
Formation 1: Line Ahead
Pattern 2 Light Cruiser He-Class flagshipHeavy Cruiser Ne-Class eliteHeavy Cruiser Ne-Class eliteLight Cruiser Tsu-Class eliteDestroyer Ha-Class Late ModelDestroyer Ha-Class Late Model
Formation 4: Echelon
Formation 1: Line Ahead
Pattern 3 Light Cruiser He-Class flagshipLight Cruiser Tsu-Class eliteDestroyer Ha-Class Late ModelDestroyer Ha-Class Late ModelDestroyer Ha-Class Late ModelDestroyer Ha-Class Late Model
Formation 1: Line Ahead
Formation 4: Echelon
K
敵鉄底海峡任務部隊 増援艦隊
Night Battle Node
Pattern 1 Battleship Ta-Class flagshipBattleship Ta-Class flagshipLight Cruiser Tsu-ClassDestroyer Ro-Class Late ModelDestroyer Ro-Class Late ModelDestroyer Ro-Class Late Model
Formation 1: Line Ahead
Formation 2: Double Line
Pattern 2 Heavy Cruiser Ne-Class eliteHeavy Cruiser Ne-ClassLight Cruiser Tsu-ClassDestroyer Ro-Class Late ModelDestroyer Ro-Class Late ModelDestroyer Ro-Class Late Model
Formation 1: Line Ahead
Formation 2: Double Line
Pattern 3 Heavy Cruiser Ne-ClassHeavy Cruiser Ne-ClassLight Cruiser Tsu-ClassDestroyer Ro-Class Late ModelDestroyer I-ClassDestroyer I-Class
Formation 2: Double Line
Pattern 4 Heavy Cruiser Ne-Class eliteHeavy Cruiser Ne-ClassLight Cruiser Tsu-ClassDestroyer Ro-Class Late ModelDestroyer I-ClassDestroyer I-Class
Formation 1: Line Ahead
L
Maelstrom Node
Pattern 1Fuel - ?
M
敵任務部隊 増援部隊
Pattern 1 Standard Carrier Wo-Class flagshipLight Carrier Nu-Class flagshipHeavy Cruiser Ne-Class eliteLight Cruiser Tsu-Class eliteDestroyer Ha-Class Late ModelDestroyer Ha-Class Late Model
Formation 3: Diamond
AP:72
AS:161
AS+:321
Pattern 2 Standard Carrier Wo-Class flagshipLight Carrier Nu-Class eliteHeavy Cruiser Ne-Class eliteLight Cruiser Tsu-Class eliteDestroyer Ha-Class Late ModelDestroyer Ha-Class Late Model
Formation 3: Diamond
AP:72
AS:162
AS+:324
Pattern 3 Standard Carrier Wo-Class flagshipStandard Carrier Wo-Class flagshipLight Carrier Nu-Class flagshipLight Cruiser Tsu-Class eliteDestroyer Ha-Class Late ModelDestroyer Ha-Class Late Model
Formation 3: Diamond
AP:128
AS:287
AS+:573
Pattern 4 Standard Carrier Wo-Class flagshipLight Carrier Nu-Class eliteHeavy Cruiser Ne-ClassLight Cruiser Tsu-ClassDestroyer Ha-Class Late ModelDestroyer Ha-Class Late Model
Formation 3: Diamond
AP:72
AS:162
AS+:324
Pattern 5 Standard Carrier Wo-Class flagshipLight Carrier Nu-Class eliteHeavy Cruiser Ne-Class eliteLight Cruiser Tsu-ClassDestroyer Ha-Class Late ModelDestroyer Ha-Class Late Model
Formation 3: Diamond
AP:72
AS:162
AS+:324
Pattern 6 Standard Carrier Wo-Class flagshipStandard Carrier Wo-Class flagshipStandard Carrier Wo-Class flagshipLight Cruiser Tsu-Class eliteDestroyer Ha-Class Late ModelDestroyer Ha-Class Late Model
Formation 3: Diamond
AP:168
AS:378
AS+:756
N
敵南方支援艦隊
Night Battle Node
Pattern 1 Battleship Ru-Class flagshipBattleship Ru-Class flagshipHeavy Cruiser Ne-Class eliteLight Cruiser Tsu-Class eliteDestroyer Ro-Class Late ModelDestroyer Ro-Class Late Model
Formation 4: Echelon
Formation 1: Line Ahead
Pattern 2 Torpedo Cruiser Chi-Class flagshipTorpedo Cruiser Chi-Class flagshipTorpedo Cruiser Chi-Class flagshipLight Cruiser Tsu-Class eliteDestroyer Ro-Class Late ModelDestroyer Ro-Class Late Model
Formation 1: Line Ahead
Formation 4: Echelon
Pattern 3 Heavy Cruiser Ri-Class flagshipLight Cruiser He-Class flagshipLight Cruiser He-Class flagshipLight Cruiser Tsu-Class eliteDestroyer Ro-Class Late ModelDestroyer Ro-Class Late Model
Formation 1: Line Ahead
Formation 4: Echelon
O
Pattern 1Choose your route
P
敵泊地投錨中 輸送船団
Night Battle Node
Pattern 1 Transport Ship Wa-Class eliteTransport Ship Wa-Class eliteTransport Ship Wa-Class eliteTransport Ship Wa-Class eliteDestroyer Ro-Class Late ModelDestroyer Ro-Class Late Model
Formation 2: Double Line
Pattern 2 Transport Ship Wa-Class flagshipTransport Ship Wa-Class eliteTransport Ship Wa-Class eliteTransport Ship Wa-Class eliteDestroyer Ro-Class Late ModelDestroyer Ro-Class Late Model
Formation 2: Double Line
Pattern 3 Transport Ship Wa-Class eliteTransport Ship Wa-Class eliteTransport Ship Wa-Class eliteDestroyer Ro-Class Late ModelDestroyer I-ClassDestroyer I-Class
Formation 2: Double Line
Pattern 4 Transport Ship Wa-Class flagshipTransport Ship Wa-Class flagshipTransport Ship Wa-Class eliteTransport Ship Wa-Class eliteDestroyer Ro-Class Late ModelDestroyer Ro-Class Late Model
Formation 2: Double Line
Pattern 5 Transport Ship Wa-Class eliteTransport Ship Wa-Class eliteTransport Ship Wa-Class eliteDestroyer Ro-Class Late ModelDestroyer Ro-Class Late ModelDestroyer I-Class
Formation 2: Double Line
Pattern 6 Transport Ship Wa-Class flagshipTransport Ship Wa-Class flagshipTransport Ship Wa-Class flagshipTransport Ship Wa-Class eliteDestroyer Ro-Class Late ModelDestroyer Ro-Class Late Model
Formation 2: Double Line
Q
敵南方艦隊 旗艦
Pattern 1 Southern War PrincessLight Cruiser Tsu-Class eliteLight Cruiser Tsu-Class eliteDestroyer Ha-Class Late ModelDestroyer Ha-Class Late ModelDestroyer Ha-Class Late Model
Formation 1: Line Ahead
Formation 2: Double Line
AP:32
AS:71
AS+:141
Pattern 2 Southern War PrincessTorpedo Cruiser Chi-Class flagshipTorpedo Cruiser Chi-Class flagshipLight Cruiser Tsu-Class eliteDestroyer Ha-Class Late ModelDestroyer Ha-Class Late Model
Formation 1: Line Ahead
Formation 2: Double Line
AP:32
AS:71
AS+:141
Pattern 3 Southern War PrincessLight Carrier Nu-Class flagshipLight Carrier Nu-Class flagshipLight Cruiser Tsu-Class eliteDestroyer Ha-Class Late ModelDestroyer Ha-Class Late Model
Formation 2: Double Line
Formation 1: Line Ahead
AP:62
AS:140
AS+:279

World 5/5-3/Drop list