- Welcome to the Kancolle Wiki!
- If you have any questions regarding site content, account registration, etc., please visit the KanColle Wiki Discord
Difference between revisions of "Kirishima/Equipment Bonuses"
Jump to navigation
Jump to search
| Line 2: | Line 2: | ||
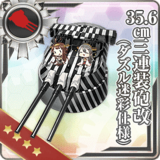
! {{RedGunHeavy}}{{EquipmentLink|35.6cm Twin Gun Mount (Dazzle Camouflage)}} | ! {{RedGunHeavy}}{{EquipmentLink|35.6cm Twin Gun Mount (Dazzle Camouflage)}} | ||
| style="text-align:left;" | | | style="text-align:left;" | | ||
| − | | +1 || || || || || || | + | | +1 || || || || || || |
| style="text-align:left;" | | | style="text-align:left;" | | ||
|- | |- | ||
! {{RedGunHeavy}}{{EquipmentLink|35.6cm Triple Gun Mount Kai (Dazzle Camouflage)}} | ! {{RedGunHeavy}}{{EquipmentLink|35.6cm Triple Gun Mount Kai (Dazzle Camouflage)}} | ||
| style="text-align:left;" | | | style="text-align:left;" | | ||
| − | | +1 || || || || || || | + | | +1 || || || || || || |
| + | | style="text-align:left;" | | ||
| + | |- | ||
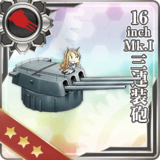
| + | ! {{RedGunHeavy}}{{EquipmentLink|16inch Mk.I Triple Gun Mount}}<br/> OR {{RedGunHeavy}}{{EquipmentLink|16inch Mk.I Triple Gun Mount + AFCT Kai}}<br/> OR {{RedGunHeavy}}{{EquipmentLink|16inch Mk.I Triple Gun Mount Kai + FCR Type 284}} | ||
| + | | style="text-align:left;" | | ||
| + | | +1 || || || || || +1 || <font color=#CC0000>-3</font> | ||
| style="text-align:left;" | | | style="text-align:left;" | | ||
|- | |- | ||
| Line 20: | Line 25: | ||
| style="text-align:left;" | | | style="text-align:left;" | | ||
|- | |- | ||
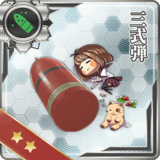
| − | {{ | + | ! {{GreenAmmo}}{{EquipmentLink|Type 3 Shell}} |
| + | | style="text-align:left;" | '''(1st equipped)''' | ||
| + | | +1 || || || || || || | ||
| + | | style="text-align:left;" | One-time | ||
|- | |- | ||
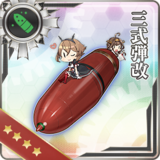
| − | ! {{RedGunHeavy}}{{EquipmentLink|16inch | + | ! {{GreenAmmo}}{{EquipmentLink|Type 3 Shell Kai}} |
| + | | style="text-align:left;" | '''(1st equipped)''' | ||
| + | | +3 || || +2 || || || || | ||
| + | | style="text-align:left;" | One-time | ||
| + | |- | ||
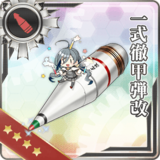
| + | ! {{RedAmmo}}{{EquipmentLink|Type 1 Armor Piercing Shell Kai}} | ||
| + | | style="text-align:left;" | '''(1st equipped)''' | ||
| + | | +1 || || || || || || | ||
| + | | style="text-align:left;" | One-time | ||
| + | |- | ||
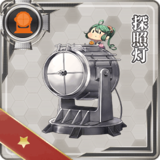
| + | ! {{Searchlight}}{{EquipmentLink|Searchlight}} | ||
| + | | style="text-align:left;" | '''(1st equipped)''' | ||
| + | | +4 || || || || || || <font color=#CC0000>-1</font> | ||
| + | | style="text-align:left;" | One-time | ||
| + | |- | ||
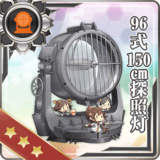
| + | ! {{Searchlight}}{{EquipmentLink|Type 96 150cm Searchlight}} | ||
| + | | style="text-align:left;" | '''(1st equipped)''' | ||
| + | | +6 || || || || || || <font color=#CC0000>-2</font> | ||
| + | | style="text-align:left;" | One-time | ||
| + | |- | ||
| + | ! colspan="10" | Ship-Type Bonuses | ||
| + | |- | ||
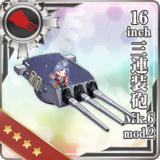
| + | ! {{RedGunHeavy}}{{EquipmentLink|16inch Triple Gun Mount Mk.6 mod.2}} | ||
| style="text-align:left;" | | | style="text-align:left;" | | ||
| − | | +1 || || || || || | + | | +1 || || || || || || |
| style="text-align:left;" | | | style="text-align:left;" | | ||
|- | |- | ||
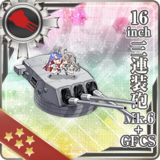
| − | ! {{RedGunHeavy}}{{EquipmentLink|16inch | + | ! {{RedGunHeavy}}{{EquipmentLink|16inch Triple Gun Mount Mk.6 + GFCS}} |
| style="text-align:left;" | | | style="text-align:left;" | | ||
| − | | +1 || || || || || | + | | +1 || || || || || || |
| style="text-align:left;" | | | style="text-align:left;" | | ||
|- | |- | ||
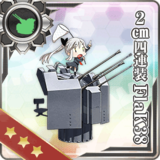
| − | ! {{ | + | ! rowspan="4"|{{GreenGunMG}}{{EquipmentLink|2cm Flakvierling 38}} |
| + | | style="text-align:left;" | '''(★4-6)''' | ||
| + | | || || +1 || || || || +1 | ||
| style="text-align:left;" | | | style="text-align:left;" | | ||
| − | | +1 || || || || || +1 | + | |- |
| + | | style="text-align:left;" | '''(★7-9)''' | ||
| + | | +1 || || +2 || || || || +1 | ||
| style="text-align:left;" | | | style="text-align:left;" | | ||
|- | |- | ||
| − | + | | style="text-align:left;" | '''(★MAX)''' | |
| − | | style="text-align:left;" | | + | | +1 || || +3 || || || || +2 |
| − | | +1 || || || || || || | ||
| style="text-align:left;" | | | style="text-align:left;" | | ||
|- | |- | ||
| − | ! {{RedGunHeavy}}{{EquipmentLink| | + | | style="text-align:left;" | '''(★4-MAX) + AIR Radar''' |
| − | | style="text-align:left;" | | + | | || || +1 || || || || |
| − | | + | + | | style="text-align:left;" | One-time |
| + | |} | ||
| + | {{Ship/EquipmentBonuses|Kai|class=<includeonly>mw-collapsed</includeonly>}} | ||
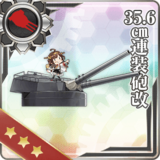
| + | ! {{RedGunHeavy}}{{EquipmentLink|35.6cm Twin Gun Mount Kai}} | ||
| + | | style="text-align:left;" | | ||
| + | | +2 || || || || || || +1 | ||
| style="text-align:left;" | | | style="text-align:left;" | | ||
| − | |||
|- | |- | ||
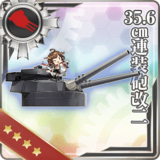
| − | ! {{ | + | ! {{RedGunHeavy}}{{EquipmentLink|35.6cm Twin Gun Mount Kai Ni}} |
| style="text-align:left;" | | | style="text-align:left;" | | ||
| − | | + | + | | +2 || || || || || || +1 |
| style="text-align:left;" | | | style="text-align:left;" | | ||
|- | |- | ||
| − | ! {{GreenAmmo}}{{EquipmentLink|Type 3 Shell}} | + | ! {{GreenAmmo}}{{EquipmentLink|Type 3 Shell Kai}} |
| + | | style="text-align:left;" | '''(1st equipped)''' | ||
| + | | +1 || || +1 || || || || | ||
| + | | style="text-align:left;" | One-time | ||
| + | |- | ||
| + | ! {{RedAmmo}}{{EquipmentLink|Type 1 Armor Piercing Shell Kai}} | ||
| + | | style="text-align:left;" | '''(1st equipped)''' | ||
| + | | +1 || || || || || || | ||
| + | | style="text-align:left;" | One-time | ||
| + | |- | ||
| + | ! {{Searchlight}}{{EquipmentLink|Searchlight}} | ||
| + | | style="text-align:left;" | '''(1st equipped)''' | ||
| + | | +4 || || || || || || <font color=#CC0000>-1</font> | ||
| + | | style="text-align:left;" | One-time | ||
| + | |- | ||
| + | ! {{Searchlight}}{{EquipmentLink|Type 96 150cm Searchlight}} | ||
| + | | style="text-align:left;" | '''(1st equipped)''' | ||
| + | | +6 || || || || || || <font color=#CC0000>-2</font> | ||
| + | | style="text-align:left;" | One-time | ||
| + | |- | ||
| + | ! colspan="10" | Ship-Type Bonuses | ||
| + | |- | ||
| + | ! {{RedGunHeavy}}{{EquipmentLink|16inch Triple Gun Mount Mk.6 mod.2}} | ||
| style="text-align:left;" | | | style="text-align:left;" | | ||
| +1 || || || || || || | | +1 || || || || || || | ||
| style="text-align:left;" | | | style="text-align:left;" | | ||
|- | |- | ||
| − | ! {{ | + | ! {{RedGunHeavy}}{{EquipmentLink|16inch Triple Gun Mount Mk.6 + GFCS}} |
| style="text-align:left;" | | | style="text-align:left;" | | ||
| − | | + | + | | +1 || || || || || || |
| style="text-align:left;" | | | style="text-align:left;" | | ||
|- | |- | ||
| − | ! {{ | + | ! rowspan="4"|{{GreenGunMG}}{{EquipmentLink|2cm Flakvierling 38}} |
| + | | style="text-align:left;" | '''(★4-6)''' | ||
| + | | || || +1 || || || || +1 | ||
| style="text-align:left;" | | | style="text-align:left;" | | ||
| − | | + | + | |- |
| + | | style="text-align:left;" | '''(★7-9)''' | ||
| + | | +1 || || +2 || || || || +1 | ||
| style="text-align:left;" | | | style="text-align:left;" | | ||
|- | |- | ||
| − | + | | style="text-align:left;" | '''(★MAX)''' | |
| − | | style="text-align:left;" | | + | | +1 || || +3 || || || || +2 |
| − | | + | ||
| style="text-align:left;" | | | style="text-align:left;" | | ||
| + | |- | ||
| + | | style="text-align:left;" | '''(★4-MAX) + AIR Radar''' | ||
| + | | || || +1 || || || || | ||
| + | | style="text-align:left;" | One-time | ||
|} | |} | ||
{{Ship/EquipmentBonuses|class=<includeonly>mw-collapsed</includeonly>}} | {{Ship/EquipmentBonuses|class=<includeonly>mw-collapsed</includeonly>}} | ||
| Line 83: | Line 149: | ||
| +1 || || || || || || +1 | | +1 || || || || || || +1 | ||
| style="text-align:left;" | | | style="text-align:left;" | | ||
| + | |- | ||
| + | ! {{GreenAmmo}}{{EquipmentLink|Type 3 Shell Kai}} | ||
| + | | style="text-align:left;" | '''(1st equipped)''' | ||
| + | | +1 || || +1 || || || || | ||
| + | | style="text-align:left;" | One-time | ||
| + | |- | ||
| + | ! {{RedAmmo}}{{EquipmentLink|Type 1 Armor Piercing Shell Kai}} | ||
| + | | style="text-align:left;" | '''(1st equipped)''' | ||
| + | | +1 || || || || || || | ||
| + | | style="text-align:left;" | One-time | ||
| + | |- | ||
| + | ! {{Searchlight}}{{EquipmentLink|Searchlight}} | ||
| + | | style="text-align:left;" | '''(1st equipped)''' | ||
| + | | +4 || || || || || || <font color=#CC0000>-1</font> | ||
| + | | style="text-align:left;" | One-time | ||
| + | |- | ||
| + | ! {{Searchlight}}{{EquipmentLink|Type 96 150cm Searchlight}} | ||
| + | | style="text-align:left;" | '''(1st equipped)''' | ||
| + | | +6 || || || || || || <font color=#CC0000>-2</font> | ||
| + | | style="text-align:left;" | One-time | ||
| + | |- | ||
| + | ! colspan="10" | Ship-Type Bonuses | ||
|- | |- | ||
! {{RedGunHeavy}}{{EquipmentLink|16inch Triple Gun Mount Mk.6 mod.2}} | ! {{RedGunHeavy}}{{EquipmentLink|16inch Triple Gun Mount Mk.6 mod.2}} | ||
| − | | style="text-align:left;" | | + | | style="text-align:left;" | |
| +1 || || || || || || | | +1 || || || || || || | ||
| style="text-align:left;" | | | style="text-align:left;" | | ||
|- | |- | ||
! {{RedGunHeavy}}{{EquipmentLink|16inch Triple Gun Mount Mk.6 + GFCS}} | ! {{RedGunHeavy}}{{EquipmentLink|16inch Triple Gun Mount Mk.6 + GFCS}} | ||
| − | | style="text-align:left;" | | + | | style="text-align:left;" | |
| +1 || || || || || || | | +1 || || || || || || | ||
| style="text-align:left;" | | | style="text-align:left;" | | ||
|- | |- | ||
| − | ! {{ | + | ! rowspan="4"|{{GreenGunMG}}{{EquipmentLink|2cm Flakvierling 38}} |
| − | | style="text-align:left;" | | + | | style="text-align:left;" | '''(★4-6)''' |
| − | | | + | | || || +1 || || || || +1 |
| style="text-align:left;" | | | style="text-align:left;" | | ||
|- | |- | ||
| − | + | | style="text-align:left;" | '''(★7-9)''' | |
| − | | style="text-align:left;" | | + | | +1 || || +2 || || || || +1 |
| − | | +1 || || + | ||
| style="text-align:left;" | | | style="text-align:left;" | | ||
|- | |- | ||
| − | + | | style="text-align:left;" | '''(★MAX)''' | |
| − | | style="text-align:left;" | | + | | +1 || || +3 || || || || +2 |
| − | | + | ||
| style="text-align:left;" | | | style="text-align:left;" | | ||
|- | |- | ||
| − | + | | style="text-align:left;" | '''(★4-MAX) + AIR Radar''' | |
| − | | style="text-align:left;" | | + | | || || +1 || || || || |
| − | | | + | | style="text-align:left;" | One-time |
| − | | style="text-align:left;" | | ||
|} | |} | ||
Revision as of 09:55, 7 April 2022
| [edit]Kirishima Kai Ni Equipment Bonuses | |||||||||||||||||||||||||||||||||||||||||||||||||||||||||||||||||||||||||||||||||||||||||||||||||||
|---|---|---|---|---|---|---|---|---|---|---|---|---|---|---|---|---|---|---|---|---|---|---|---|---|---|---|---|---|---|---|---|---|---|---|---|---|---|---|---|---|---|---|---|---|---|---|---|---|---|---|---|---|---|---|---|---|---|---|---|---|---|---|---|---|---|---|---|---|---|---|---|---|---|---|---|---|---|---|---|---|---|---|---|---|---|---|---|---|---|---|---|---|---|---|---|---|---|---|---|
| Equipment | Extra Requirement | Note | |||||||||||||||||||||||||||||||||||||||||||||||||||||||||||||||||||||||||||||||||||||||||||||||||

|
+1 | ||||||||||||||||||||||||||||||||||||||||||||||||||||||||||||||||||||||||||||||||||||||||||||||||||
|
+1 | ||||||||||||||||||||||||||||||||||||||||||||||||||||||||||||||||||||||||||||||||||||||||||||||||||
 OR 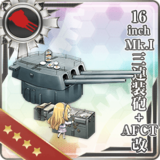 OR 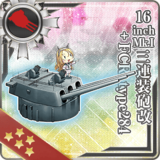
|
+1 | +1 | -3 | ||||||||||||||||||||||||||||||||||||||||||||||||||||||||||||||||||||||||||||||||||||||||||||||||
|
+2 | +1 | |||||||||||||||||||||||||||||||||||||||||||||||||||||||||||||||||||||||||||||||||||||||||||||||||
|
+3 | +1 | +1 | ||||||||||||||||||||||||||||||||||||||||||||||||||||||||||||||||||||||||||||||||||||||||||||||||
|
(1st equipped) | +1 | One-time | ||||||||||||||||||||||||||||||||||||||||||||||||||||||||||||||||||||||||||||||||||||||||||||||||
|
(1st equipped) | +3 | +2 | One-time | |||||||||||||||||||||||||||||||||||||||||||||||||||||||||||||||||||||||||||||||||||||||||||||||
|
(1st equipped) | +1 | One-time | ||||||||||||||||||||||||||||||||||||||||||||||||||||||||||||||||||||||||||||||||||||||||||||||||
|
(1st equipped) | +4 | -1 | One-time | |||||||||||||||||||||||||||||||||||||||||||||||||||||||||||||||||||||||||||||||||||||||||||||||
|
(1st equipped) | +6 | -2 | One-time | |||||||||||||||||||||||||||||||||||||||||||||||||||||||||||||||||||||||||||||||||||||||||||||||
| Ship-Type Bonuses | |||||||||||||||||||||||||||||||||||||||||||||||||||||||||||||||||||||||||||||||||||||||||||||||||||
|
+1 | ||||||||||||||||||||||||||||||||||||||||||||||||||||||||||||||||||||||||||||||||||||||||||||||||||
|
+1 | ||||||||||||||||||||||||||||||||||||||||||||||||||||||||||||||||||||||||||||||||||||||||||||||||||
|
(★4-6) | +1 | +1 | ||||||||||||||||||||||||||||||||||||||||||||||||||||||||||||||||||||||||||||||||||||||||||||||||
| (★7-9) | +1 | +2 | +1 | ||||||||||||||||||||||||||||||||||||||||||||||||||||||||||||||||||||||||||||||||||||||||||||||||
| (★MAX) | +1 | +3 | +2 | ||||||||||||||||||||||||||||||||||||||||||||||||||||||||||||||||||||||||||||||||||||||||||||||||
| (★4-MAX) + AIR Radar | +1 | One-time | |||||||||||||||||||||||||||||||||||||||||||||||||||||||||||||||||||||||||||||||||||||||||||||||||
| [edit]Kirishima Kai Equipment Bonuses | |||||||||||||||||||||||||||||||||||||||||||||||||||||||||||||||||||||||||||||||||||||||||||||||||||
|---|---|---|---|---|---|---|---|---|---|---|---|---|---|---|---|---|---|---|---|---|---|---|---|---|---|---|---|---|---|---|---|---|---|---|---|---|---|---|---|---|---|---|---|---|---|---|---|---|---|---|---|---|---|---|---|---|---|---|---|---|---|---|---|---|---|---|---|---|---|---|---|---|---|---|---|---|---|---|---|---|---|---|---|---|---|---|---|---|---|---|---|---|---|---|---|---|---|---|---|
| Equipment | Extra Requirement | Note | |||||||||||||||||||||||||||||||||||||||||||||||||||||||||||||||||||||||||||||||||||||||||||||||||
|
|
+2 | +1 | |||||||||||||||||||||||||||||||||||||||||||||||||||||||||||||||||||||||||||||||||||||||||||||||||
|
|
+2 | +1 | |||||||||||||||||||||||||||||||||||||||||||||||||||||||||||||||||||||||||||||||||||||||||||||||||
|
|
(1st equipped) | +1 | +1 | One-time | |||||||||||||||||||||||||||||||||||||||||||||||||||||||||||||||||||||||||||||||||||||||||||||||
|
|
(1st equipped) | +1 | One-time | ||||||||||||||||||||||||||||||||||||||||||||||||||||||||||||||||||||||||||||||||||||||||||||||||
|
|
(1st equipped) | +4 | -1 | One-time | |||||||||||||||||||||||||||||||||||||||||||||||||||||||||||||||||||||||||||||||||||||||||||||||
|
|
(1st equipped) | +6 | -2 | One-time | |||||||||||||||||||||||||||||||||||||||||||||||||||||||||||||||||||||||||||||||||||||||||||||||
| Ship-Type Bonuses | |||||||||||||||||||||||||||||||||||||||||||||||||||||||||||||||||||||||||||||||||||||||||||||||||||
|
|
+1 | ||||||||||||||||||||||||||||||||||||||||||||||||||||||||||||||||||||||||||||||||||||||||||||||||||
|
|
+1 | ||||||||||||||||||||||||||||||||||||||||||||||||||||||||||||||||||||||||||||||||||||||||||||||||||
|
|
(★4-6) | +1 | +1 | ||||||||||||||||||||||||||||||||||||||||||||||||||||||||||||||||||||||||||||||||||||||||||||||||
| (★7-9) | +1 | +2 | +1 | ||||||||||||||||||||||||||||||||||||||||||||||||||||||||||||||||||||||||||||||||||||||||||||||||
| (★MAX) | +1 | +3 | +2 | ||||||||||||||||||||||||||||||||||||||||||||||||||||||||||||||||||||||||||||||||||||||||||||||||
| (★4-MAX) + AIR Radar | +1 | One-time | |||||||||||||||||||||||||||||||||||||||||||||||||||||||||||||||||||||||||||||||||||||||||||||||||
| [edit]Kirishima Equipment Bonuses | |||||||||||||||||||||||||||||||||||||||||||||||||||||||||||||||||||||||||||||||||||||||||||||||||||
|---|---|---|---|---|---|---|---|---|---|---|---|---|---|---|---|---|---|---|---|---|---|---|---|---|---|---|---|---|---|---|---|---|---|---|---|---|---|---|---|---|---|---|---|---|---|---|---|---|---|---|---|---|---|---|---|---|---|---|---|---|---|---|---|---|---|---|---|---|---|---|---|---|---|---|---|---|---|---|---|---|---|---|---|---|---|---|---|---|---|---|---|---|---|---|---|---|---|---|---|
| Equipment | Extra Requirement | Note | |||||||||||||||||||||||||||||||||||||||||||||||||||||||||||||||||||||||||||||||||||||||||||||||||
|
|
+1 | +1 | |||||||||||||||||||||||||||||||||||||||||||||||||||||||||||||||||||||||||||||||||||||||||||||||||
|
|
+1 | +1 | |||||||||||||||||||||||||||||||||||||||||||||||||||||||||||||||||||||||||||||||||||||||||||||||||
|
|
(1st equipped) | +1 | +1 | One-time | |||||||||||||||||||||||||||||||||||||||||||||||||||||||||||||||||||||||||||||||||||||||||||||||
|
|
(1st equipped) | +1 | One-time | ||||||||||||||||||||||||||||||||||||||||||||||||||||||||||||||||||||||||||||||||||||||||||||||||
|
|
(1st equipped) | +4 | -1 | One-time | |||||||||||||||||||||||||||||||||||||||||||||||||||||||||||||||||||||||||||||||||||||||||||||||
|
|
(1st equipped) | +6 | -2 | One-time | |||||||||||||||||||||||||||||||||||||||||||||||||||||||||||||||||||||||||||||||||||||||||||||||
| Ship-Type Bonuses | |||||||||||||||||||||||||||||||||||||||||||||||||||||||||||||||||||||||||||||||||||||||||||||||||||
|
|
+1 | ||||||||||||||||||||||||||||||||||||||||||||||||||||||||||||||||||||||||||||||||||||||||||||||||||
|
|
+1 | ||||||||||||||||||||||||||||||||||||||||||||||||||||||||||||||||||||||||||||||||||||||||||||||||||
|
|
(★4-6) | +1 | +1 | ||||||||||||||||||||||||||||||||||||||||||||||||||||||||||||||||||||||||||||||||||||||||||||||||
| (★7-9) | +1 | +2 | +1 | ||||||||||||||||||||||||||||||||||||||||||||||||||||||||||||||||||||||||||||||||||||||||||||||||
| (★MAX) | +1 | +3 | +2 | ||||||||||||||||||||||||||||||||||||||||||||||||||||||||||||||||||||||||||||||||||||||||||||||||
| (★4-MAX) + AIR Radar | +1 | One-time | |||||||||||||||||||||||||||||||||||||||||||||||||||||||||||||||||||||||||||||||||||||||||||||||||