• Welcome to the Kancolle Wiki!
  • If you have any questions regarding site content, account registration, etc., please visit the KanColle Wiki Discord

World 3/3-5

From Kancolle Wiki
Jump to navigation Jump to search

World 3-5 【Extra Operation】 北方AL海域 Aleutian Islands Campaign

Strategy Name
北方海域戦闘哨戒 (Northern Water Combat Patrols)
Difficulty
☆ ☆ ☆ ☆ ☆ ☆ ☆ ☆ ☆
Item
Ammunition
Strategy Content
北方海域に敵増援の動きがある。中規模の水上打撃部隊を派遣し、敵増援を捕捉、これを撃破せよ!
There is a movement of enemy reinforcements to the northern sea. Dispatch a medium size fleet, intercept the enemy reinforcements and destroy it!
3-5 True-South route
Fleet 1XX, 5DD, (XX = AV or CL)
Route F G K
Other Notes Enemy Air Power only present after 3 clears.
AP AS AS+
16 35 70
3-5 South route
Fleet 2CL, 4XX (XX = AV, CL, or DD)
Route Random based on the number of DDs.
F G K
B C F G K
Other Notes Enemy Air Power only present after 3 clears.
AP AS AS+
16 35 70
3-5 North route
Fleet 3CV/BB, 3XX (XX = CA(V), SS(V), or CLT)
Route B D H K
Other Notes
AP AS AS+
170 381 762

Stage Guide

3-5 Branching Rules
Nodes Rules
Start
B
  • Guaranteed if one of the following requirements are met:
    • Amount of SS(V) ≥ 3
    • Amount of (F)BB(V) ≥ 2
    • Amount of (F)BB(V) + CA(V) ≥ 3
    • Fleet contains CV(L)
    • Fleet contains CLT
  • 25% chance of B when amount of DD = 4
  • 50% chance of B when amount of DD ≤ 3
F
  • Does not meet the requirements to go to B
  • Guaranteed if the amount of DD ≥ 5
  • 75% chance of F when amount of DD = 4
  • 50% chance of F when amount of DD ≤ 3
B
A
  • Meet ANY of the following requirements:
    • Amount of SS(V) ≥ 4
    • Amount of CV(L/B) ≥ 4
    • Amount of CV(L/B) + (F)BB(V) ≥ 5
C
  • Does not meet the requirement to go to any other nodes
D
  • Meet ANY of the following requirements:
    • Amount of CLT ≥ 2
    • Amount of CV(L) ≥ 2
    • Amount of (F)BB(V) ≥ 3 (Overrides E node branching)
    • Amount of CA(V) ≥ 2 and use neither a DD / CL
E
  • Meet ALL of the following requirements:
    • Amount of DD ≥ 2
    • Amount of CL = 1
    • Fleet contains no CV(L/B)
E
H
  • Fixed Route
F
E
  • Guaranteed if one of the following requirements are met:
    • Fleet contains CV(L/B), (F)BB(V) or LHA
  • 25% chance of E if none of the requirements are met
G
  • Guaranteed if ALL of the following requirements are met:
    • Amount of CL ≤ 2
    • Fleet contains no LHA, CA(V), (F)BB(V) or CV(L/B)
  • 75% chance of G if none of the requirements are me
G
I
  • LoS check:
    • Go to I if LoS < 23 (Cn4)
    • Go to K if LoS > 28 (Cn4)
    • Random routing if 23 ≤ LoS ≤ 28 (Cn4)
K
H
J
  • Meet ANY of the following requirements (LoS check pass is ignored):
    • Amount of (F)BB(V) + CV(B/L) ≥ 2 AND Fleet contains Akitsumaru
    • Amount of (F)BB(V) + CV(B/L) ≥ 4
  • Have LoS < 40 (Cn4)
K

Have LoS > 40 (Cn4) AND do not meet the requirements to go to node J


Tips

To complete the map, you need to defeat the boss flagship (Tsu-Class Light Cruiser) 4 times.

  • Upon completing this task you will be rewarded with 150 Ranking points and a medal.
  • The map will reset at midnight JST at the beginning of every month.
  • The map will stay in Final Form once you cleared it until the next month reset. Therefore, it's recommended to do all 3-5 quests pre-clear for an easier time, as doing them post-clear can make the job much harder.
  • LoS requirement:
    • For G K (south) LoS ≥ 28 (Cn4)
    • For H K (north) LoS ≥ ~40 (Cn4)
  • Middle routes (B E H K or F E H K) are not recommended, not only does this require an awkward fleet composition (either 1CL, 2DD in a heavy fleet or 1BB/CV in a light one), Node E presents two Ru-Flags that can potentially damage any of your ships.


Recommended Fleets

  • 3CV/BB, 3XX (XX = CA(V), SS(V), or CLT)
  • Route = B D H K
    • Ships that are specialized in AACI can be used to protect your fleet on the way to the boss node.

  • 1CL, 5DD
  • 1AV, 5DD
  • Route = F G K
    • This is the strongest possible composition that is guaranteed to reach the boss via this route, assuming LoS requirements are met. It is recommended to try the south route with this composition first.
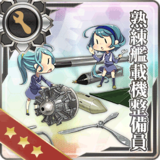
    • Using an Elite Torpedo Squadron Command FacilityElite Torpedo Squadron Command Facility can be very helpful to avoid retreats.
    • Sparkling can help for lower-level DDs as you are unlikely to kill or disable all enemies in preboss nodes, which can lead to closing torpedoes critically damaging low-armored DDs.

  • 1AV, 1CL, 4DD
  • 2AV, 2CL, 2DD
  • 3-4AV, 2-3CL
  • Route = Random based on the number of DDs :
    • F G K
    • B C F G K
    • Sacrifices guaranteed routing, but in exchange for opening strikes, and the possibility of AP/AS at Node G on the final clear.
      • There is a risk of getting sent off-course to node B. You may opt to refresh the game if sent to B.

  • Hayasui Kai, 2AV, 1CLT, 2CL
  • Route = B C F G K
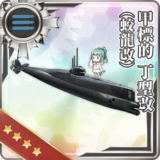
    • Arming Hayasui with a SCAMPSkilled Carrier-based Aircraft Maintenance Personnel and some Torpedo Bombers will help her by getting a better chance to do some damage in battle.
    • AV should be armed with either SPB or SPF.
    • CLT and CL capable of carrying Midget SubmarineType A Kouhyouteki
      Type C Kouhyouteki
      Type D Kouhyouteki Kai (Kouryuu Kai)
      are preferred to help wipe out the enemies easier.
    • While it is more expensive in comparison to other compositions, this is also more likely to ensure your survival to the boss node.


Nodes and Enemy Encounters

Show/Hide Nodes and Enemy Encounters
Nodes and Enemy Encounters
NodePatternXpNode InfoFormAir
A
Battle Avoided
Pattern 1"Must be my imagination" (battle avoided)
B
北方前衛警戒部隊
Pattern 1 Light Cruiser Ho-Class flagshipBattleship Ta-Class eliteHeavy Cruiser Ri-Class eliteHeavy Cruiser Ri-Class eliteDestroyer I-Class Late ModelDestroyer I-Class Late Model
Formation 1: Line Ahead
Formation 2: Double Line
Pattern 2 Light Cruiser Ho-Class flagshipHeavy Cruiser Ri-Class flagshipBattleship Ta-Class eliteTorpedo Cruiser Chi-Class eliteDestroyer I-Class Late ModelDestroyer I-Class Late Model
Formation 1: Line Ahead
Pattern 3 Light Cruiser Ho-Class flagshipBattleship Ta-Class eliteHeavy Cruiser Ri-Class eliteTorpedo Cruiser Chi-Class eliteDestroyer I-Class Late ModelDestroyer I-Class Late Model
Formation 1: Line Ahead
C
Battle Avoided
Pattern 1"Must be my imagination" (battle avoided)
D
北方派遣任務部隊
Pattern 1 Standard Carrier Wo-Class flagshipStandard Carrier Wo-Class flagshipBattleship Ta-Class flagshipHeavy Cruiser Ri-Class eliteDestroyer Ro-Class Late ModelDestroyer Ro-Class Late Model
Formation 3: Diamond
AP:75
AS:168
AS+:336
Pattern 2 Standard Carrier Wo-Class flagshipStandard Carrier Wo-Class flagshipStandard Carrier Wo-Class flagshipBattleship Ta-Class flagshipDestroyer Ro-Class Late ModelDestroyer Ro-Class Late Model
Formation 3: Diamond
AP:143
AS:321
AS+:642
Pattern 3 Standard Carrier Wo-Class flagshipStandard Carrier Wo-Class flagshipBattleship Ta-Class flagshipHeavy Cruiser Ri-Class eliteDestroyer I-Class Late ModelDestroyer I-Class Late Model
Formation 3: Diamond
AP:75
AS:168
AS+:336
Pattern 4 Standard Carrier Wo-Class flagshipStandard Carrier Wo-Class flagshipBattleship Ta-Class flagshipHeavy Cruiser Ri-Class eliteDestroyer Ro-Class Late ModelDestroyer Ro-Class Late Model
Formation 3: Diamond
AP:124
AS:279
AS+:558
Pattern 5 Standard Carrier Wo-Class flagshipStandard Carrier Wo-Class flagshipBattleship Ta-Class flagshipLight Cruiser Ho-Class eliteDestroyer I-Class Late ModelDestroyer I-Class Late Model
Formation 3: Diamond
AP:75
AS:168
AS+:336
E
北方遊撃部隊
Pattern 1 Battleship Ru-Class flagshipBattleship Ru-Class flagshipDestroyer Ha-Class Late ModelDestroyer Ha-Class Late ModelSubmarine Ka-Class flagshipSubmarine Ka-Class elite
Formation 2: Double Line
Pattern 2 Battleship Ru-Class flagshipBattleship Ru-Class flagshipDestroyer Ha-Class Late ModelDestroyer I-Class Late ModelDestroyer I-Class Late ModelSubmarine Ka-Class flagship
Formation 2: Double Line
Pattern 3 Light Carrier Nu-Class flagshipBattleship Ru-Class flagshipBattleship Ru-Class flagshipDestroyer Ha-Class Late ModelDestroyer Ha-Class Late ModelSubmarine Ka-Class flagship
Formation 2: Double Line
AP:16
AS:35
AS+:69
F
北方増援部隊前衛A
Pattern 1 Light Cruiser He-Class flagshipHeavy Cruiser Ri-Class eliteTorpedo Cruiser Chi-Class eliteTorpedo Cruiser Chi-Class eliteDestroyer Ro-Class Late ModelDestroyer I-Class Late Model
Formation 1: Line Ahead
Pattern 2 Light Cruiser He-Class flagshipHeavy Cruiser Ri-Class flagshipTorpedo Cruiser Chi-Class eliteTorpedo Cruiser Chi-Class eliteDestroyer Ro-Class Late ModelDestroyer Ro-Class Late Model
Formation 1: Line Ahead
Pattern 3 Light Cruiser He-Class flagshipHeavy Cruiser Ri-Class eliteTorpedo Cruiser Chi-Class eliteTorpedo Cruiser Chi-ClassDestroyer I-Class Late ModelDestroyer I-Class Late Model
Formation 1: Line Ahead
Pattern 4 Light Cruiser Ho-Class flagshipTorpedo Cruiser Chi-Class eliteTorpedo Cruiser Chi-Class eliteTorpedo Cruiser Chi-ClassDestroyer I-Class Late ModelDestroyer I-Class Late Model
Formation 1: Line Ahead
G
北方増援部隊前衛B
Pattern 1 Heavy Cruiser Ri-Class flagshipHeavy Cruiser Ri-Class eliteHeavy Cruiser Ri-Class eliteLight Cruiser To-Class eliteDestroyer I-Class Late ModelDestroyer I-Class Late Model
Formation 2: Double Line
Formation 1: Line Ahead
Pattern 2 Light Carrier Nu-Class flagshipHeavy Cruiser Ri-Class flagshipHeavy Cruiser Ri-Class eliteDestroyer Ha-Class Late ModelDestroyer I-Class Late ModelDestroyer I-Class Late Model
Formation 3: Diamond
AP:16
AS:35
AS+:69
Pattern 3 Heavy Cruiser Ri-Class flagshipHeavy Cruiser Ri-Class eliteLight Cruiser To-Class eliteLight Cruiser He-Class eliteDestroyer I-Class Late ModelDestroyer I-Class Late Model
Formation 2: Double Line
Pattern 4 Light Carrier Nu-Class flagshipHeavy Cruiser Ri-Class flagshipHeavy Cruiser Ri-Class eliteDestroyer Ro-Class Late ModelDestroyer I-Class Late ModelDestroyer I-Class Late Model
Formation 3: Diamond
AP:16
AS:35
AS+:69
H
北方AL泊地
Pattern 1 Northern Princess Weaken FormEscort FortressEscort FortressHeavy Cruiser Ri-Class flagshipDestroyer Ro-Class Late ModelDestroyer Ro-Class Late Model
Formation 3: Diamond
AP:90
AS:201
AS+:402
Pattern 2
Final Form
Northern Princess Weaken Final FormEscort FortressEscort FortressEscort FortressEscort FortressEscort Fortress
Formation 3: Diamond
AP:170
AS:381
AS+:762
Pattern 3 Northern Princess Weaken FormEscort FortressEscort FortressEscort FortressEscort FortressEscort Fortress
Formation 3: Diamond
AP:148
AS:332
AS+:663
Pattern 4 Northern Princess Weaken FormEscort FortressEscort FortressEscort FortressEscort FortressEscort Fortress
Formation 3: Diamond
AP:145
AS:326
AS+:651
Pattern 5 Northern Princess Weaken FormEscort FortressEscort FortressHeavy Cruiser Ri-Class flagshipDestroyer Ro-Class Late ModelDestroyer Ro-Class Late Model
Formation 3: Diamond
AP:87
AS:195
AS+:390
Pattern 6
Final Form
Northern Princess Weaken Final FormEscort FortressEscort FortressEscort FortressEscort FortressEscort Fortress
Formation 3: Diamond
AP:167
AS:375
AS+:750
I
Battle Avoided
Pattern 1"Must be my imagination" (battle avoided)
J
Resource Node
Pattern 1Ammo + 50
K
北方増援部隊主力
Pattern 1 Light Cruiser Tsu-ClassTransport Ship Wa-Class eliteTransport Ship Wa-Class eliteBattleship Ta-Class flagshipDestroyer Ro-Class Late ModelDestroyer Ro-Class Late Model
Formation 1: Line Ahead
Pattern 2
Final Form
Light Cruiser Tsu-ClassTransport Ship Wa-Class flagshipTransport Ship Wa-Class flagshipBattleship Ta-Class flagshipDestroyer Ni-Class Late ModelDestroyer Ni-Class Late Model
Formation 1: Line Ahead
Pattern 3 Light Cruiser Tsu-ClassTransport Ship Wa-Class eliteTransport Ship Wa-Class eliteBattleship Ru-Class flagshipDestroyer Ro-Class Late ModelDestroyer Ro-Class Late Model
Formation 2: Double Line
Pattern 4 Light Cruiser Tsu-ClassTransport Ship Wa-Class eliteTransport Ship Wa-Class eliteBattleship Ru-Class flagshipDestroyer I-Class Late ModelDestroyer I-Class Late Model
Formation 2: Double Line
Pattern 5
Final Form
Light Cruiser Tsu-ClassTransport Ship Wa-Class flagshipTransport Ship Wa-Class flagshipBattleship Ta-Class flagshipDestroyer Ha-Class Late ModelDestroyer Ha-Class Late Model
Formation 1: Line Ahead

World 3/3-5/Drop list