- Welcome to the Kancolle Wiki!
- If you have any questions regarding site content, account registration, etc., please visit the KanColle Wiki Discord
Winter 2015 Event
Jump to navigation
Jump to search
Introduction
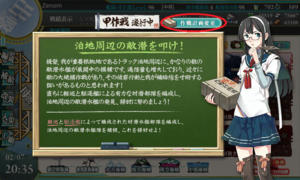
The Winter 2015 Event, 【Counter-attack! Assault on Truk Anchorage】 will begin February 6th, ending two weeks later on February 23rd.
It is based around Operation Hailstone
Patch Notes
See Recent Updates for more info.
- New Ships
- New Enemy Vessels
- Light Cruiser Demon (軽巡棲鬼)
- Battleship Water Demon (戦艦水鬼)
- New Equipment
- Prototype 51cm Twin Cannon (E-2 Hard only clear reward)
- WG42 (Wurfgerät 42) (E-3 Hard and Normal only clear reward and U-511 stock equipment)
- Prototype FaT Type 95 Oxygen Torpedo Kai (Ro-500 (aka U-511 Kai Ni) stock equipment)
- Voice and other Updates
Mechanics
Participation requirements
- Must have a 75% sortie win ratio
- Must have 5 empty ship slots for new ships
- Must have 20 free equipment slots
Special Mechanics
- Combined Fleet (E-3 and E-5)
- Line of Sight requirements on some (all?) maps.
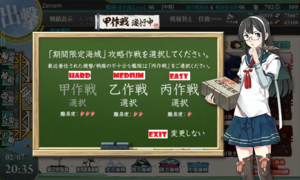
- Selectable and Changeable difficulty
- This event has 3 ranks: easy (丙), medium (乙), hard (甲).
- You can choose the difficulty in each map separately.
- Different difficulties give different medals, equipment and materials when clearing the maps.
- Ships rewards (U-511, Katori and Amagi) will appear regardless of the difficulty.
- Difficulties probably affect drop rates, but ships still drop in any difficulty.
- When the difficulty is changed, the boss's health bar will be reset.
- Once the map is cleared (boss HP bar is depleted and killed), you CANNOT go back and change the difficulty.
- There is no ship locking for this event.
- The boss HP gauges does not regenerate over time in any map in any difficulty.
- Support Expeditions are available. Expedition 141 Focuses on Support for Normal Nodes, Whereas Expedition 142 Focuses Support on Boss Nodes. The Expeditions DO REQUIRE that you have 2 DDs in your fleet. Do take note that their expeditions will end early after you finish one sortie, so try to make the most use out of them.
Event Maps
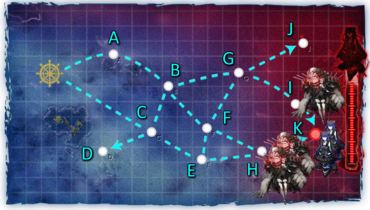
E-1
Information
|
|||
|
Branching rules
| |||
|
Tips
| |||
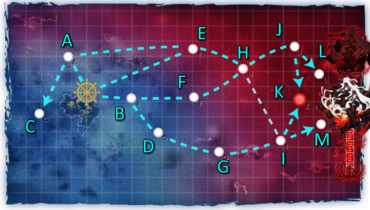
E-2
Information
|
|||
|
Branching rules
| |||
|
Tips
| |||
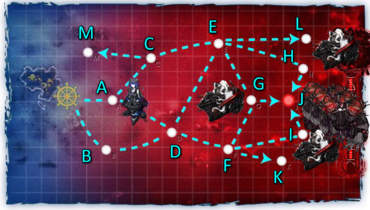
E-3
Information
|
|||
|
Branching rules
| |||
|
Tips
| |||
E-4
Information
|
|||
|
Branching rules
| |||
|
Tips
| |||
E-5
Information
|
|||
|
Branching rules | |||
|
Tips
| |||
See Also
References
Tools
- Air Superiority Calculator (Japanese version. English version in works)
- KanColle Calculator and tools by no1244 (in Japanese)
- Air Superiority Calculator (in Japanese)
- Effective LoS Calculator (in Japanese)
Discussions
- Before and After Resource Checks
- Reports and Results: E-1
- Reports and Results: E-2
- Reports and Results: E-3
- Reports and Results: E-4
- Reports and Results: E-5
Player Live Streams
- KanColle U.S.A. Streamers
- Zak提督's stream: twitch.tv/bl2w (will be playing every day from 8:00 PM - 10:00 PM EST / 10:00 AM - 12:00 PM JST)
- Yamato_kai2000's stream: http://www.twitch.tv/yamato_kai2000 (schedule 7:30 PM - 9:20PM PST (Mondays, Wednesdays, Fridays, and Saturdays) / 12:30 PM - 2:20 PM JST Tuesdays, Thursdays, Saturdays, and Sundays)
- Totaku's stream: Totaku's Livestream (will be playing on weekends from 1:30 AM - 6:00 AM CST / 4:30 PM - 9:00 PM JST)
- DS4's stream 1: twitch.tv/deltasierra4 (will be playing on weekends from 9:00 PM - 3:00 AM CST / 12:00 PM - 6:00 PM JST. More stream announcements will be made on the wiki chat)
- DS4's stream 2: DS4 on Livestream
- Remi_Scarlet's stream: twitch.tv/remi_scarlet
- NikaidoAkiBro's stream: twitch.tv/nikaidorumibro
- HandgunOtonashi's stream : twitch.tv/handgunotonashi EST 1200 onwards.
- SlashZero's stream: hitbox.tv/JenXIII (main) twitch.tv/jenxiii (mirror)
- Kevadu's stream: http://www.twitch.tv/kevadu/ (will be frontlining, staying up all night to try and clear the event as quickly as possible after maintenance finishes)
- Sekronashi's stream: http://www.twitch.tv/sekronashi
- Crescentia's stream: http://www.hitbox.tv/crescentia (main) twitch.tv/crescentia (backup)
Gensui Hime's Stream: http://www.twitch.tv/gensuihime (All day Friday after 5PM, based on CST)c0mpl3x1ty & DeepDFantasy: http://twitch.tv/c0mpl3x1ty (Friday at 9:00PM EST)finished- keemeef~'s stream http://www.twitch.tv/keemeef/ (6:00pm PST onwards; usually late hours)
- Blizzie's stream: twitch.tv/blizzietv (Speedrun attempt -- Sat, Feb 7 @ 1 PM PST)
- Kancolle E.U Streamers
- jeftai's stream: http://www.twitch.tv/jefferytai (will be playing randomly)
- ArcticaFrost http://www.twitch.tv/SaberFrost
- Naikon http://www.twitch.tv/naikon86
- Kancolle S.E.A. Streamers
- dragonjet's Twitch (be one of the first to see, watch event maps, new ships and seasonal CGs get ripped first-hand)
- Lolibunny's twitch (GMT +8 2100- 0100) (Not available on feb 7 and 8) I need resources
- TempestaMkII's Twitch (Watch me fail horribly at this event) (GMT+8 2100 - 0000(On weekdays and weekends) / 1000 - 1200 (On weekends))
- Kancolle E.A. Streamers
- pcp8p67's Stream: http://www.twitch.tv/pcp8p67 (W.G. Forum mainstream, Korean base.)
- Xie's stream: http://twitch.tv/xiei (Live from Japan, random times)

