- Welcome to the Kancolle Wiki!
- If you have any questions regarding site content, account registration, etc., please visit the KanColle Wiki Discord
User:Chrno98/Sandbox
General Information
- There are 2 different tags for this map:
- Blue Tag: 3rd Fleet (Requirement: Combined Fleet or Single Fleet with CV) (Northern Start)
- Purple Tag: 6th Fleet (Requirements: Single Fleet with no CV) (2 Southern Starts)
Phase 1: TP Phase
This phase will require you to run a Single Fleet to deplete the TP bar at Q, consisting of a Ne-Class Kai and light escorts There are currently two known compositions to complete this phase:
- Recommended Fleet:1 CL 1 CAV/AV 4 DD (FAST)

6th Fleet
(Purple Tag) - Route: A B E H J Q
- LBAS: Q 5 Range (no Airpower)
- Notes: Support expeditions are optional. You can use vanguard formation to pass the surface nodes
- LoS: About 44+/34+/27+/23+ Cn3 on Hard/Medium/Easy/Casual is required to route from J to Q with this comp.
- Will deplete the TP Gauge fast compared to the Submarine Composition.
- May result in extra bucket being spent while doing the runs.
- Will also result in additional ship being locked the map.
- Recommended Fleet:
 6SS(V)
6th Fleet
(Purple Tag) - Route: A B D H J Q
- LBAS: H 4 Range (no Airpower), Q 5 Range (no Airpower)
- Notes: Only recommended if you have some Type 2 Ka-Mi Tanks and Drum Canister carrying Subs (Luigi Torelli Kai or higher).
- Sub Fleet will be almost safe from any harm through the map as long as a land base is placed in Node H and Q.
- However, the amount of TP drain per run will be very low, requiring more runs to be taken (Around 40-50 runs depending on the equipment you have).
- This can be ideal if you plan to conserve ships for tagging in later sections of the event.
- This can also be helpful in conserving buckets that would otherwise be spent in this map using a surface related composition.
- LoS: The LoS check from J to Q is ignored if using a full fleet of 6 SS(V).
- Based on current data, using less than 3-4 SS(V) in a fleet may result in off-routing to L regardless.
Phase 1.5: Unlock the route to Node U
Unlocking U has two requirements:
- Reach C
- S rank P twice (Hard), once (Medium)
Phase 2: Defeat CA Hime at Node U
You can use the same fleet you used in the previous unlocking phase
- Composition:Carrier Task Force (CTF): 2 FBB 2 CV 2 CA + 1 CL 5 DD (Fast)

3rd Fleet
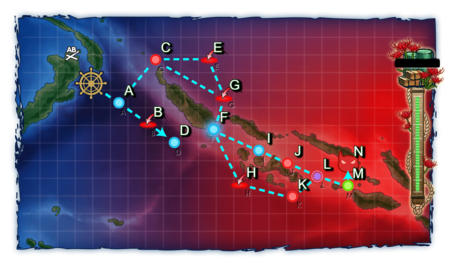
(Blue Tag) - Route: G K M N P T U
- Alternatively, you can use a single fleet comprised of 3 CV(L), 2 (FBB or CA(V)), and a DD with a maximum of 2 CV to route G K N P T U
- LBAS: Range 6, no Air Power
- Notes: AACI is heavily recommended due to three airstrikes on route. Support Expeditions are optional
- Composition:Carrier Task Force (CTF): 2 FBB 2 CV 2 CA + 1 CL 5 DD (Fast)
Phase 3: Defeat CV Hime at Node ZII
In this phase, you will need to take out an Aircraft Carrier Princess. There are several compositions availabe depending on selected difficulty:
- Composition:6 SS

6th Fleet
(Purple Tag)- The recommended composition for all difficulties
- Route: W Z ZI ZII
- LBAS Range: 8 Range, AP/AS on Hard 103/231
- Notes: Node Support is recommended to help you pass through the 2 surface battle nodes. Boss Support Expedition is optional if you send LBAS to the Boss.
- LoS: 29+/23+/21+/18+ Cn3 on Hard/Medium/Easy/Casual is required to route from ZI to ZII.
- Composition:CL, AV/CAV, DD, 3 SS

6th Fleet
(Purple Tag)- Only should be considered if you lack submarines
- Route: V W X Y Z ZI ZII
- LBAS Range: 8 Range, AP/AS on Hard 103/231
- Notes: Node Support is recommended. Boss Support is also recommended.
- LoS: 29+/23+/21+/18+ Cn3 on Hard/Medium/Easy/Casual is required to route from ZI to ZII.
- CompositionAS, BBV, 2CLT, 2SS(V)

6th Fleet
(Purple Tag)- Easy and Casual Difficulty Only (Use this Composition in case of a lack of Submarines)
- Route: V W X Y Z ZI ZII
- LBAS Range: 8 Range, AP/AS on Easy/Casual 88/197
- Notes: Node Support is recommended. Boss Support is also recommended.
- LoS: 29+/23+/21+/18+ Cn3 on Hard/Medium/Easy/Casual is required to route from ZI to ZII.
- Composition:2CL, 4DD

6th Fleet
(Purple Tag)- Casual Only (Use this Composition in case of a lack of Submarines)
- Route: W X Y Z ZI ZII
- LBAS Range: 8 Range, AP/AS on Easy 88/197
- Notes: Vanguard formation can be utilized to help with passing rate. Boss Support is optional but recommended.
- LoS: 29+/23+/21+/18+ Cn3 on Hard/Medium/Easy/Casual is required to route from ZI to ZII.
E-3
| Information | ||||
|---|---|---|---|---|
| Event Tag | Orange Tag: 2nd Torpedo Squadron Yellow Tag: Combined Fleet Grey Tag: 8th Fleet | |||
| Boss Gauges | Hard (甲): 750 TP, 800 HP, 5220 HP | |||
| Medium (乙): 500 TP, 800 HP, 4620 HP | ||||
| Easy (丙): 350 TP, 800 HP, 4020 HP | ||||
| Casual (丁): 350 TP, 800 HP, 4020 HP | ||||
| Map Bosses | ||||
General Information
This map has three ship locks:
- Orange Tag: 2nd Torpedo Squadron (Single Fleet)
- Grey Tag: 8th Fleet (Single Fleet, with CA(V) flagship)
- Starting point unlocks after Phase 1 is cleared
- Only really used for one unlocking gimmick
- Yellow Tag: Combined Fleet (Combined Fleet)
- Same starting point as Orange Tag, but tagged with Combined Fleet Tag when sortied as a Combined Fleet (STF or CTF)
Phase 1: TP Phase
Phase 1 is a TP Phase, with 350/350/500/750 points required on Casual/Easy/Medium/Hard at HQ 120
- Composition:0-1 CL, 5-6 DD

2nd Torpedo Squadron
(Orange Tag)- A fleet with CL will off-route to E
- Route: A C G F I J L M N with 0 CL
- A C E G F I J L M N with 1 CL
- A total of 0/?/3/4 drum-equipped ships are required on Casual/Easy/Medium/Hard for this route.
- LBAS:
- 2 LBAS with 4x LBAA each to boss (7 Range); OR
- 1 LBAS with 4x Toukai/ASW to C (2 Range), 1 LBAS with 4x LBAA to Boss; OR
- Fighter sweep E G
- Notes:
- Support expeditions are optional, vanguard formation can be used to increase passing rate. Generic AACI is sufficient for the Air Raids.
- S-Ranking the boss is not strictly necessary, but if desired, the new Torpedo/SLO+/Torpedo and/or Torpedo/SLO+/Drum cut-ins may be useful.
- With a Reinforcement Expansion unlocked, a Torpedo/Torpedo/Drum/[SLO+] set-up may be utilized.
- SLO+ refers to Torpedo Squadron Skilled Lookouts.
- This phase has no LoS check.
Phase 1.5: Unlock the 2nd Boss Node
Unlocking W has 2 requirements:
- AS Node B & O2
- S rank Node O3 & O1
- A rank O1 on EASY/CASUAL only
- Required for all difficulties
- Composition:Single Fleet: 2 CA(V), 1-2 CL, 2-3 DD

8th Fleet
(Grey Tag) - A CA(V) must be flagship.
- Route: P B O1 O3
- LBAS: Range 3, no airpower O1; Range 4, no air power O3
- Note: O1 contains a New Submarine Princess along with 2 other submarines. Bring Toukai/ASW Aircraft as well as OASW. O3 is a surface combat node.
Phase 2: Defeat the Enemy Combined Fleet
The objective here is to take down the enemy combined fleet at Node W
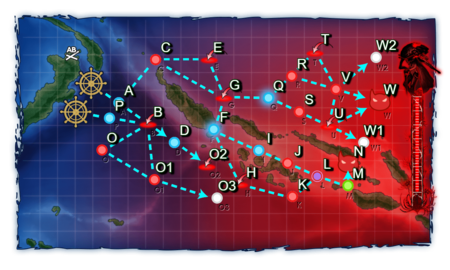
Goes Q S instead of Q R
- Composition:Carrier Task Force (CTF): 2 CV, 2 CVL, 1 CAV, 1 CL + 1 CA, 1 CL, 4 DD

Combined Fleet
(Yellow Tag)- Speed does not matter for this composition and route (i.e. use of Slow CVLs is acceptable).
- Route: A C E G Q R V W
- LBAS: Range 6 V & 7 W.
- AD/AP/AS for V Hard: 62/124/279.
- AD/AP/AS for W Hard: 90/180/405. LD: 96/191/429.
Phase 2.5: Unlock the Route to Node Z
To unlock Z, you will only need to AS H
- Composition:Transport Combined Fleet (TCF): 0-1 CVE, 1CAV/AV, 4-5 DD + 1 CL, 3 DD

Combined Fleet
(Yellow Tag) - Route: A C E G F H
- Alternatively you can run
 1 AV 5 DD
2nd Torpedo Squadron
(Orange Tag) in order to save locks as the fleet is similar to Phase 1 and 3.- If using the single fleet method, you need to use a 4-slot AV like Commandant Teste or Nisshin. 3-slot girls will struggle to take AS against all but the weakest enemy composition.
- Route: A C E G F H
- LBAS: Range 5, AP/AS for Hard: 160/359
- Note: Set up your LBAS with fighters only and send them to Node H to help secure AS.
- 1 CVE and 1 CAV with full fighter & SPF set-ups can almost certainly attain AS without the need for LBAS swapping.
- Note: EASY/CASUAL will have node Z unlocked as soon as you beaten phase 2 without doing this steps
Phase 3: Defeat Lungga Hime
This is the final phase for this map and the MO. The objective is to sink the Lungga princess at Z. There is a boss debuff available for unlocking once LD is reached, if so desired.
- Composition:Single Fleet: 6 DD OR 1 CL 5 DD (EASY AND CASUAL ONLY)

2nd Torpedo Squadron
(Orange Tag)- A fleet with CL will off-route to E
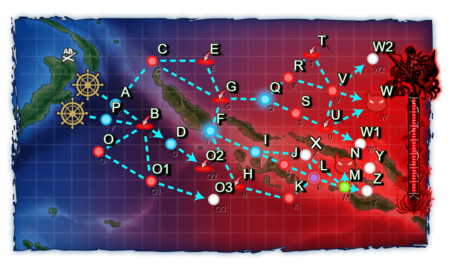
- Route: A C G F I X M Z with 0 CL
- A C E G F I X M Z with 1 CL
- LBAS: Range 8, no Airpower
- Note: Fleet must have 0/3/4/5 drum-equipped ships on Casual/Easy/Medium/Hard.
- LoS Requirement: About Cn3 48+/38+/29+/23+ is required on Hard/Medium/Easy/Casual to route from M to Z.
Lungga Hime Debuff Phase
You can do all these steps in any order. There are 6 requirements that must be met once Last Dance threshold has been reached:
- LBAS raid - AS x1
- O3 - S rank x1
- E - AS x1
- W - S rank x1
- K - S rank x1
- N - S rank x1 (use TCF to reach)


