- Welcome to the Kancolle Wiki!
- If you have any questions regarding site content, account registration, etc., please visit the KanColle Wiki Discord
Difference between revisions of "Sandbox/Winter 2022 E-5"
| Line 70: | Line 70: | ||
** Using Fletcher/Akizuki Class for AACI/ASW/Night Gear duty is highly recommended | ** Using Fletcher/Akizuki Class for AACI/ASW/Night Gear duty is highly recommended | ||
** Setting up the Carriers to be capable of Night Attacks should be strongly considered | ** Setting up the Carriers to be capable of Night Attacks should be strongly considered | ||
| + | |||
| + | The second Phase of this map unlocks immediatly after defeating Phase 1. The Boss fleet of this Phase contains the European Armoured Carrier Hime, which can have up to '''392''' armour on Hard Last Dance. Coupled with bonuses in the low 1.15x range and a night cap of 360 this means that stacking multiple high attack ships, like Nagato+Mutsu Special Attacks, Kitakami, Ooi, Ryuuhou Kai Ni E (as CVN), to fish for critical hits is mandatory. | ||
==Phase 2: Crush the Main Enemy Assault Fleet!== | ==Phase 2: Crush the Main Enemy Assault Fleet!== | ||
| + | |||
| + | <tabber> | ||
| + | |-|Carrier Task Force= | ||
| + | |||
| + | * '''2(F)BB, 2CV(B), 1CVL, 1CL + 1-2CLT, 1-2CA(V), 1CL, 2DD''' [[File:Winter2022EventTag4.png]] | ||
| + | ** 2 {{Radar}} on 2 seperate ships are required to route to the Boss | ||
| + | * Route: {{MapRoute|2|grey|H|blue|I|red|J|red|K|pink|L|red|M1|pink|M|blue|N|red}} | ||
| + | ** LBAS: 100/199 AD/AP on Hard (Range 8). It is recommended to send all bases to the Boss. | ||
| + | |||
| + | |-|Surface Task Force= | ||
| + | |||
| + | * * '''3(F)BB, 2-3CVL, 0-1CL + CL 1-2CLT, 0-1CA(V), 2-3DD '''[[File:Winter2022EventTag4.png]] | ||
| + | ** 2 {{Radar}} on 2 seperate ships are required to route to the Boss | ||
| + | ** 4 DD + CL are required to not face routing penalties | ||
| + | * Route: {{MapRoute|2|grey|H|blue|I|red|J|red|K|pink|L|red|M1|pink|M|blue|N|red}} | ||
| + | ** LBAS: 100/199 AD/AP on Hard (Range 8). It is recommended to send all bases to the Boss. | ||
| + | |||
| + | </tabber> | ||
==Phase 1.5: == | ==Phase 1.5: == | ||
Revision as of 11:11, 15 March 2022
Sandbox Rules
This sandbox is to be used to construct an event guide for the above-mentioned event map. These guides are to all of the following requirements:
- List of branching unlocking requirements (If there are multiple requirements, compositions for each path along with the below requirements will be needed to discuss the unlocking requirements in question)
- A list of working compositions that work: (These must have possible alternatives for players who may or may not have all ships needed for a specific path)
- The Path said composition will take (To explain what path the composition will take)
- A summary or description of what kind of obstacles a composition will face.
- A description of the boss node, what it consists and a descriptive guide on what the player should consider for a course of action to successfully win the battle.
- (Optional) Tips to farm to take the path to collect certain ships (This will also require a composition, path, and possible description.
Editors are to construct their own version of their guide and complete them in a timely fashion.
No other editors are to allowed to edit over other editors' work without the full consent of the editor and his approval to do so.
Several versions will be constructed through this page and will be reviewed and approved by the staff/ collaboration committee before being moved for the Summer 2020 Event which it'll be reviewed and updated once more before it can be released.
Overall there will be 3 versions of the guide that will be constructed which will include:
- Preliminary Guide
- Polished Guide
- Finalized Guide
With each approval of each version of the guide, the said guide will be updated to the main page, and construction of the next version will begin.
All guides outside of the approved version will be removed and work will begin from the approved version to make it better for the next version until the finalized version is made.
Map Overview
E5 is a 3 Phase Map with Combined Fleet and Strike Fleet Sections. 3 Land Bases are available to Sortie on this map.
There are three Tags:
- The Striking Force Fleet Tag
 [Yellow]Striking Force Fleet: A 7-Ship fleet used for Phase 1
 - The Combined Fleet Tag
 [Blue]Combined Fleet: The same found on E3. Used for Phase 2
 - The Decisive Battle Fleet Tag
 [Dark Green]Decisive Battle Fleet: A combined Fleet for Phase 3.
- Note the following (Hard Mode): The Decisive Battle Fleet Tag is applied to a Surface Task Force containing only untagged ships after Phase 2 is beaten. Therefore Caution is advised once proceeding to the unlock Phase after Phase 2.
Heavy Land Base Bomber LBAS mechanic
A new mechanic known as "Heavy Land-Based Bomber Air Raid sequence" has been introduced on E5. Unlike previous mechanics in the game, this mechanic is a "Quick Time Event" (QTE), and requires monitoring and timing of releasing the LBASs to successfully intercept the enemy air-raid by pressing a button at the right time.
- This means that the player is required to pay attention while the fleet is in the map screen.
- The heavy air raid will occur at random at any given point during sorties on E5 and may even sometimes not happen at all.
- For now, the following information will be provided to help organize a better LBAS defense unit to successfully intercept against the air raid:
- When the LBAS sequence occurs, a button will appear on screen:
- When this button is pressed is the QTE, the exact moment it is clicked on directly affecting the outcome of the air-raid.
- This button needs to be pressed at the right time to trigger the best results from the LBAS.

- Pressing the button before 2.5 s or after 3 s after it appears will result in fewer LBAS planes appearing to provide defense.
- Pressing between 2.5 and 3 s will result in the best result from the LBAS defense.
- While there is no visual indicator given, the best result may be achieved when the first bomber reaches the point marked on the picture to the right
- Heavy LBAS Air-Raids will consist of 2 to 3 waves of bombers appearing once the sequence starts.
- The LBAS will need to be armed with planes that can provide "high altitude interceptions" or fighting planes armed with "diagonal upward guns", including the following planes:
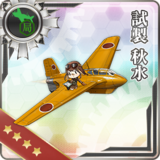
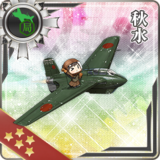

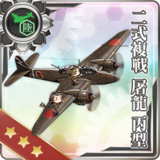
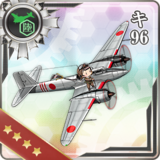
As of current the exact bonus provided from all these planes is not fully known and requires more investigation.
Phase 1: Spearhead the Attack off Kitakyushu!
- Strike Force = CV, CVL, (F)BB, CL, 3DD
- 3
 on 3 seperate ships are required to route to the Boss
- 3
- Route = 1 A B C D E F G
- LBAS: 116/232 AD/AP on Hard (Range 9). It is recommended to send as many Bases as possible to the boss. However, sending ASW LBAS to D might be considered.
- Using Fletcher/Akizuki Class for AACI/ASW/Night Gear duty is highly recommended
- Setting up the Carriers to be capable of Night Attacks should be strongly considered
The second Phase of this map unlocks immediatly after defeating Phase 1. The Boss fleet of this Phase contains the European Armoured Carrier Hime, which can have up to 392 armour on Hard Last Dance. Coupled with bonuses in the low 1.15x range and a night cap of 360 this means that stacking multiple high attack ships, like Nagato+Mutsu Special Attacks, Kitakami, Ooi, Ryuuhou Kai Ni E (as CVN), to fish for critical hits is mandatory.
Phase 2: Crush the Main Enemy Assault Fleet!
- 2(F)BB, 2CV(B), 1CVL, 1CL + 1-2CLT, 1-2CA(V), 1CL, 2DD

- 2 on 2 seperate ships are required to route to the Boss
- 2
- Route: 2 H I J K L M1 M N
- LBAS: 100/199 AD/AP on Hard (Range 8). It is recommended to send all bases to the Boss.
- * 3(F)BB, 2-3CVL, 0-1CL + CL 1-2CLT, 0-1CA(V), 2-3DD
- 2 on 2 seperate ships are required to route to the Boss
- 4 DD + CL are required to not face routing penalties
- 2
- Route: 2 H I J K L M1 M N
- LBAS: 100/199 AD/AP on Hard (Range 8). It is recommended to send all bases to the Boss.