- Welcome to the Kancolle Wiki!
- If you have any questions regarding site content, account registration, etc., please visit the KanColle Wiki Discord
Difference between revisions of "World 6/6-1"
< World 6
Jump to navigation
Jump to search
(Drop table rework) |
Jigaraphale (talk | contribs) |
||
| Line 3: | Line 3: | ||
| map = 6-1 Map.png | | map = 6-1 Map.png | ||
| difficulty = ☆ ☆ ☆ ☆ ☆ ☆ ☆ ☆ | | difficulty = ☆ ☆ ☆ ☆ ☆ ☆ ☆ ☆ | ||
| − | | item = | + | | item = - |
| exp = 380 | | exp = 380 | ||
| code = 潜水艦作戦 (Submarine Operation) | | code = 潜水艦作戦 (Submarine Operation) | ||
| Line 10: | Line 10: | ||
| aircon = {{AirControlSystem | | aircon = {{AirControlSystem | ||
| Map = 6-1 CV Fleet | | Map = 6-1 CV Fleet | ||
| − | | Fleet = | + | | Fleet = 1CV, 1CL, 1CLT, 3SS(V) |
| − | | Route = C | + | | Route = {{MapRoute|C|red|F|red|G|blue|H|red|K|red}} |
| AS = 126 | | AS = 126 | ||
| − | | Notes = | + | | Notes = Has a 15% chance to off-route to Node {{MapRoute|I|red}} |
}} | }} | ||
{{AirControlSystem | {{AirControlSystem | ||
| Map = 6-1 AS Fleet | | Map = 6-1 AS Fleet | ||
| − | | Fleet = | + | | Fleet = 1AS, 1CL, 4SS(V) |
| − | | Route = A | + | | Route = {{MapRoute|A|blue|F|red|G|blue|H|red|K|red}} |
| AS = 126 | | AS = 126 | ||
| Notes = | | Notes = | ||
| Line 51: | Line 51: | ||
** Amount of SS(V) ≥ 3 | ** Amount of SS(V) ≥ 3 | ||
** Amount of BB(V) + CV(L/B) + CA(V) ≤ 1 | ** Amount of BB(V) + CV(L/B) + CA(V) ≤ 1 | ||
| − | ** Pass the | + | ** Pass the LoS check: ≥ 16 (Cn4) |
| − | *** Routing becomes random if | + | ***Routing becomes random if 12 ≤ LoS ≤ 15.9 (Cn4) |
|G/empty -> I = | |G/empty -> I = | ||
| Line 63: | Line 63: | ||
|H -> E/empty, J, K = | |H -> E/empty, J, K = | ||
| − | * Always node E if | + | * Always node E if LoS ≤ 20 (Cn4) |
* If the fleet contains AS: | * If the fleet contains AS: | ||
| − | ** Always node K if | + | ** Always node K if LoS ≥ 25 (Cn4) |
| − | ** Random between E and K if | + | ** Random between E and K if 20 ≤ LoS ≤ 24.9 (Cn4) |
* If the fleet does not contain AS: | * If the fleet does not contain AS: | ||
| − | ** Always node K if | + | ** Always node K if LoS ≥ 36 (Cn4) |
| − | ** Random between J and K if | + | ** Random between J and K if 25 ≤ LoS ≤ 35.9 (Cn4) |
| − | ** Random between E, J and K if | + | ** Random between E, J and K if 20 ≤ LoS ≤ 24.9 (Cn4) |
}} | }} | ||
===Tips=== | ===Tips=== | ||
| − | *At least 3 SS are required to reach the boss. | + | *At least 3 SS(V) are required to reach the boss. |
| − | *There are LoS checks G | + | *There are LoS checks at {{MapRoute|G|blue|H|red}} and {{MapRoute|H|red|K|red}}. They do not have high LoS requirements, but an all-submarine fleet without recons/radar can be sent to {{MapRoute|I|red}}. |
| − | + | ||
| − | * | + | * You may also need to use a "New Submarine Torpedo Cut-In" : |
| − | ** | + | {{Template:Equipment/New Submarine Torpedo Cut-In|intro=radar}} |
| − | **CV may or may not wish to equip SCAMP, as it allows | + | |
| − | + | ||
| − | + | ===Recommended Fleet=== | |
| − | **Allows the fleet to completely ignore any enemy ships that can't attack | + | <tabber> |
| − | **You pretty much want to count on cut-in attacks (at boss), so only use remodeled | + | |-|CV fleet= |
| − | *** | + | *1CV, 1CL, 1CLT, 3SS(V) |
| − | *''' | + | *Route = {{MapRoute|C|red|F|red|G|blue|H|red|K|red}} |
| − | **The | + | **Has a 15% chance to off-route to Node {{MapRoute|I|red}} |
| − | ** | + | **Most effective fleet for taking out the boss but it will have to go through node {{MapRoute|C|red}} where there's a Ru-class Flagship. |
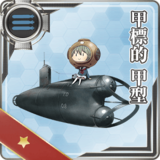
| − | + | *Using a {{EquipmentLink|Type A Kouhyouteki|Type C Kouhyouteki|Type D Kouhyouteki Kai (Kouryuu Kai)|text=Midget Submarine}} on both your CL & CLT gives you a powerful [[Opening Torpedo Salvo]] (Otorp). | |
| − | + | *For your CV, either: | |
| + | **CV may use several {{Equipment/Link|Kikka Kai|Jet Keiun Kai|text=Jets}}, adding the [[Jets|Jet Assault]] phase to your already strong Otorp, allowing you to wipe all pre-boss fleets before they can attack you. | ||
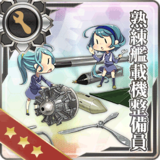
| + | **CV may or may not wish to equip a {{EquipmentLink|Skilled Carrier-based Aircraft Maintenance Personnel|text=SCAMP}} or long-range bomber, as it allows it to act first. | ||
| + | *Try to use a CVB so that it can attack even in ''Chuuha''. | ||
| + | |||
| + | |-|SS fleet= | ||
| + | *'''6SS(V)''' | ||
| + | *Route = {{MapRoute|A|blue|D|red|F|red|G|blue|H|red|K|red}} | ||
| + | **Allows the fleet to completely ignore any enemy ships that can't attack SSs, however node {{MapRoute|D|red}} is pretty harsh on SS with late-model DDs and flagship CLs. | ||
| + | **You pretty much want to count on [[Opening Torpedo Salvo]] (Otorp) & cut-in attacks (at boss), so only use remodeled SS if you're using this composition. | ||
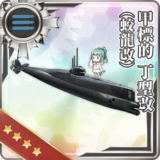
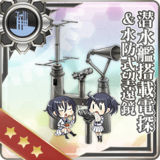
| + | **You may need recon seaplanes or {{EquipmentLink|Submarine Radar & Waterproof Telescope|Submarine Radar & Passive Radiolocator (E27)|Late Model Submarine Radar & Passive Radiolocator|text=Submarine Radars}} for this meet the LoS requirements. | ||
| + | ***If opened, the Submarine Radars can be fitted in an [[Reinforcement Expansion]]. | ||
| + | **As SSVs have few slots, you may want to just give all your seaplanes to the same SSV. You want as many combat-capable submarines for this route. | ||
| + | |||
| + | |||
| + | |-|AS fleet= | ||
| + | *1AS, 1CL, 4SS(V) | ||
| + | *1AS, 2DD, 3SS(V) | ||
| + | *Route = {{MapRoute|A|blue|F|red|G|blue|H|red|K|red}} | ||
| + | **The shortest route in terms of the number of battles. | ||
| + | **'''1AS combined with at least 2 SS(V) unlock the "Submarine-Tender Touch", a special attack that can trigger several times in the map, consuming a [[Submarine Supply Material]] each time.''' | ||
| + | **The AS can equip recon seaplanes to free up slots for your SS(V)s. | ||
| + | **A trade-off is that any enemy ship still in light damage or better shape at the end of the shelling phase will have fewer targets to launch their torpedoes at, so the AS and its escorts have to tank all the preboss ships that can't perform ASW. | ||
| + | </tabber> | ||
| + | |||
| + | |||
| + | Node {{MapRoute|I|red}} has so good drops like [[I-401]] . | ||
| + | *If you want to farm there, you can use: | ||
| + | **1BB, 3CLT, 1CL, 1CV | ||
| + | **1CL, 3CLT, 2CV | ||
| + | **Route = {{MapRoute|C|red|F|red|G|blue|I|red}} | ||
| + | |||
===Nodes And Enemy Encounters=== | ===Nodes And Enemy Encounters=== | ||
Revision as of 18:51, 5 January 2022
World 6-1: 潜水艦作戦 Submarine Operation
| Strategy Name | 潜水艦作戦 (Submarine Operation)
| ||
| Difficulty | ☆ ☆ ☆ ☆ ☆ ☆ ☆ ☆
| ||
| Item | -
| ||
| Strategy Content | 有力な潜水艦隊を編成し、中部海域哨戒線に進出せよ。敵艦隊を発見、これを漸減撃滅せよ!
Organize a strong submarine fleet and advance a patrol line into the Middle Sea region. Locate enemy fleets and gradually destroy them! | ||
| 6-1 CV Fleet | ||
| Fleet | 1CV, 1CL, 1CLT, 3SS(V) | |
| Route | C F G H K | |
| Other Notes | Has a 15% chance to off-route to Node I | |
| AP | AS | AS+ |
| 56 | 126 | 252 |
| 6-1 AS Fleet | ||
| Fleet | 1AS, 1CL, 4SS(V) | |
| Route | A F G H K | |
| Other Notes | ||
| AP | AS | AS+ |
| 56 | 126 | 252 |
Stage Guide
| 6-1 Branching Rules | ||
|---|---|---|
| Nodes | Rules | |
| Start | A |
|
B | ||
C | ||
A |
D |
|
F |
| |
G |
H |
|
I |
| |
H |
E |
|
J | ||
K | ||
Tips
- At least 3 SS(V) are required to reach the boss.
- There are LoS checks at G H and H K. They do not have high LoS requirements, but an all-submarine fleet without recons/radar can be sent to I.
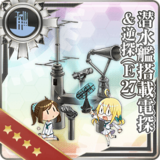
- You may also need to use a "New Submarine Torpedo Cut-In" :
Template:Equipment/New Submarine Torpedo Cut-In
Recommended Fleet
- 1CV, 1CL, 1CLT, 3SS(V)
- Route = C F G H K
- Has a 15% chance to off-route to Node I
- Most effective fleet for taking out the boss but it will have to go through node C where there's a Ru-class Flagship.
- Using a Midget Submarine

 on both your CL & CLT gives you a powerful Opening Torpedo Salvo (Otorp).
 - For your CV, either:
- CV may use several Jets

 , adding the Jet Assault phase to your already strong Otorp, allowing you to wipe all pre-boss fleets before they can attack you.
 - CV may or may not wish to equip a SCAMP
 or long-range bomber, as it allows it to act first.
- CV may use several Jets
- Try to use a CVB so that it can attack even in Chuuha.
- 6SS(V)
- Route = A D F G H K
- Allows the fleet to completely ignore any enemy ships that can't attack SSs, however node D is pretty harsh on SS with late-model DDs and flagship CLs.
- You pretty much want to count on Opening Torpedo Salvo (Otorp) & cut-in attacks (at boss), so only use remodeled SS if you're using this composition.
- You may need recon seaplanes or Submarine Radars
 for this meet the LoS requirements.
- If opened, the Submarine Radars can be fitted in an Reinforcement Expansion.
- As SSVs have few slots, you may want to just give all your seaplanes to the same SSV. You want as many combat-capable submarines for this route.
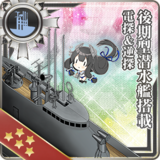
- 1AS, 1CL, 4SS(V)
- 1AS, 2DD, 3SS(V)
- Route = A F G H K
- The shortest route in terms of the number of battles.
- 1AS combined with at least 2 SS(V) unlock the "Submarine-Tender Touch", a special attack that can trigger several times in the map, consuming a Submarine Supply Material each time.
- The AS can equip recon seaplanes to free up slots for your SS(V)s.
- A trade-off is that any enemy ship still in light damage or better shape at the end of the shelling phase will have fewer targets to launch their torpedoes at, so the AS and its escorts have to tank all the preboss ships that can't perform ASW.
Node I has so good drops like I-401 .
- If you want to farm there, you can use:
- 1BB, 3CLT, 1CL, 1CV
- 1CL, 3CLT, 2CV
- Route = C F G I
Nodes And Enemy Encounters
| Nodes and Enemy Encounters | |||||
|---|---|---|---|---|---|
| Node | Pattern | Xp | Node Info | Form | Air |
| A Battle Avoided | Pattern 1 | "Must be my imagination" (battle avoided) | |||
| B Battle Avoided | Pattern 1 | "Must be my imagination" (battle avoided) | |||
| C 中部海域 敵遊撃部隊 | Pattern 1 | AP:16 AS:35 AS+:69 | |||
| Pattern 2 | AP:16 AS:35 AS+:69 | ||||
| D 中部海域哨戒戦 D地点 | Pattern 1 | ||||
| E Battle Avoided | Pattern 1 | "Must be my imagination" (battle avoided) | |||
| F 中部海域哨戒戦 F地点 | Pattern 1 | ||||
| Pattern 2 | |||||
| Pattern 3 | |||||
| Pattern 4 | |||||
| G Battle Avoided | Pattern 1 | "Must be my imagination" (battle avoided) | |||
| H 中部海域哨戒戦 H地点 | Pattern 1 | ||||
| Pattern 2 | |||||
| Pattern 3 | |||||
| I 敵機動部隊 | Pattern 1 | AP:112 AS:252 AS+:504 | |||
| Pattern 2 | AP:120 AS:270 AS+:540 | ||||
| Pattern 3 | AP:64 AS:144 AS+:288 | ||||
| J 中部海域 敵輸送船団 | Pattern 1 | ||||
| Pattern 2 | |||||
| K 敵回航中空母 | Pattern 1 | AP:56 AS:126 AS+:252 | |||
| Pattern 2 | AP:56 AS:126 AS+:252 | ||||