- Welcome to the Kancolle Wiki!
- If you have any questions regarding site content, account registration, etc., please visit the KanColle Wiki Discord
Combined Fleet
The Combined Fleet system was first introduced in the Summer Event of 2014 specially for the Battle of Midway. Combined fleets allow up to a total of 12 ships across two fleets to take part in a sortie. The Combined Fleet system was again used in the Autumn Event of 2014, and the Winter Event of 2015 but with revised mechanics.
Composition
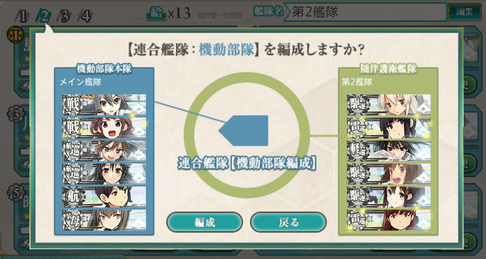
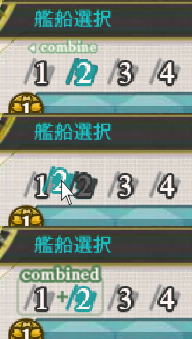
Combined Fleet (連合艦隊 Rengou Kantai) (currently only available during certain events) can be formed by viewing the second fleet, and then dragging the "/2" icon over the "/1" icon (refer to the picture on the right). The first fleet is the main fleet and, in general, comprises the heavy ships, while the second fleet is a lighter "escort" fleet, and comprises the lighter ships.
In order to disband a combined fleet either click on the "combined" icon or make changes to either fleet so that they no longer meet the requirements.
There are currently two different types of combined fleets available for use:
- The Carrier Task Force (機動部隊 Kidou Butai)
- The Surface Task Force (水上部隊 Suijou Butai)
Each type of combined fleet has different composition requirements. In some cases, you will be given the option to choose between which combined fleet you want to make. In other cases, you will be told which fleet to create for the sortie. When choosing between the two different types of combined fleets, besides fleet composition requirements, take note that the combat order is different for each type (see Combat Phases).
Carrier Task Force (機動部隊)
Main (fleet 1):
- Maximum of 2 BB/BBV
- Minimum of 2 CV/CVL
- Maximum of 4 CV/CVL
Escort (fleet 2):
- Exactly 1 CL (CLT does not count)
- Minimum of 2 DD
- Maximum of 2 CA/CAV
- Maximum of 2 BB (fast only)
- Maximum of 1 AV
Surface Task Force (水上部隊)
Main (fleet 1):
- Minimum of 2 of a combination of CL/CA/CAV/BB/BBV
- Maximum of 1 CV or 2 CVL
- Maximum of 4 BB
- Maximum of 4 CA/CAV
Escort (fleet 2):
- Exactly 1 CL (CLT does not count)
- Minimum 2 DD
- Maximum of 2 CA/CAV
- Maximum of 2 BBs (fast only)
- Maximum of 1 AV
Combat Mechanics
Because there are two fleets involved, combat flow for a combined fleet is quite different from a normal fleet battle.
Fleet Formations
For different combined fleet types, the colors may be different, but the formations' effects are the same in combat.
| Formation | Formation Icon | Advised Use | Main Fleet Modifiers | Escort Fleet Modifiers | Notes |
|---|---|---|---|---|---|
| 第一警戒航行序列(対潜警戒)
Cruising Formation 1 (anti-sub) |
Anti-submarine | ( |
Moderate torpedo accuracy and moderate shelling accuracy. Similar to line abreast formation. | ||
| 第二警戒航行序列(前方警戒)
Cruising Formation 2 (forward) |
Surface battle and ASW simultaneously | ( |
High torpedo accuracy and moderate shelling accuracy. Similar to double line formation. | ||
| 第三警戒航行序列(輪形陣)
Cruising Formation 3 (ring) |
Anti-air | ( |
Very low torpedo accuracy and low shelling accuracy. Requires 5+ ships in escort fleet. Similar to diamond formation. | ||
| 第四警戒航行序列(戦闘隊形)
Cruising Formation 4 (battle) |
All-out attack | ( |
Highest torpedo accuracy and moderate shelling accuracy. Requires 4+ ships in escort fleet. Similar to line ahead formation. |
- The typical +5 modifier for basic attack power (shelling and torpedo) does not apply and instead is either +15 or +0 for the main and escort fleet, respectively.
- The escort fleet generally has better ASW accuracy than the main fleet.
- The ASW accuracy trend among the four formations seems to follow the damage modifiers (i.e. Formation 4 is the worst and 1 is the best).
Combat Phases
This is where there is a difference between the two types of combined fleets. For the Carrier Task Force, the escort fleet engages first, while for the Surface Task Force, the main fleet engages first. Each phase in itself is similar to normal non-Combined Fleet combat. For a full run through on what each phase does, please see Combat:Combat Stages.
Carrier Task Force
| Phase | Notes |
|---|---|
| Aerial Scouting | No different from normal. |
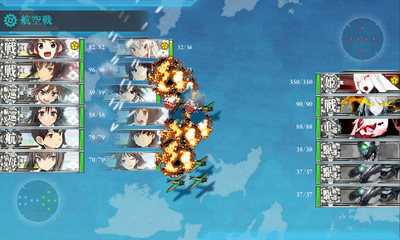
| Aerial Combat | Only ships in the main fleet can launch planes, but all ships can respond with AA and can be hit by enemy planes. |
| Opening Engagement | Support fleet activates. (If support conditions are met. See Expedition:Support Expeditions) Opening torpedo salvo by the escort fleet (e.g. CLT, SS) and enemy fleet. |
| Engagement Type | Engagement type is declared (e.g. Head-on, Parallel, T-Cross). |
| Escort Fleet Engages | Escort fleet begins their shelling round by range order. (One round only, regardless of whether BB are present) Escort fleet does a torpedo salvo exchange with the enemy fleet. |
| Main Fleet Engages | Main fleet begins its shelling round by range order, and then by line-up order. (Second round only if BB or certain bosses are present on either side) |
| Night Combat | Main fleet retreats, leaving only escort fleet. Night battle equipment activation (if any). Night battle commences in line-up order. |
Surface Task Force
| Phase | Notes |
|---|---|
| Aerial Scouting | No different from normal. |
| Aerial Combat | Only ships in the main fleet can launch planes, but all ships can respond with AA and can be hit by enemy planes. |
| Opening Engagement | Support fleet activates. (If support conditions are met. See Expedition:Support Expeditions) Opening torpedo salvo by the escort fleet (e.g. CLT, SS) and enemy fleet. |
| Engagement Type | Engagement type is declared (e.g. Head-on, Parallel, T-Cross). |
| Main Fleet Engages | Main fleet begins its shelling round by range order, and then by line-up order. (Second round only if BB or certain bosses are present on either side) |
| Escort Fleet Engages | Escort fleet begins their shelling round by range order. (One round only regardless of whether BB are present) Escort fleet does a torpedo salvo exchange with the enemy fleet. |
| Night Combat | Main fleet retreats, leaving only the escort fleet. Night battle equipment activation (if any). Night battle commences in line-up order. |
General Notes
- Anti-submarine warfare takes place following the same order as stated above, except that phases like aerial combat cannot occur for obvious reasons.
- In contrast to normal sorties, anti-submarine warfare damage is not reduced during night battle.
- The main fleet will not take part in anything related to torpedoes.
- Equipment on the main fleet will not affect night battles.
- The shelling accuracy of all of the ships in a combined fleet appears to be very low, probably to balance out the 12 vs 6 system.
- If a fleet does no damage in a battle (e.g. main fleet takes out all of enemy before escort fleet can fire, or vice versa), then the MVP for that fleet defaults to the flagship.
- When entering a night battle, only damage dealt at night will be taken into account when determining MVP.
- Thus, the first fleet's flagship will receive MVP after a night battle.
- The flagship of the escort fleet (a.k.a. second fleet) is unsinkable. (link)
- You can have the same ship in both of your fleets (e.g. having Yuudachi in both fleets while combined).
Special Mechanics
Fleet Command Facility
The Fleet Command Facility (stock equipment of Ooyodo Kai) allows a destroyer in the second fleet of a combined fleet to escort a heavily damaged ship in the first fleet away from the sortie. This may be useful if you tend to encounter just one ship going red on the pre-boss node most of the time.
- Must be equipped in the flagship of the first fleet and you must have one non-flagship DD that is neither heavily nor moderately damaged to have the option to escort a damaged ship.
- The screen will show up after Results, and before the Continue/Retreat screen. The heavily damaged ship and another DD will show up, with green sentences. The left button will remove the damaged ship and a DD from combat and they will both lose 25 morale (on top of 15 from returning from sortie) and all remaining fuel. The right button will continue without escorting.
- See this video for an example.
- Both ships (the damaged ship being escorted back and the ship escorting her back) will be permanently out of the rest of the sortie.
- One ship may be escorted per battle (i.e. multiple ships can be escorted back to base over several nodes).
- It is not possible to escort the escort fleet's flagship.
- As of the Autumn 2014 event, escort ships are counted out of the score calculation, allowing you to get an A or S rank as long as you fulfill the usual criteria.
References
- Japanese wikiwiki
- Compilation of testing results with Surface Task Force after the Winter 2015 event


