- Welcome to the Kancolle Wiki!
- If you have any questions regarding site content, account registration, etc., please visit the KanColle Wiki Discord
Difference between revisions of "Gotland/Equipment Bonuses"
< Gotland
Jump to navigation
Jump to search
| Line 2: | Line 2: | ||
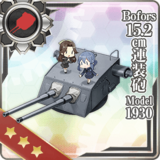
! {{RedGunMedium}}{{EquipmentLink|Bofors 15.2cm Twin Gun Mount Model 1930}} | ! {{RedGunMedium}}{{EquipmentLink|Bofors 15.2cm Twin Gun Mount Model 1930}} | ||
| style="text-align:left;" | | | style="text-align:left;" | | ||
| − | | +1 || || +2 || || || || +1 | + | | +1 || || +2 || || || || || +1 |
| style="text-align:left;" | | | style="text-align:left;" | | ||
|- | |- | ||
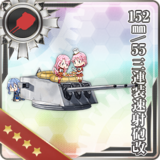
! {{RedGunMedium}}{{EquipmentLink|152mm/55 Triple Rapid Fire Gun Mount Kai}} | ! {{RedGunMedium}}{{EquipmentLink|152mm/55 Triple Rapid Fire Gun Mount Kai}} | ||
| style="text-align:left;" | | | style="text-align:left;" | | ||
| − | | +1 || || +1 || || || || +1 | + | | +1 || || +1 || || || || || +1 |
| style="text-align:left;" | | | style="text-align:left;" | | ||
|- | |- | ||
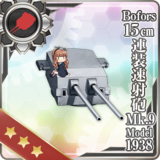
! {{RedGunMedium}}{{EquipmentLink|Bofors 15cm Twin Rapid Fire Gun Mount Mk.9 Model 1938}}<br/> OR {{RedGunMedium}}{{EquipmentLink|Bofors 15cm Twin Rapid Fire Gun Mount Mk.9 Kai + Single Rapid Fire Gun Mount Mk.10 Kai Model 1938}} | ! {{RedGunMedium}}{{EquipmentLink|Bofors 15cm Twin Rapid Fire Gun Mount Mk.9 Model 1938}}<br/> OR {{RedGunMedium}}{{EquipmentLink|Bofors 15cm Twin Rapid Fire Gun Mount Mk.9 Kai + Single Rapid Fire Gun Mount Mk.10 Kai Model 1938}} | ||
| style="text-align:left;" | | | style="text-align:left;" | | ||
| − | | +2 || || +1 || || || || +1 | + | | +2 || || +1 || || || || || +1 |
| style="text-align:left;" | | | style="text-align:left;" | | ||
|- | |- | ||
! {{GreenGunDP}}{{EquipmentLink|5inch Twin Dual-purpose Gun Mount (Concentrated Deployment)}}<br/> OR {{GreenGunDP}}{{EquipmentLink|GFCS Mk.37 + 5inch Twin Dual-purpose Gun Mount (Concentrated Deployment)}} | ! {{GreenGunDP}}{{EquipmentLink|5inch Twin Dual-purpose Gun Mount (Concentrated Deployment)}}<br/> OR {{GreenGunDP}}{{EquipmentLink|GFCS Mk.37 + 5inch Twin Dual-purpose Gun Mount (Concentrated Deployment)}} | ||
| style="text-align:left;" | | | style="text-align:left;" | | ||
| − | | <font color=#CC0000>-2</font> || || <font color=#CC0000>-1</font> || || || || <font color=#CC0000>-4</font> | + | | <font color=#CC0000>-2</font> || || <font color=#CC0000>-1</font> || || || || || <font color=#CC0000>-4</font> |
| style="text-align:left;" | | | style="text-align:left;" | | ||
|- | |- | ||
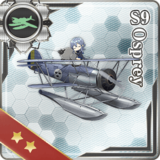
! {{Seaplane}}{{EquipmentLink|S9 Osprey}} | ! {{Seaplane}}{{EquipmentLink|S9 Osprey}} | ||
| style="text-align:left;" | | | style="text-align:left;" | | ||
| − | | +1 || || || +2 || || || +2 | + | | +1 || || || +2 || || || || +2 |
| style="text-align:left;" | | | style="text-align:left;" | | ||
|- | |- | ||
! {{Seaplane}}{{EquipmentLink|Swordfish Mk.II Kai (Reconnaissance Seaplane Model)}} | ! {{Seaplane}}{{EquipmentLink|Swordfish Mk.II Kai (Reconnaissance Seaplane Model)}} | ||
| style="text-align:left;" | | | style="text-align:left;" | | ||
| − | | +1 || || || +3 || +2 || || +1 | + | | +1 || || || +3 || +2 || || || +1 |
| style="text-align:left;" | | | style="text-align:left;" | | ||
|- | |- | ||
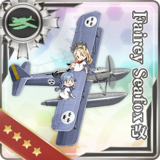
! rowspan="2"|{{Seaplane}}{{EquipmentLink|Fairey Seafox Kai}} | ! rowspan="2"|{{Seaplane}}{{EquipmentLink|Fairey Seafox Kai}} | ||
| style="text-align:left;" | | | style="text-align:left;" | | ||
| − | | +4 || || || +2 || +6 || || +3 | + | | +4 || || || +2 || +6 || || || +3 |
| style="text-align:left;" | | | style="text-align:left;" | | ||
|- | |- | ||
| style="text-align:left;" | '''(1st equipped)''' | | style="text-align:left;" | '''(1st equipped)''' | ||
| − | | +2 || || || || +3 || || +2 | + | | +2 || || || || +3 || || || +2 |
| style="text-align:left;" | One-time | | style="text-align:left;" | One-time | ||
|- | |- | ||
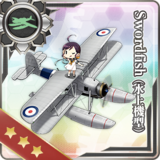
! {{Seaplane}}{{EquipmentLink|Swordfish (Seaplane Model)}} | ! {{Seaplane}}{{EquipmentLink|Swordfish (Seaplane Model)}} | ||
| style="text-align:left;" | | | style="text-align:left;" | | ||
| − | | +2 || || || +1 || +1 || || +1 | + | | +2 || || || +1 || +1 || || || +1 |
| style="text-align:left;" | | | style="text-align:left;" | | ||
|- | |- | ||
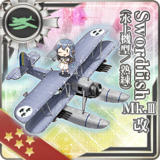
! rowspan="2"|{{Seaplane}}{{EquipmentLink|Swordfish Mk.III Kai (Seaplane Model)}} | ! rowspan="2"|{{Seaplane}}{{EquipmentLink|Swordfish Mk.III Kai (Seaplane Model)}} | ||
| style="text-align:left;" | | | style="text-align:left;" | | ||
| − | | +4 || || || +3 || +3 || || +2 | + | | +4 || || || +3 || +3 || || || +2 |
| style="text-align:left;" | | | style="text-align:left;" | | ||
|- | |- | ||
| style="text-align:left;" | '''(1st equipped)''' | | style="text-align:left;" | '''(1st equipped)''' | ||
| − | | +2 || +2 || || || +1 || || +1 | + | | +2 || +2 || || || +1 || || || +1 |
| style="text-align:left;" | One-time | | style="text-align:left;" | One-time | ||
|- | |- | ||
! rowspan="2"|{{Seaplane}}{{EquipmentLink|Swordfish Mk.III Kai (Seaplane Model/Skilled)}} | ! rowspan="2"|{{Seaplane}}{{EquipmentLink|Swordfish Mk.III Kai (Seaplane Model/Skilled)}} | ||
| style="text-align:left;" | | | style="text-align:left;" | | ||
| − | | +5 || || || +4 || +3 || || +4 | + | | +5 || || || +4 || +3 || || || +4 |
| style="text-align:left;" | | | style="text-align:left;" | | ||
|- | |- | ||
| style="text-align:left;" | '''(1st equipped)''' | | style="text-align:left;" | '''(1st equipped)''' | ||
| − | | +3 || +3 || || || +2 || || +2 | + | | +3 || +3 || || || +2 || || || +2 |
| style="text-align:left;" | One-time | | style="text-align:left;" | One-time | ||
|- | |- | ||
| − | ! colspan=" | + | ! colspan="11" | Ship-Type Bonuses |
|- | |- | ||
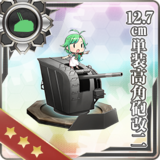
! {{GreenGunDP}}{{EquipmentLink|12.7cm Single High-angle Gun Mount Kai 2}} | ! {{GreenGunDP}}{{EquipmentLink|12.7cm Single High-angle Gun Mount Kai 2}} | ||
| − | | style="text-align:left;" | '''+ | + | | style="text-align:left;" | '''+ [[Surface Radar]]''' |
| − | | +1 || || || || || || +2 | + | | +1 || || || || || || || +2 |
| style="text-align:left;" | One-time | | style="text-align:left;" | One-time | ||
|- | |- | ||
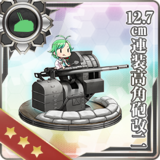
! {{GreenGunDP}}{{EquipmentLink|12.7cm Twin High-angle Gun Mount Kai 2}} | ! {{GreenGunDP}}{{EquipmentLink|12.7cm Twin High-angle Gun Mount Kai 2}} | ||
| − | | style="text-align:left;" | '''+ | + | | style="text-align:left;" | '''+ [[Surface Radar]]''' |
| − | | +2 || || || || || || +1 | + | | +2 || || || || || || || +1 |
| style="text-align:left;" | One-time | | style="text-align:left;" | One-time | ||
|- | |- | ||
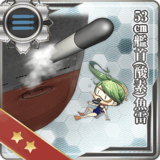
! {{TorpedoWeapon}}{{EquipmentLink|53cm Bow (Oxygen) Torpedo Mount}} | ! {{TorpedoWeapon}}{{EquipmentLink|53cm Bow (Oxygen) Torpedo Mount}} | ||
| style="text-align:left;" | | | style="text-align:left;" | | ||
| − | | || <font color=#CC0000>-5</font> || || || || || | + | | || <font color=#CC0000>-5</font> || || || || || || |
| style="text-align:left;" | | | style="text-align:left;" | | ||
|- | |- | ||
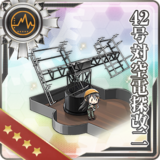
! {{Radar}}{{EquipmentLink|Type 42 Air Radar Kai Ni}} | ! {{Radar}}{{EquipmentLink|Type 42 Air Radar Kai Ni}} | ||
| style="text-align:left;" | | | style="text-align:left;" | | ||
| − | | || || || || || || <font color=#CC0000>-7</font> | + | | || || || || || || || <font color=#CC0000>-7</font> |
| + | | style="text-align:left;" | | ||
| + | |- | ||
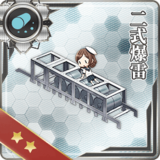
| + | ! rowspan="2"|{{DepthCharge}}{{EquipmentLink|Type 2 Depth Charge}} | ||
| + | | style="text-align:left;" | '''(★8-9)''' | ||
| + | | || || || +1 || || || || | ||
| + | | style="text-align:left;" | | ||
| + | |- | ||
| + | | style="text-align:left;" | '''(★MAX)''' | ||
| + | | || || || +2 || || || || | ||
| style="text-align:left;" | | | style="text-align:left;" | | ||
|- | |- | ||
! {{DepthCharge}}{{EquipmentLink|Hedgehog (Initial Model)}} | ! {{DepthCharge}}{{EquipmentLink|Hedgehog (Initial Model)}} | ||
| style="text-align:left;" | '''(1st equipped)''' | | style="text-align:left;" | '''(1st equipped)''' | ||
| − | | || || || +1 || || || +1 | + | | || || || +1 || || || || +1 |
| style="text-align:left;" | One-time | | style="text-align:left;" | One-time | ||
|- | |- | ||
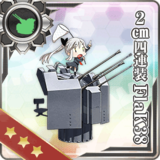
! rowspan="4"|{{GreenGunMG}}{{EquipmentLink|2cm Flakvierling 38}} | ! rowspan="4"|{{GreenGunMG}}{{EquipmentLink|2cm Flakvierling 38}} | ||
| style="text-align:left;" | '''(★4-6)''' | | style="text-align:left;" | '''(★4-6)''' | ||
| − | | || || +1 || || || || +1 | + | | || || +1 || || || || || +1 |
| style="text-align:left;" | | | style="text-align:left;" | | ||
|- | |- | ||
| style="text-align:left;" | '''(★7-9)''' | | style="text-align:left;" | '''(★7-9)''' | ||
| − | | +1 || || +2 || || || || +1 | + | | +1 || || +2 || || || || || +1 |
| style="text-align:left;" | | | style="text-align:left;" | | ||
|- | |- | ||
| style="text-align:left;" | '''(★MAX)''' | | style="text-align:left;" | '''(★MAX)''' | ||
| − | | +1 || || +3 || || || || +2 | + | | +1 || || +3 || || || || || +2 |
| style="text-align:left;" | | | style="text-align:left;" | | ||
|- | |- | ||
| − | | style="text-align:left;" | '''(★4-MAX) + | + | | style="text-align:left;" | '''(★4-MAX) + [[Air Radar]]''' |
| − | | || || +1 || || || || | + | | || || +1 || || || || || |
| + | | style="text-align:left;" | One-time | ||
| + | |- | ||
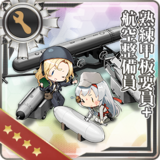
| + | ! rowspan="10"|{{AviationPersonnel}}{{EquipmentLink|Skilled Deck Personnel + Aviation Maintenance Hands}} | ||
| + | | style="text-align:left;" | '''(1st equipped) (★1)''' | ||
| + | | +1 || || || || || || || | ||
| + | | style="text-align:left;" | One-time | ||
| + | |- | ||
| + | | style="text-align:left;" | '''(1st equipped) (★2)''' | ||
| + | | +1 || || || || || || +1 || | ||
| + | | style="text-align:left;" | One-time | ||
| + | |- | ||
| + | | style="text-align:left;" | '''(1st equipped) (★3)''' | ||
| + | | +1 || || || || || || +1 || +1 | ||
| style="text-align:left;" | One-time | | style="text-align:left;" | One-time | ||
| + | |- | ||
| + | | style="text-align:left;" | '''(1st equipped) (★4)''' | ||
| + | | +1 || || || || || || +1 || +1 | ||
| + | | style="text-align:left;" | {{Dive}}+1, One-time | ||
| + | |- | ||
| + | | style="text-align:left;" | '''(1st equipped) (★5)''' | ||
| + | | +1 || +1 || || || || || +1 || +1 | ||
| + | | style="text-align:left;" | {{Dive}}+1, One-time | ||
| + | |- | ||
| + | | style="text-align:left;" | '''(1st equipped) (★6)''' | ||
| + | | +1 || +1 || +1 || || || || +1 || +1 | ||
| + | | style="text-align:left;" | {{Dive}}+1, One-time | ||
| + | |- | ||
| + | | style="text-align:left;" | '''(1st equipped) (★7)''' | ||
| + | | +2 || +1 || +1 || || || || +1 || +1 | ||
| + | | style="text-align:left;" | {{Dive}}+1, One-time | ||
| + | |- | ||
| + | | style="text-align:left;" | '''(1st equipped) (★8)''' | ||
| + | | +2 || +1 || +1 || || || || +2 || +1 | ||
| + | | style="text-align:left;" | {{Dive}}+1, One-time | ||
| + | |- | ||
| + | | style="text-align:left;" | '''(1st equipped) (★9)''' | ||
| + | | +2 || +1 || +1 || || || || +2 || +2 | ||
| + | | style="text-align:left;" | {{Dive}}+1, One-time | ||
| + | |- | ||
| + | | style="text-align:left;" | '''(1st equipped) (★MAX)''' | ||
| + | | +3 || +1 || +1 || || || || +2 || +2 | ||
| + | | style="text-align:left;" | {{Dive}}+1, One-time | ||
|} | |} | ||
{{Ship/EquipmentBonuses|class=<includeonly>mw-collapsed</includeonly>}} | {{Ship/EquipmentBonuses|class=<includeonly>mw-collapsed</includeonly>}} | ||
! {{RedGunMedium}}{{EquipmentLink|Bofors 15.2cm Twin Gun Mount Model 1930}} | ! {{RedGunMedium}}{{EquipmentLink|Bofors 15.2cm Twin Gun Mount Model 1930}} | ||
| style="text-align:left;" | | | style="text-align:left;" | | ||
| − | | +1 || || +2 || || || || +1 | + | | +1 || || +2 || || || || || +1 |
| style="text-align:left;" | | | style="text-align:left;" | | ||
|- | |- | ||
! {{RedGunMedium}}{{EquipmentLink|152mm/55 Triple Rapid Fire Gun Mount Kai}} | ! {{RedGunMedium}}{{EquipmentLink|152mm/55 Triple Rapid Fire Gun Mount Kai}} | ||
| style="text-align:left;" | | | style="text-align:left;" | | ||
| − | | +1 || || +1 || || || || +1 | + | | +1 || || +1 || || || || || +1 |
| style="text-align:left;" | | | style="text-align:left;" | | ||
|- | |- | ||
! {{RedGunMedium}}{{EquipmentLink|Bofors 15cm Twin Rapid Fire Gun Mount Mk.9 Model 1938}}<br/> OR {{RedGunMedium}}{{EquipmentLink|Bofors 15cm Twin Rapid Fire Gun Mount Mk.9 Kai + Single Rapid Fire Gun Mount Mk.10 Kai Model 1938}} | ! {{RedGunMedium}}{{EquipmentLink|Bofors 15cm Twin Rapid Fire Gun Mount Mk.9 Model 1938}}<br/> OR {{RedGunMedium}}{{EquipmentLink|Bofors 15cm Twin Rapid Fire Gun Mount Mk.9 Kai + Single Rapid Fire Gun Mount Mk.10 Kai Model 1938}} | ||
| style="text-align:left;" | | | style="text-align:left;" | | ||
| − | | +2 || || +1 || || || || +1 | + | | +2 || || +1 || || || || || +1 |
| style="text-align:left;" | | | style="text-align:left;" | | ||
|- | |- | ||
! {{GreenGunDP}}{{EquipmentLink|5inch Twin Dual-purpose Gun Mount (Concentrated Deployment)}}<br/> OR {{GreenGunDP}}{{EquipmentLink|GFCS Mk.37 + 5inch Twin Dual-purpose Gun Mount (Concentrated Deployment)}} | ! {{GreenGunDP}}{{EquipmentLink|5inch Twin Dual-purpose Gun Mount (Concentrated Deployment)}}<br/> OR {{GreenGunDP}}{{EquipmentLink|GFCS Mk.37 + 5inch Twin Dual-purpose Gun Mount (Concentrated Deployment)}} | ||
| style="text-align:left;" | | | style="text-align:left;" | | ||
| − | | <font color=#CC0000>-2</font> || || <font color=#CC0000>-1</font> || || || || <font color=#CC0000>-4</font> | + | | <font color=#CC0000>-2</font> || || <font color=#CC0000>-1</font> || || || || || <font color=#CC0000>-4</font> |
| style="text-align:left;" | | | style="text-align:left;" | | ||
|- | |- | ||
! {{Seaplane}}{{EquipmentLink|S9 Osprey}} | ! {{Seaplane}}{{EquipmentLink|S9 Osprey}} | ||
| style="text-align:left;" | | | style="text-align:left;" | | ||
| − | | +1 || || || +2 || || || +2 | + | | +1 || || || +2 || || || || +2 |
| style="text-align:left;" | | | style="text-align:left;" | | ||
|- | |- | ||
! {{Seaplane}}{{EquipmentLink|Swordfish Mk.II Kai (Reconnaissance Seaplane Model)}} | ! {{Seaplane}}{{EquipmentLink|Swordfish Mk.II Kai (Reconnaissance Seaplane Model)}} | ||
| style="text-align:left;" | | | style="text-align:left;" | | ||
| − | | +1 || || || +3 || +2 || || +1 | + | | +1 || || || +3 || +2 || || || +1 |
| style="text-align:left;" | | | style="text-align:left;" | | ||
|- | |- | ||
! {{Seaplane}}{{EquipmentLink|Fairey Seafox Kai}} | ! {{Seaplane}}{{EquipmentLink|Fairey Seafox Kai}} | ||
| style="text-align:left;" | | | style="text-align:left;" | | ||
| − | | +4 || || || +2 || +6 || || +3 | + | | +4 || || || +2 || +6 || || || +3 |
| style="text-align:left;" | | | style="text-align:left;" | | ||
|- | |- | ||
! {{Seaplane}}{{EquipmentLink|Swordfish (Seaplane Model)}} | ! {{Seaplane}}{{EquipmentLink|Swordfish (Seaplane Model)}} | ||
| style="text-align:left;" | | | style="text-align:left;" | | ||
| − | | +2 || || || +1 || +1 || || +1 | + | | +2 || || || +1 || +1 || || || +1 |
| style="text-align:left;" | | | style="text-align:left;" | | ||
|- | |- | ||
! {{Seaplane}}{{EquipmentLink|Swordfish Mk.III Kai (Seaplane Model)}} | ! {{Seaplane}}{{EquipmentLink|Swordfish Mk.III Kai (Seaplane Model)}} | ||
| style="text-align:left;" | | | style="text-align:left;" | | ||
| − | | +4 || || || +3 || +3 || || +2 | + | | +4 || || || +3 || +3 || || || +2 |
| style="text-align:left;" | | | style="text-align:left;" | | ||
|- | |- | ||
! {{Seaplane}}{{EquipmentLink|Swordfish Mk.III Kai (Seaplane Model/Skilled)}} | ! {{Seaplane}}{{EquipmentLink|Swordfish Mk.III Kai (Seaplane Model/Skilled)}} | ||
| style="text-align:left;" | | | style="text-align:left;" | | ||
| − | | +5 || || || +4 || +3 || || +4 | + | | +5 || || || +4 || +3 || || || +4 |
| style="text-align:left;" | | | style="text-align:left;" | | ||
|- | |- | ||
| − | ! colspan=" | + | ! colspan="11" | Ship-Type Bonuses |
|- | |- | ||
! {{GreenGunDP}}{{EquipmentLink|12.7cm Single High-angle Gun Mount Kai 2}} | ! {{GreenGunDP}}{{EquipmentLink|12.7cm Single High-angle Gun Mount Kai 2}} | ||
| − | | style="text-align:left;" | '''+ | + | | style="text-align:left;" | '''+ [[Surface Radar]]''' |
| − | | +1 || || || || || || +2 | + | | +1 || || || || || || || +2 |
| style="text-align:left;" | One-time | | style="text-align:left;" | One-time | ||
|- | |- | ||
! {{GreenGunDP}}{{EquipmentLink|12.7cm Twin High-angle Gun Mount Kai 2}} | ! {{GreenGunDP}}{{EquipmentLink|12.7cm Twin High-angle Gun Mount Kai 2}} | ||
| − | | style="text-align:left;" | '''+ | + | | style="text-align:left;" | '''+ [[Surface Radar]]''' |
| − | | +2 || || || || || || +1 | + | | +2 || || || || || || || +1 |
| style="text-align:left;" | One-time | | style="text-align:left;" | One-time | ||
|- | |- | ||
! {{TorpedoWeapon}}{{EquipmentLink|53cm Bow (Oxygen) Torpedo Mount}} | ! {{TorpedoWeapon}}{{EquipmentLink|53cm Bow (Oxygen) Torpedo Mount}} | ||
| style="text-align:left;" | | | style="text-align:left;" | | ||
| − | | || <font color=#CC0000>-5</font> || || || || || | + | | || <font color=#CC0000>-5</font> || || || || || || |
| style="text-align:left;" | | | style="text-align:left;" | | ||
|- | |- | ||
! {{Radar}}{{EquipmentLink|Type 42 Air Radar Kai Ni}} | ! {{Radar}}{{EquipmentLink|Type 42 Air Radar Kai Ni}} | ||
| + | | style="text-align:left;" | '''Kai''' | ||
| + | | || || || || || || || <font color=#CC0000>-7</font> | ||
| style="text-align:left;" | | | style="text-align:left;" | | ||
| − | | || || || || || || | + | |- |
| + | ! rowspan="2"|{{DepthCharge}}{{EquipmentLink|Type 2 Depth Charge}} | ||
| + | | style="text-align:left;" | '''(★8-9)''' | ||
| + | | || || || +1 || || || || | ||
| + | | style="text-align:left;" | | ||
| + | |- | ||
| + | | style="text-align:left;" | '''(★MAX)''' | ||
| + | | || || || +2 || || || || | ||
| style="text-align:left;" | | | style="text-align:left;" | | ||
|- | |- | ||
! {{DepthCharge}}{{EquipmentLink|Hedgehog (Initial Model)}} | ! {{DepthCharge}}{{EquipmentLink|Hedgehog (Initial Model)}} | ||
| style="text-align:left;" | '''(1st equipped)''' | | style="text-align:left;" | '''(1st equipped)''' | ||
| − | | || || || +1 || || || +1 | + | | || || || +1 || || || || +1 |
| style="text-align:left;" | One-time | | style="text-align:left;" | One-time | ||
|- | |- | ||
! rowspan="4"|{{GreenGunMG}}{{EquipmentLink|2cm Flakvierling 38}} | ! rowspan="4"|{{GreenGunMG}}{{EquipmentLink|2cm Flakvierling 38}} | ||
| style="text-align:left;" | '''(★4-6)''' | | style="text-align:left;" | '''(★4-6)''' | ||
| − | | || || +1 || || || || +1 | + | | || || +1 || || || || || +1 |
| style="text-align:left;" | | | style="text-align:left;" | | ||
|- | |- | ||
| style="text-align:left;" | '''(★7-9)''' | | style="text-align:left;" | '''(★7-9)''' | ||
| − | | +1 || || +2 || || || || +1 | + | | +1 || || +2 || || || || || +1 |
| style="text-align:left;" | | | style="text-align:left;" | | ||
|- | |- | ||
| style="text-align:left;" | '''(★MAX)''' | | style="text-align:left;" | '''(★MAX)''' | ||
| − | | +1 || || +3 || || || || +2 | + | | +1 || || +3 || || || || || +2 |
| style="text-align:left;" | | | style="text-align:left;" | | ||
|- | |- | ||
| − | | style="text-align:left;" | '''(★4-MAX) + | + | | style="text-align:left;" | '''(★4-MAX) + [[Air Radar]]''' |
| − | | || || +1 || || || || | + | | || || +1 || || || || || |
| style="text-align:left;" | One-time | | style="text-align:left;" | One-time | ||
| + | |- | ||
| + | ! rowspan="10"|{{AviationPersonnel}}{{EquipmentLink|Skilled Deck Personnel + Aviation Maintenance Hands}} | ||
| + | | style="text-align:left;" | '''(1st equipped) (★1)''' | ||
| + | | +1 || || || || || || || | ||
| + | | style="text-align:left;" | One-time | ||
| + | |- | ||
| + | | style="text-align:left;" | '''(1st equipped) (★2)''' | ||
| + | | +1 || || || || || || +1 || | ||
| + | | style="text-align:left;" | One-time | ||
| + | |- | ||
| + | | style="text-align:left;" | '''(1st equipped) (★3)''' | ||
| + | | +1 || || || || || || +1 || +1 | ||
| + | | style="text-align:left;" | One-time | ||
| + | |- | ||
| + | | style="text-align:left;" | '''(1st equipped) (★4)''' | ||
| + | | +1 || || || || || || +1 || +1 | ||
| + | | style="text-align:left;" | {{Dive}}+1, One-time | ||
| + | |- | ||
| + | | style="text-align:left;" | '''(1st equipped) (★5)''' | ||
| + | | +1 || +1 || || || || || +1 || +1 | ||
| + | | style="text-align:left;" | {{Dive}}+1, One-time | ||
| + | |- | ||
| + | | style="text-align:left;" | '''(1st equipped) (★6)''' | ||
| + | | +1 || +1 || +1 || || || || +1 || +1 | ||
| + | | style="text-align:left;" | {{Dive}}+1, One-time | ||
| + | |- | ||
| + | | style="text-align:left;" | '''(1st equipped) (★7)''' | ||
| + | | +2 || +1 || +1 || || || || +1 || +1 | ||
| + | | style="text-align:left;" | {{Dive}}+1, One-time | ||
| + | |- | ||
| + | | style="text-align:left;" | '''(1st equipped) (★8)''' | ||
| + | | +2 || +1 || +1 || || || || +2 || +1 | ||
| + | | style="text-align:left;" | {{Dive}}+1, One-time | ||
| + | |- | ||
| + | | style="text-align:left;" | '''(1st equipped) (★9)''' | ||
| + | | +2 || +1 || +1 || || || || +2 || +2 | ||
| + | | style="text-align:left;" | {{Dive}}+1, One-time | ||
| + | |- | ||
| + | | style="text-align:left;" | '''(1st equipped) (★MAX)''' | ||
| + | | +3 || +1 || +1 || || || || +2 || +2 | ||
| + | | style="text-align:left;" | {{Dive}}+1, One-time | ||
|} | |} | ||
Revision as of 14:29, 31 January 2023
| [edit]Gotland Andra Equipment Bonuses | |||||||||||||||||||||||||||||||||||||||||||||||||||||||||||||||||||||||||||||||||||||||||||||||||||
|---|---|---|---|---|---|---|---|---|---|---|---|---|---|---|---|---|---|---|---|---|---|---|---|---|---|---|---|---|---|---|---|---|---|---|---|---|---|---|---|---|---|---|---|---|---|---|---|---|---|---|---|---|---|---|---|---|---|---|---|---|---|---|---|---|---|---|---|---|---|---|---|---|---|---|---|---|---|---|---|---|---|---|---|---|---|---|---|---|---|---|---|---|---|---|---|---|---|---|---|
| Equipment | Extra Requirement | Note | |||||||||||||||||||||||||||||||||||||||||||||||||||||||||||||||||||||||||||||||||||||||||||||||||
|
+1 | +2 | +1 | ||||||||||||||||||||||||||||||||||||||||||||||||||||||||||||||||||||||||||||||||||||||||||||||||
|
+1 | +1 | +1 | ||||||||||||||||||||||||||||||||||||||||||||||||||||||||||||||||||||||||||||||||||||||||||||||||
 OR 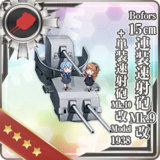
|
+2 | +1 | +1 | ||||||||||||||||||||||||||||||||||||||||||||||||||||||||||||||||||||||||||||||||||||||||||||||||
 OR 
|
-2 | -1 | -4 | ||||||||||||||||||||||||||||||||||||||||||||||||||||||||||||||||||||||||||||||||||||||||||||||||
|
+1 | +2 | +2 | ||||||||||||||||||||||||||||||||||||||||||||||||||||||||||||||||||||||||||||||||||||||||||||||||

|
+1 | +3 | +2 | +1 | |||||||||||||||||||||||||||||||||||||||||||||||||||||||||||||||||||||||||||||||||||||||||||||||
|
+4 | +2 | +6 | +3 | |||||||||||||||||||||||||||||||||||||||||||||||||||||||||||||||||||||||||||||||||||||||||||||||
| (1st equipped) | +2 | +3 | +2 | One-time | |||||||||||||||||||||||||||||||||||||||||||||||||||||||||||||||||||||||||||||||||||||||||||||||
|
+2 | +1 | +1 | +1 | |||||||||||||||||||||||||||||||||||||||||||||||||||||||||||||||||||||||||||||||||||||||||||||||

|
+4 | +3 | +3 | +2 | |||||||||||||||||||||||||||||||||||||||||||||||||||||||||||||||||||||||||||||||||||||||||||||||
| (1st equipped) | +2 | +2 | +1 | +1 | One-time | ||||||||||||||||||||||||||||||||||||||||||||||||||||||||||||||||||||||||||||||||||||||||||||||
|
+5 | +4 | +3 | +4 | |||||||||||||||||||||||||||||||||||||||||||||||||||||||||||||||||||||||||||||||||||||||||||||||
| (1st equipped) | +3 | +3 | +2 | +2 | One-time | ||||||||||||||||||||||||||||||||||||||||||||||||||||||||||||||||||||||||||||||||||||||||||||||
| Ship-Type Bonuses | |||||||||||||||||||||||||||||||||||||||||||||||||||||||||||||||||||||||||||||||||||||||||||||||||||
|
+ Surface Radar | +1 | +2 | One-time | |||||||||||||||||||||||||||||||||||||||||||||||||||||||||||||||||||||||||||||||||||||||||||||||
|
+ Surface Radar | +2 | +1 | One-time | |||||||||||||||||||||||||||||||||||||||||||||||||||||||||||||||||||||||||||||||||||||||||||||||
|
-5 | ||||||||||||||||||||||||||||||||||||||||||||||||||||||||||||||||||||||||||||||||||||||||||||||||||
|
-7 | ||||||||||||||||||||||||||||||||||||||||||||||||||||||||||||||||||||||||||||||||||||||||||||||||||
|
(★8-9) | +1 | |||||||||||||||||||||||||||||||||||||||||||||||||||||||||||||||||||||||||||||||||||||||||||||||||
| (★MAX) | +2 | ||||||||||||||||||||||||||||||||||||||||||||||||||||||||||||||||||||||||||||||||||||||||||||||||||

|
(1st equipped) | +1 | +1 | One-time | |||||||||||||||||||||||||||||||||||||||||||||||||||||||||||||||||||||||||||||||||||||||||||||||
|
(★4-6) | +1 | +1 | ||||||||||||||||||||||||||||||||||||||||||||||||||||||||||||||||||||||||||||||||||||||||||||||||
| (★7-9) | +1 | +2 | +1 | ||||||||||||||||||||||||||||||||||||||||||||||||||||||||||||||||||||||||||||||||||||||||||||||||
| (★MAX) | +1 | +3 | +2 | ||||||||||||||||||||||||||||||||||||||||||||||||||||||||||||||||||||||||||||||||||||||||||||||||
| (★4-MAX) + Air Radar | +1 | One-time | |||||||||||||||||||||||||||||||||||||||||||||||||||||||||||||||||||||||||||||||||||||||||||||||||
|
(1st equipped) (★1) | +1 | One-time | ||||||||||||||||||||||||||||||||||||||||||||||||||||||||||||||||||||||||||||||||||||||||||||||||
| (1st equipped) (★2) | +1 | +1 | One-time | ||||||||||||||||||||||||||||||||||||||||||||||||||||||||||||||||||||||||||||||||||||||||||||||||
| (1st equipped) (★3) | +1 | +1 | +1 | One-time | |||||||||||||||||||||||||||||||||||||||||||||||||||||||||||||||||||||||||||||||||||||||||||||||
| (1st equipped) (★4) | +1 | +1 | +1 | ||||||||||||||||||||||||||||||||||||||||||||||||||||||||||||||||||||||||||||||||||||||||||||||||
| (1st equipped) (★5) | +1 | +1 | +1 | +1 | |||||||||||||||||||||||||||||||||||||||||||||||||||||||||||||||||||||||||||||||||||||||||||||||
| (1st equipped) (★6) | +1 | +1 | +1 | +1 | +1 | ||||||||||||||||||||||||||||||||||||||||||||||||||||||||||||||||||||||||||||||||||||||||||||||
| (1st equipped) (★7) | +2 | +1 | +1 | +1 | +1 | ||||||||||||||||||||||||||||||||||||||||||||||||||||||||||||||||||||||||||||||||||||||||||||||
| (1st equipped) (★8) | +2 | +1 | +1 | +2 | +1 | ||||||||||||||||||||||||||||||||||||||||||||||||||||||||||||||||||||||||||||||||||||||||||||||
| (1st equipped) (★9) | +2 | +1 | +1 | +2 | +2 | ||||||||||||||||||||||||||||||||||||||||||||||||||||||||||||||||||||||||||||||||||||||||||||||
| (1st equipped) (★MAX) | +3 | +1 | +1 | +2 | +2 | ||||||||||||||||||||||||||||||||||||||||||||||||||||||||||||||||||||||||||||||||||||||||||||||