- Welcome to the Kancolle Wiki!
- If you have any questions regarding site content, account registration, etc., please visit the KanColle Wiki Discord
User:Remi Scarlet/Blog/FurutakaKaiNiCosplay/Day8
'Day 8 New!
Date: 5/30/15 and 5/31/15
Time spent: ~6 hours
Show/Hide Day 8
These "Day #" namings are kind of dumb because this is the second time I've had two days' worth of updates in "one day" lol. Oh well, too lazy to update sometimes.
Torpedo Tubing
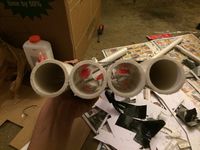
So Day 8 was filled with lots of PVC. Like, lots of PVC. So these two days I've basically been constructing the frames for the torpedo launcher and smoke stack backpack. Surprisingly enough, just doing these two things took a shitton of time because of how much PVC I had to cut, drill, screw and tape. I guess I'll just start in order for now. So first up is the torpedo casing. Since the torpedo encasing, or the tube that houses the actual torpedoes, are lined up in a row of four and immobile, I just went ahead and taped them together in a straight line.

With the tubes in place without a chance of movement, all I had to do was cut them and be done! Except nothing's ever that simple. The tubes actually ended up moving ever so slightly every time I started cutting a new part of the rack so I had a diagonally uneven cut across the PVCs. I ended up fixing by cutting a bit more diagonally and using filers to even out the pipes. After that, I curved the front tip to be rounded via more filing and then relashed the pipes together with more tape. Not I use gorilla tape, tape for the toughest jobs on earth!
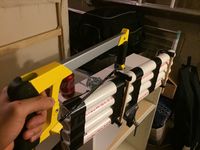
Cutting the PVC rack diagonally.
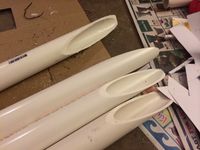
After cutting, we end up with tubes looking like this

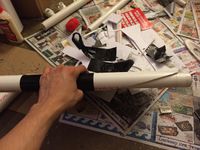
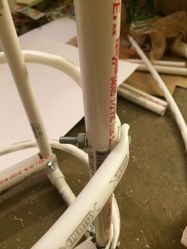
Filing down the tip to be a bit rounded
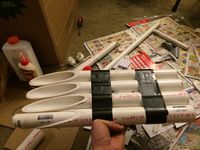
PVC lashed together with an example torpedo tip
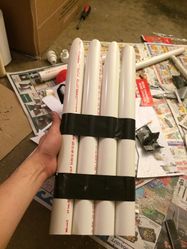
Racks from a different angle
Back shot of racks
Side view of torpedo rack
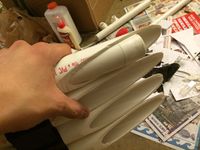
Underside shot of torpedo rack


Exhaust Pipe Backpack
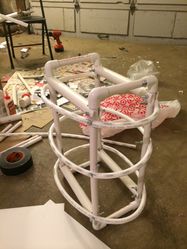
So the idea here was basically that just constructing a gigantic backpack that looks like the exhaust pipe thing that a lot of the ships have would be kind of annoying and difficult without making them ridiculously weak and prone to destruction. Since I want to be able to use this cosplay for at least a year, I decided to go absolutely overkill and construct and entire goddamn frame out of PVC for this portion.
So as you can see, this is literally a box frame made from PVC. Techniques I used to construct this are the same as what I used for the joints with the shoulder cannon. Except this time I made it so that it wouldn't really move around via simply positioning of the screws and the inherent nature of a cube.

Obviously though, since you can't really make a ovalular(I didn't know this was a word until I just googled it) frame with a box so I went ahead and lashed together some bendier PVC in an oval around the frame. This was done without any heat bending, I should note. There are multiple types of PVC and while I don't know the names of them at the top of my head, your local Home Depot or similar outlet should definitely have these. You should basically be able to bend the PVC like in the following pictures without too much difficulty. Two of the three rings were definitely a bit difficult and needed the use of pliers to get in-place correctly, but otherwise these should be relatively straightforward.
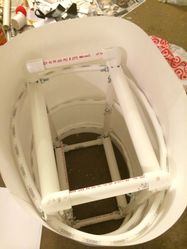
Frame screwed with rounded PVC to serve as surface for paper walls
Closer shot of PVC screws

Another shot of the screws


So with that, I decided to get started on figuring out how to get the actual walls around the frame. For this, I went out and bought 8 pieces of large poster paper. This paper shouldn't be glossy on either side and should only cost like $0.79 per sheet (Which was what I bought them for each).
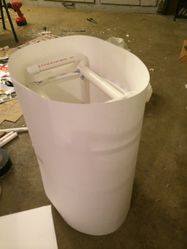
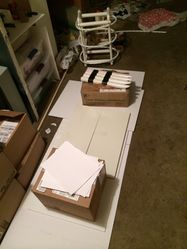
Test paper wrapped around frame to give idea of size
View of inside


Since the circumference is a bit too large for a single piece of the poster paper, I got two sheets and lightly taped them together to try and get an estimate on total length required as well as the overlapping portions. This was used in the next step where I basically did the gigantic poster paper version of the paper layering I did on Day 1.
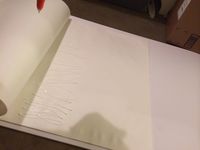
Gluing together poster sized paper to make large "layered" paper.
Shot of long layered paper. Long as in about 5 feet long.


That all said and done... well, I kinda stopped there cuz I just need to wait for the paper to dry overnight at this point.