- Welcome to the Kancolle Wiki!
- If you have any questions regarding site content, account registration, etc., please visit the KanColle Wiki Discord
User:Remi Scarlet/Blog/FurutakaKaiNiCosplay/Day11
'Day 11 New!
Date: 6/10/15 through 6/16/15
Time spent: ~15-20 hours idr
These "Days" are actually getting dumb because I'm posting like per-week progress at this point lol.
Show/Hide Day 11
I think I've been getting lazy with the posts. This is basically a week of progress in one post.
Cannon Mechanization


So this one will be interesting. I went through like three phases over the past week for this so I'll write about it as if I'm going through it.
To be quite honest, the task of actually creating the mechanized turrets was (and still is) a bit of a daunting task. It's been forever since I've worked with circuits and kinematics and I've never had to worry about the finer numbers with cosplay before. That said, the best way to get used to something is generally just diving in head first so... well, I started with what I could figure out and got started.
The first thing I did was done on day 9. This was actually attaching the servo motor to the PVC's cross-section. With that done, I had to figure out how to mount and house the motor and moving components in the turret's casing itself. This was relatively simple as all I did was get a thinner PVC that slid into the existing turret barrels and could move freely. This is shown in the images to the right.
With that done, I had to actually construct the casing for the cannons to house the components into.
Diagram of turret side walls
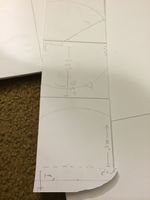
Cutout

Cover of arm cannon
Bottom of arm cannon's turret with barrel pieces mounted into place.


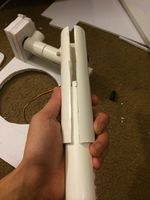
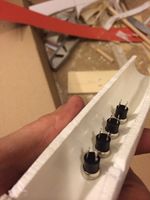
That done, I decided to work on the control grip which would house the buttons which would be connected to the circuit board. This would be accomplished quite elegantly by sliding a smaller PVC pipe into a larger one that fit snugly and cutting each pipe in a specific manner as shown to the right.
This ended up working really well because of the heights of the buttons and the thickness of the PVC walls. It ended up being a snug fit and they're quite comfortable.
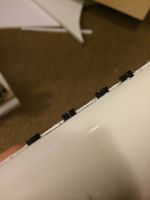
The control grip with the buttons will be enclosed in this.

Holes screwed into smaller PVC and buttons bolted in
Underside
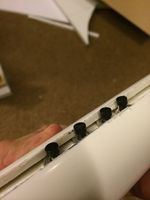
Larger PVC piece slid on top
Buttons barely poke out, making for a comfortable press


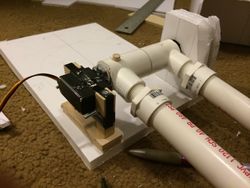
This done, I still had the motor which would rotate the cannon left and right to mount. This would be simply mounted to the roof of the cannon's casing and attached once again to the cross-section of a PVC.
With all these parts now ready, I wired them up to the circuit board and tried it out.
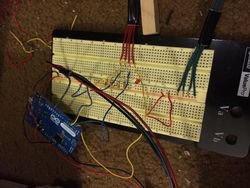
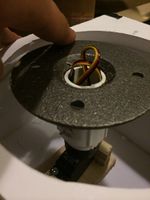
Breadboard with turret wiring

Control grip wired

Shot of multiple components


Now wired up, I decided to give it a spin and powered up the arduino and whatnot. After some difficulties, I realized that the thing was nigh impossible to actually use because of the way the center pipe was mounted on the servo motor and it was causing too much sheer force and bending it. This was with the PVC naively attached to the servo as-is and expecting to move the entire turret by simply "holding" the pipe in-place.
Going back to the drawing board and trying to resolve the issue, I figured that the primary issue here was that there was
- Too much sheer force along the pipe and it was difficult for the motor to overcome it.
- Too unstable and wobbly
- Too much pressure on the bottom of the turret and the board that acted as the base (The friction between the rotating portion and the stationary portion)
- This part was caused because I was originally holding the PVC pipe in-place by adding a horizontal dowel through the PVC and keeping it stationary via... well, applying pressure upwards.
To overcome this, I decided to stop using the horizontal dowel and instead use this handy thing.

Meet the might floor flange. It's made of metal and it's heavy! Though honestly, this was a good investment I believe because holy shit this is sturdy as hell. I'll just add a gallery for now for the various layers and processes I did with this.
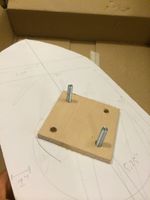
Base of cannon being reinforced with basswood.

Other side
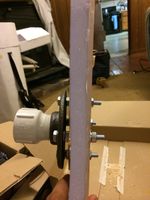
Example of how floor flange will connect

Different shot
Attached to the motor

Support pieces sliding in

Arm cannon base sliding on
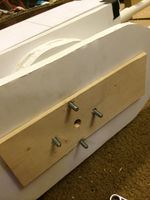
Some leeway left for nuts and washers


That done, I thought I was basically set and could go ahead and power the whole thing and go WHREEEEEEEE and have fun. Unfortunately, the motors were still very weak and the turrets moved slowly. After trying to figure out the issue for a good two hours of fiddling with the circuit and googling, I finally figured out that I'm a complete dumbass and that I came very close to frying my entire Arduino and $50 worth of motors. Turns out my power supplies and various numbers were completely off and I had to completely redo everything and buy another $50 of electronics between batteries, adapters and components. Whee.

So yeah, we'll see where this goes when my stuff comes in this week.
Shin/Leg Armor
So yeah, this is the thing the leg torpedoes are stuck to. I hate this part the most. Fuck.
So I've linked this page before, but I suggest just looking at the "Construction" page for this website FIRST, THEN looking at my images cuz it's probably easier to read that then me explain it.
Different angle
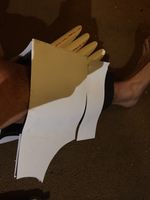
Craft foam being glued into shape of shin guard
Different angle

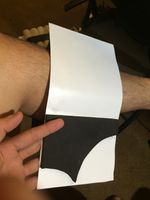
Shin armor frame made of craft foam
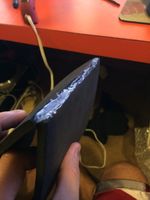
Shin armor
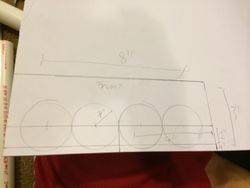
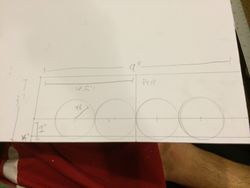
Laying out styrene coating and taking measurements

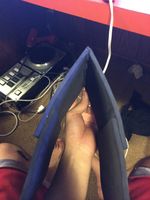
Styrene layer hot-glued on
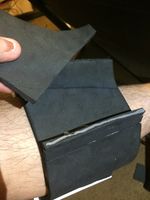
Hot gluing further pieces of craft foam to other sections of shin

Top piece with styrene coating applied
Different angle


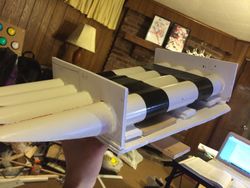
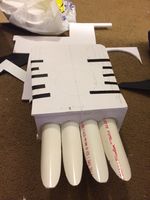
Torpedo Rack
This is fun stuff. As in not fun stuff. I'm starting to get incredibly lazy. Have a gallery.
Torpedo rack holes
other side

Torpedo rack base
Torpedo rack under construction

Everything but side panels applied
Shot of torpedo rack from top

From back

Underside
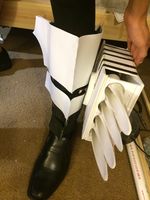
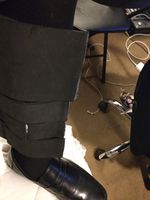
Example of torpedo rack mounted on leg. Not stabilized or tightly secured
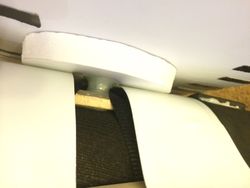
Spacing between shin armor pieces to fit torpedo rack. Need to make this gap smaller.


