- Welcome to the Kancolle Wiki!
- If you have any questions regarding site content, account registration, etc., please visit the KanColle Wiki Discord
Difference between revisions of "Template:Event Mechanics"
Jump to navigation
Jump to search
Jigaraphale (talk | contribs) m |
Jigaraphale (talk | contribs) |
||
| Line 47: | Line 47: | ||
**** '''The damage the ship suffered may become worse during the evacuation, but she will never sink. | **** '''The damage the ship suffered may become worse during the evacuation, but she will never sink. | ||
| − | *The '''[[Vanguard Formation]]''' can be used. | + | *The '''{{ToolTip|[[Combat#Formation_Selection|Vanguard Formation]]|[[File:Vanguard.png]]}}''' can be used. |
** This formation will organize the fleet such that the 2 to 3 last ships protect the 2 to 4 first ships of the Fleet. | ** This formation will organize the fleet such that the 2 to 3 last ships protect the 2 to 4 first ships of the Fleet. | ||
** This formation is available for single and Strike Force fleets made of 4 to 7 ships. | ** This formation is available for single and Strike Force fleets made of 4 to 7 ships. | ||
| Line 66: | Line 66: | ||
|-|Gimmicks= | |-|Gimmicks= | ||
*'''Completion Gimmicks''' might be required to further progress the map, demanding certain conditions to be accomplished on a given map to unlock several things : | *'''Completion Gimmicks''' might be required to further progress the map, demanding certain conditions to be accomplished on a given map to unlock several things : | ||
| − | * Boss [[Debuffs]], where once the "Last Dance" of the final boss of a given map is reached, its debuffed form can be unlocked. | + | ** Boss [[Debuffs]], where once the "Last Dance" of the final boss of a given map is reached, its debuffed form can be unlocked. |
| − | * Map phases, where some map areas need to be unlocked, like on [[7-2]] and [[7-3]]. | + | ** Map phases, where some map areas need to be unlocked, like on [[7-2]] and [[7-3]]. |
| − | ** Map areas can either be a path to the next boss, an intermediate path asking for new gimmicks, or a shortcut. | + | *** Map areas can either be a path to the next boss, an intermediate path asking for new gimmicks, or a shortcut. |
| − | *'''Choosing a higher difficulty''' on an event map will reset it to its initial state. | + | **'''Choosing a higher difficulty''' on an event map will reset it to its initial state. |
| − | *These conditions range from reaching certain nodes, defeating specific nodes, attaining air superiority on certain nodes, and defending against Air Raids. As soon as all the given conditions are met, the map advances to the next phase. Lower difficulties may require fewer conditions to be met to complete the phase. | + | **These conditions range from reaching certain nodes, defeating specific nodes, attaining air superiority on certain nodes, and defending against Air Raids. As soon as all the given conditions are met, the map advances to the next phase. Lower difficulties may require fewer conditions to be met to complete the phase. |
| − | *'''Enemy Radar Ambush Nodes''', where entering these nodes will result in the fleet facing off against an enemy fleet that will ambush and attack it. | + | *'''[[Combat/Map Mechanics and Nodes#Short_Battle_Nodes|Enemy Radar Ambush Nodes]]''', where entering these nodes will result in the fleet facing off against an enemy fleet that will ambush and attack it. |
** The fleet will not be able to fight against the enemy fleet. | ** The fleet will not be able to fight against the enemy fleet. | ||
** By meeting certain conditions, these nodes can be evaded. | ** By meeting certain conditions, these nodes can be evaded. | ||
*[[Repairs#Emergency_Anchorage_Repairs|'''Emergency Anchorage Maintenance/Repairs''']]. | *[[Repairs#Emergency_Anchorage_Repairs|'''Emergency Anchorage Maintenance/Repairs''']]. | ||
| − | ** Both [[Akashi | + | ** Both [[Akashi]] and [[Akitsushima Kai]] will be capable of conducting emergency repairs; however, Akitsushima has more limited capabilities compared to Akashi. |
| + | ** This consumes [[File:Item Icon Emergency Repair Material.png|25px]] [[Emergency Repair Material]]s. | ||
** See [[Repairs#Emergency_Anchorage_Repairs|Emergency Anchorage Repairs]] for details. | ** See [[Repairs#Emergency_Anchorage_Repairs|Emergency Anchorage Repairs]] for details. | ||
*[[:Category:High Altitude Interceptors|'''High-Altitude Abyssal Bombers''']] that are resistant to all types of interceptors other than the {{EquipmentLink|Me 163B|Prototype Shuusui|Shuusui|text=Land-based rocket interceptors}}. | *[[:Category:High Altitude Interceptors|'''High-Altitude Abyssal Bombers''']] that are resistant to all types of interceptors other than the {{EquipmentLink|Me 163B|Prototype Shuusui|Shuusui|text=Land-based rocket interceptors}}. | ||
| − | *'''Heavy Land-Based Bomber Air Raid sequence''', a QTE where the LBAS is attacked by | + | *'''Heavy Land-Based Bomber Air Raid sequence''', a QTE where the LBAS is attacked by bombers, and where the player must click on a button at the right moment to obtain better interception, using "Land-based high-altitude interceptors". |
*{{EquipmentLink|Arctic Gear & Deck Personnel}} were introduced during the [[Fall 2020 Event]], and need to be equipped on CV(L) to sortie them on "arctic" maps. | *{{EquipmentLink|Arctic Gear & Deck Personnel}} were introduced during the [[Fall 2020 Event]], and need to be equipped on CV(L) to sortie them on "arctic" maps. | ||
Revision as of 10:34, 1 May 2022
Participation requirements
To take part in any event, a player MUST HAVE:
- A 75% sortie win ratio.
- 5 empty ship slots for new ships.
- 20 free equipment slots.
Special Mechanics
In addition to regular Sortie mechanics, events often involve some specific or rarer mechanics :
- The difficulty system returns: it is possible to choose between Operation A (甲, Hard), Operation B (乙, Medium), Operation C (丙, Easy), or Operation D (丁, Casual).
- Choosing Hard or Normal requires a certain HQ Level (HQ Lv 35 for B / 80 for A in Spring 2015 Event).
- When switching from any "lower" difficulty to any "higher" difficulty, the map will fully be reset.
- When switching from any "higher" difficulty to any "lower" difficulty, the map will stay in the very same state it was previously, with only +25% of TP/HP being reset on the current phase's TP/HP bar.
- Beginning with the second map, difficulty progression rules apply.
- In order to play a map on Hard difficulty, the prior map must have been completed on either Normal or Hard.
- e.g., to do E-2 on hard, E-1 must be completed on normal or hard.
- To simulate simultaneity of battles in different locations, Fleet Tags conditions & deployment restrictions are employed.
- Ships not already color-tagged will be tagged with the color associated with a map or map's phase when deployed. This tag will be applied regardless of the difficulty and can't be removed by any measure before the end of the event.
- One map can use multiple tags, usually separated by phases or fleets.
- Several maps can share one or more tags.
- On Normal or Hard difficulty, ships must have either the same-colored tag as the map/phase being deployed to, or no tag at all.
- This requirement is sometimes waived on certain maps, mostly on the last map of the event where tags only matter on Hard, or on post-clear.
- The Combined Fleet (CF), a fleet assembling both the 1st and 2nd fleets, may come back.
- The CF is only available for the two 1st fleets, where the 2nd fleet can be merged with the 1st one in the "Fleet menu".
- The CF cannot be used in anything outside of event sorties.
- 3 different types of CF are available, depending on the map requirements and the current fleet setup.
- CF with a flagship that carries a the Fleet Command Facility
 , will be able to make use of the Ship Evacuation mechanic.
- The evacuation requires an escort destroyer.
- The evacuation consumes the ships' entire fuel & ammo reserves.
- Only one ship can be evacuated per battle.
- The Striking Force Fleet (SF), a fleet with seven ships, may come back.
- The SF is only available for the 3rd fleet, where an extra 7th ship can be added in the Fleet menu.
- The SF cannot be used in anything outside of event sorties.
- A SF with a flagship that carries a the Striking Force Fleet Command Facility
 , will be able to make use of the Single Ship Evacuation mechanic.
- The new Striking Force Fleet Command Facility will become obtainable and useable via quest F64.
- Note that the quest will consume the Fleet Command Facility and 2 Action Report in order to convert it into the new Striking Force Fleet Command Facility.
- The evacuation does not require an escort destroyer.
- The evacuation consumes the ship's entire fuel & ammo reserves.
- Only one ship can be evacuated per battle.
- The damage the ship suffered may become worse during the evacuation, but she will never sink.
- The new Striking Force Fleet Command Facility will become obtainable and useable via quest F64.
- The Vanguard Formation
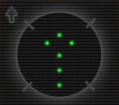 can be used.
- This formation will organize the fleet such that the 2 to 3 last ships protect the 2 to 4 first ships of the Fleet.
- This formation is available for single and Strike Force fleets made of 4 to 7 ships.
- The formation makes ships more evasive in combat, especially with well-trained Destroyers.
- This formation is available only during the duration of the event, on the event's maps as well as on the regular maps.

- NPC Friendly Fleets (FF) may be introduced to the event.
- FFs act as another unit that appears in particular battles to help aid the fleet when attacking the enemy.
- It is possible to choose between using "normal only" or "normal and powerful" FF in the main menu.
- Powerful FFs have an additional cost of 6 Instant Constructions
 for each time they are deployed in a battle.
- The blowtorches won't be consumed unless a powerful FF appears.
- If activated, one FF is randomly selected from a preset list of fleets to help the fleet.
- Which ships are in the fleet will influence which FF can help, excluding the FFs containing ships also in the main fleet.
- The FF will appear at the start of either day or night battle, depending on the node.
- Powerful FFs have an additional cost of 6 Instant Constructions
- FFs are usually available sometime after the start of the event, to help Admirals facing difficulties clearing the maps.
- Completion Gimmicks might be required to further progress the map, demanding certain conditions to be accomplished on a given map to unlock several things :
- Boss Debuffs, where once the "Last Dance" of the final boss of a given map is reached, its debuffed form can be unlocked.
- Map phases, where some map areas need to be unlocked, like on 7-2 and 7-3.
- Map areas can either be a path to the next boss, an intermediate path asking for new gimmicks, or a shortcut.
- Choosing a higher difficulty on an event map will reset it to its initial state.
- These conditions range from reaching certain nodes, defeating specific nodes, attaining air superiority on certain nodes, and defending against Air Raids. As soon as all the given conditions are met, the map advances to the next phase. Lower difficulties may require fewer conditions to be met to complete the phase.
- Enemy Radar Ambush Nodes, where entering these nodes will result in the fleet facing off against an enemy fleet that will ambush and attack it.
- The fleet will not be able to fight against the enemy fleet.
- By meeting certain conditions, these nodes can be evaded.
- Emergency Anchorage Maintenance/Repairs.
- Both Akashi and Akitsushima Kai will be capable of conducting emergency repairs; however, Akitsushima has more limited capabilities compared to Akashi.
- This consumes
 Emergency Repair Materials.
 - See Emergency Anchorage Repairs for details.
- High-Altitude Abyssal Bombers that are resistant to all types of interceptors other than the Land-based rocket interceptors
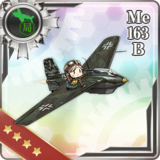
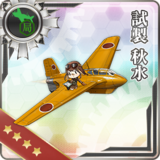
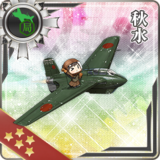 .
.
- Heavy Land-Based Bomber Air Raid sequence, a QTE where the LBAS is attacked by bombers, and where the player must click on a button at the right moment to obtain better interception, using "Land-based high-altitude interceptors".
- Arctic Gear & Deck Personnel
 were introduced during the Fall 2020 Event, and need to be equipped on CV(L) to sortie them on "arctic" maps.
- Event mechanics:
- Help:Event Preparation
- Combined Fleet (STF/CTF/TCF)
- Transport Operation
- Friendly Fleets (FF)
- Vanguard Formation ("Spoon")
- Striking Force Fleet (SF)
- Ship Locking ("Tags")
- Debuffs
- Emergency Anchorage Repair
- General mechanics:
- Map Mechanics and Nodes
- Land-Based Air Squadron (LBAS)
- Anti-Air Cut-in (AACI)
- Line of Sight (LoS)
- Improving Ship Speed
- Special Attacks (Touch)