User:Remi Scarlet/Blog/FurutakaKaiNiCosplay/Day9
'Day 9 New!
Date: 6/4/15
Time spent: ~5 hours
Show/Hide Day 9
Smokestack Backpack


Yikes. Five day hiatus because I was lazy. So basically what I worked on today was getting this smokestack finally worked out and getting it closer to final. Keep in mind that I decided to try and make this a legit backpack with a hollow inside that I can carry shit in.
That said, the primary things I worked on was finalizing the location of where the shoulder cannons would be mounted in relation to the PVC frame for the backpack and whatnot. Overall, I'm quite happy about the size and proportions of everything in relation to my body. I believe at this point, while I don't think I took a photo, the shoulder cannon's mount has been bolted into the PVC frame by this point. With proportions and size all in place, all I had to do now was get the straps bolted into place so the whole thing would be held in place without me holding it lol.
For this, I decided to go with two diagonal cross straps that made an X along my chest and a third strap that went around my torso to balance the whole thing so it wouldn't lean to one side due to the weight of the shoulder cannon. And because I'm too lazy to explain the rest, have a gallery.

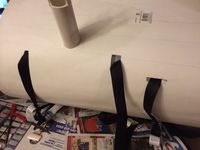
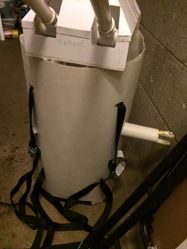
"Backpack straps" to keep the whole contraption connected to me
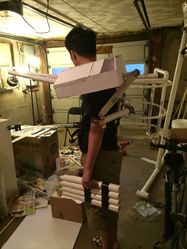
Angle of the whole thing lashed together to my body

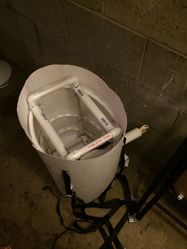
Another shot of the frames

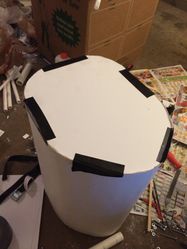
Overview shot.

Straps bolted in
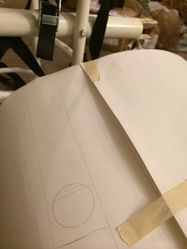
Picture of the wall panels for the smokestack backpack. Hole will be cut out to bring the shoulder cannon's over
Holes for the straps cut out


With the straps and wall panel mounted, all I had to do was cover the bottom with an actual layer of thick foamboard. Unfortunately, due to some minor miscalculations with the side panels, one corner of the PVC frame actually stuck out too much so that the foamboard couldn't fit snugly in.

The simple solution to that was just to carve out the foam board, kek
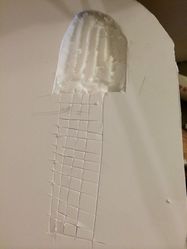
Carving out the thick foamboard to account for the PVC's positioning
Gorilla glue drying with the bottom of the whole thing drying


And then the final shots.
Backpack drying with detached shoulder cannon
Top view of backpack with PVC frame

Further shot of the whole thing


