- Welcome to the Kancolle Wiki!
- If you have any questions regarding site content, account registration, etc., please visit the KanColle Wiki Discord
Difference between revisions of "Winter 2019 Event"
m (→E-2) |
(E-2 Easy enemy fleet compositions.) |
||
| Line 1,537: | Line 1,537: | ||
|-|Casual= | |-|Casual= | ||
{{#invoke:EnemyEncounters2|encounterTemplate | {{#invoke:EnemyEncounters2|encounterTemplate | ||
| − | |A_label = | + | |A_label = リコリス飛行場 基地航空隊<br>'''<span style="color:green">Air Battle Node</span>''' |
| − | |A-1_node_info = | + | |A-1_node_info = airfield_princess |
| − | |A-1_form = | + | |A-1_form = diamond |
|A-1_xp = | |A-1_xp = | ||
| − | |A-1_enemy_air_power = | + | |A-1_enemy_air_power = 34 |
| + | |A-2_node_info = airfield_princess | ||
| + | |A-2_form = line_abreast | ||
| + | |A-2_xp = | ||
| + | |A-2_enemy_air_power = 48 | ||
| + | |A-3_node_info = airfield_princess | ||
| + | |A-3_form = diamond | ||
| + | |A-3_xp = | ||
| + | |A-3_enemy_air_power = 68 | ||
| | | | ||
| − | |B_label = | + | |B_label = 深海潜水艦隊 ラバウル警戒隊 |
| − | |B-1_node_info = | + | |B-1_node_info = ss_so-class |
| + | |B-1_form = diamond | ||
| + | |B-1_xp = | ||
| + | |B-1_enemy_air_power = | ||
| + | |B-2_node_info = ss_so-class ss_so-class | ||
| + | |B-2_form = line_abreast | ||
| + | |B-2_xp = | ||
| + | |B-2_enemy_air_power = | ||
| + | |B-3_node_info = ss_so-class ss_so-class ss_so-class | ||
| + | |B-3_form = diamond | ||
| + | |B-3_xp = | ||
| + | |B-3_enemy_air_power = | ||
| | | | ||
| − | | | + | |D_label = 深海水雷戦隊 前衛警戒隊 |
| − | | | + | |D-1_node_info = cl_tsu-class dd_i-class_late_model dd_i-class dd_i-class dd_i-class |
| + | |D-1_form = line_ahead double_line diamond | ||
| + | |D-1_xp = | ||
| + | |D-1_enemy_air_power = | ||
| | | | ||
| − | | | + | |E_label = '''<span style="color:purple">Maelstrom Node</span>''' |
| − | | | + | |E-1_node_info = fuel - ? |
| | | | ||
| − | | | + | |F_label = 深海水雷戦隊 重雷装隊 |
| − | | | + | |F-1_node_info = cl_ho-class_flagship clt_chi-class_elite clt_chi-class_elite dd_i-class_late_model dd_i-class dd_i-class |
| − | + | |F-1_form = line_ahead double_line diamond | |
| − | |||
| − | |||
| − | |||
| − | |||
| − | |||
| − | |F-1_form = | ||
|F-1_xp = | |F-1_xp = | ||
|F-1_enemy_air_power = | |F-1_enemy_air_power = | ||
| − | |||
| − | |||
| − | |||
| − | |||
| − | |||
| − | |||
| − | |||
| − | |||
| − | |||
| − | |||
| − | |||
| − | |||
| | | | ||
| − | |G_label = | + | |G_label = '''<span style="color:blue">Battle Avoided</span>''' |
| − | |G-1_node_info = | + | |G-1_node_info = '''<span style="color:blue">"Must be my imagination" (battle avoided)</span>''' |
| − | |||
| − | |||
| − | |||
| | | | ||
| − | |H_label = | + | |H_label = '''<span style="color:blue">Battle Avoided</span>''' |
| − | |H-1_node_info = | + | |H-1_node_info = '''<span style="color:blue">"Must be my imagination" (battle avoided)</span>''' |
| | | | ||
| − | |I_label = | + | |I_label = 深海戦艦部隊 前衛集団 |
| − | |I-1_node_info = | + | |I-1_node_info = bb_ru-class_flagship bb_ru-class_elite dd_ni-class_kai dd_ni-class_kai dd_i-class dd_i-class |
| − | |I-1_form = | + | |I-1_form = line_ahead double_line diamond |
|I-1_xp = | |I-1_xp = | ||
|I-1_enemy_air_power = | |I-1_enemy_air_power = | ||
| − | | | + | | |
| − | | | + | |J_label = 深海ソロモン艦隊 重巡戦隊 前衛 |
| − | | | + | |J-1_node_info = ca_ri-class_flagship ca_ri-class_elite ca_ri-class_elite dd_i-class_late_model dd_i-class dd_i-class |
| − | | | + | |J-1_form = line_ahead double_line diamond |
| − | | | + | |J-1_xp = |
| − | | | + | |J-1_enemy_air_power = |
| − | | | + | | |
| − | | | + | |K_label = 深海ソロモン艦隊 重巡戦隊 旗艦 |
| + | |K-1_node_info = heavy_cruiser_princess ca_ne-class dd_i-class_late_model dd_i-class dd_i-class | ||
| + | |K-1_form = line_ahead | ||
| + | |K-1_xp = | ||
| + | |K-1_enemy_air_power = | ||
| + | |K-2_node_info = heavy_cruiser_princess ca_ne-class dd_i-class_late_model dd_i-class dd_i-class dd_i-class | ||
| + | |K-2_form = line_ahead | ||
| + | |K-2_xp = | ||
| + | |K-2_enemy_air_power = | ||
| + | |K-3_node_info = heavy_cruiser_princess_final_form ca_ne-class dd_i-class_late_model dd_i-class dd_i-class dd_i-class | ||
| + | |K-3_form = line_ahead | ||
| + | |K-3_xp = | ||
| + | |K-3_enemy_air_power = | ||
| + | | | ||
| + | |L_label = リコリス飛行場 基地航空隊<br>'''<span style="color:green">Air Battle Node</span>''' | ||
| + | |L-1_node_info = airfield_princess | ||
| + | |L-1_form = diamond | ||
| + | |L-1_xp = | ||
| + | |L-1_enemy_air_power = 34 | ||
| + | |L-2_node_info = airfield_princess | ||
| + | |L-2_form = line_abreast | ||
| + | |L-2_xp = | ||
| + | |L-2_enemy_air_power = 48 | ||
| + | |L-3_node_info = airfield_princess | ||
| + | |L-3_form = diamond | ||
| + | |L-3_xp = | ||
| + | |L-3_enemy_air_power = 68 | ||
| + | | | ||
| + | |M_label = 深海戦艦部隊 水上打撃集団 | ||
| + | |M-1_node_info = battleship_princess dd_ni-class_kai dd_ni-class_kai dd_ni-class_kai dd_i-class dd_i-class | ||
| + | |M-1_form = line_ahead double_line diamond | ||
| + | |M-1_xp = | ||
| + | |M-1_enemy_air_power = | ||
| + | | | ||
| + | |N_label = リコリス飛行場 基地航空隊<br>'''<span style="color:green">Air Battle Node</span>''' | ||
| + | |N-1_node_info = airfield_princess | ||
| + | |N-1_form = diamond | ||
| + | |N-1_xp = | ||
| + | |N-1_enemy_air_power = 34 | ||
| + | |N-2_node_info = airfield_princess | ||
| + | |N-2_form = line_abreast | ||
| + | |N-2_xp = | ||
| + | |N-2_enemy_air_power = 48 | ||
| + | |N-3_node_info = airfield_princess airfield_princess | ||
| + | |N-3_form = diamond | ||
| + | |N-3_xp = | ||
| + | |N-3_enemy_air_power = 68 | ||
| + | | | ||
| + | |O_label = '''<span style="color:blue">Battle Avoided</span>''' | ||
| + | |O-1_node_info = '''<span style="color:blue">"Must be my imagination" (battle avoided)</span>''' | ||
| + | | | ||
| + | |P_label = 深海ソロモン艦隊 旗艦展開泊地<br>'''<span style="color:red">Enemy Combined Fleet</span>''' | ||
| + | |P-1_node_info = southern_demon bb_ru-class_elite bb_ru-class_elite cvl_nu-class_elite cvl_nu-class_elite cl_tsu-class dd_na-class_late_model dd_i-class transport_wa-class transport_wa-class transport_wa-class pt_imp | ||
| + | |P-1_form = cruising_form_4 | ||
| + | |P-1_xp = | ||
| + | |P-1_enemy_air_power = 83 | ||
| + | |P-2_node_info = southern_demon bb_ru-class_elite bb_ru-class_elite cvl_nu-class_elite cvl_nu-class_elite cl_tsu-class dd_na-class_late_model dd_na-class_late_model transport_wa-class transport_wa-class pt_imp pt_imp | ||
| + | |P-2_form = cruising_form_4 | ||
| + | |P-2_xp = | ||
| + | |P-2_enemy_air_power = 185 | ||
| + | | | ||
| + | |Q_label = 深海ソロモン配備 魚雷艇集団 | ||
| + | |Q-1_node_info = pt_imp pt_imp pt_imp pt_imp | ||
| + | |Q-1_form = diamond | ||
| + | |Q-1_xp = | ||
| + | |Q-1_enemy_air_power = | ||
| + | |Q-2_node_info = pt_imp pt_imp pt_imp pt_imp pt_imp | ||
| + | |Q-2_form = diamond | ||
| + | |Q-2_xp = | ||
| + | |Q-2_enemy_air_power = | ||
| + | |Q-3_node_info = pt_imp pt_imp pt_imp pt_imp pt_imp | ||
| + | |Q-3_form = diamond | ||
| + | |Q-3_xp = | ||
| + | |Q-3_enemy_air_power = | ||
| + | | | ||
| + | |R_label = 深海ソロモン派遣 空母任務部隊<br>'''<span style="color:green">Air Battle Node</span>''' | ||
| + | |R-1_node_info = cv_wo-class_flagship_2 cvl_nu-class_elite cvl_nu-class_elite bb_ta-class bb_ta-class cl_tsu-class | ||
| + | |R-1_form = echelon | ||
| + | |R-1_xp = | ||
| + | |R-1_enemy_air_power = 151 | ||
| + | |R-2_node_info = cv_wo-class_flagship_2 cvl_nu-class_elite bb_ta-class_elite bb_ta-class cl_he-class_flagship cl_tsu-class | ||
| + | |R-2_form = echelon | ||
| + | |R-2_xp = | ||
| + | |R-2_enemy_air_power = 127 | ||
| + | |R-3_node_info = cv_wo-class_flagship_2 cv_wo-class_elite bb_ta-class_elite bb_ta-class cl_he-class_flagship cl_tsu-class | ||
| + | |R-3_form = echelon | ||
| + | |R-3_xp = | ||
| + | |R-3_enemy_air_power = 130 | ||
| + | | | ||
| + | |T_label = 深海ソロモン派遣 空母任務部隊 | ||
| + | |T-1_node_info = cv_wo-class_flagship_2 cvl_nu-class_elite cvl_nu-class_elite bb_ta-class bb_ta-class cl_tsu-class | ||
| + | |T-1_form = echelon | ||
| + | |T-1_xp = | ||
| + | |T-1_enemy_air_power = 151 | ||
| + | |T-2_node_info = cv_wo-class_flagship_2 cvl_nu-class_elite bb_ta-class_elite bb_ta-class cl_he-class_flagship cl_tsu-class | ||
| + | |T-2_form = echelon | ||
| + | |T-2_xp = | ||
| + | |T-2_enemy_air_power = 127 | ||
| + | |T-3_node_info = cv_wo-class_flagship_2 cv_wo-class_elite bb_ta-class_elite bb_ta-class cl_he-class_flagship cl_tsu-class | ||
| + | |T-3_form = echelon | ||
| + | |T-3_xp = | ||
| + | |T-3_enemy_air_power = 130 | ||
| + | | | ||
| + | |U_label = 深海任務部隊 上陸支援打撃群 | ||
| + | |U-1_node_info = bbv_re-class ca_ne-class cl_tsu-class dd_ni-class_kai_late_model dd_ni-class_kai dd_ni-class_kai | ||
| + | |U-1_form = line_ahead diamond | ||
| + | |U-1_xp = | ||
| + | |U-1_enemy_air_power = 94 | ||
| + | |U-2_node_info = bbv_re-class ca_ne-class dd_ni-class_kai dd_ni-class_kai dd_i-class dd_i-class | ||
| + | |U-2_form = diamond | ||
| + | |U-2_xp = | ||
| + | |U-2_enemy_air_power = 94 | ||
| + | | | ||
| + | |V_label = リコリス飛行場 基地航空隊<br>'''<span style="color:green">Air Battle Node</span>''' | ||
| + | |V-1_node_info = airfield_princess | ||
| + | |V-1_form = diamond | ||
| + | |V-1_xp = | ||
| + | |V-1_enemy_air_power = 34 | ||
| + | |V-2_node_info = airfield_princess | ||
| + | |V-2_form = line_abreast | ||
| + | |V-2_xp = | ||
| + | |V-2_enemy_air_power = 48 | ||
| + | |V-3_node_info = airfield_princess airfield_princess | ||
| + | |V-3_form = diamond | ||
| + | |V-3_xp = | ||
| + | |V-3_enemy_air_power = 68 | ||
| + | | | ||
| + | |W_label = 深海ブイン攻略任務群 上陸船団 | ||
| + | |W-1_node_info = transport_wa-class_elite transport_wa-class transport_wa-class cl_tsu-class dd_ni-class_kai dd_ni-class_kai | ||
| + | |W-1_form = line_ahead echelon vanguard | ||
| + | |W-1_xp = | ||
| + | |W-1_enemy_air_power = | ||
| + | | | ||
| + | |X_label = '''<span style="color:blue">Battle Avoided</span>''' | ||
| + | |X-1_node_info = '''<span style="color:blue">"Must be my imagination" (battle avoided)</span>''' | ||
| | | | ||
|final_form = | |final_form = | ||
| − | |boss_node = | + | |boss_node = K P |
}} | }} | ||
</tabber> <!---To all the new players who are wanting to contribute data we are providing you with a simple reference to use to review kanmusus that will likely to drop, please refer the common list of ships which can be added once they appear as your drop: | </tabber> <!---To all the new players who are wanting to contribute data we are providing you with a simple reference to use to review kanmusus that will likely to drop, please refer the common list of ships which can be added once they appear as your drop: | ||
Revision as of 14:08, 1 January 2019
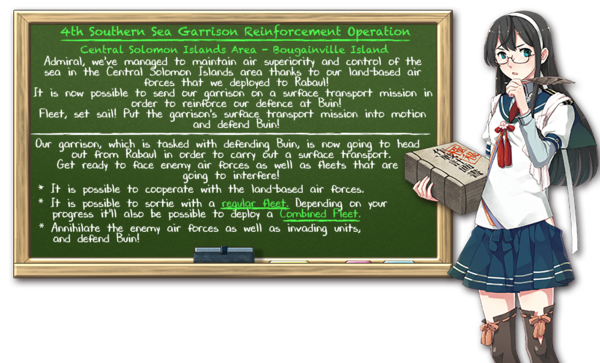
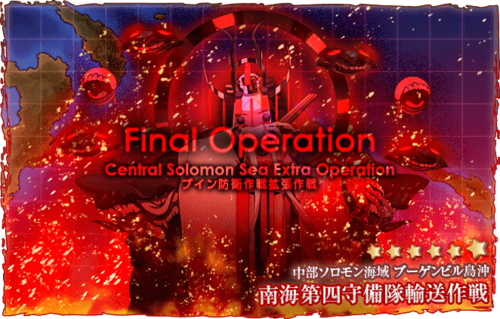
The "Winter 2019 Event", Interception! Operation Buin Defense is scheduled to begin on the December 26th, 2018, on the day following Christmas and will be a small scale event. Given it's size the likely length of the event will be 2 weeks and X number of days (Depending on delays or other issues) and should last till sometime during Early - Mid Jaunary, 2019
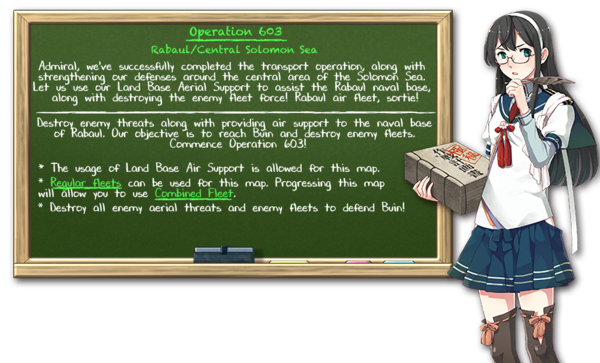
The known details based on what Kensuke Tanaka mentioned in his interview about the Event of the event will be based around the Central Solomon Islands where Rabaul will be providing air support for the campaign. What is known is that the Campaign will begin from Buin as you take a rat transport fleet through the Battle of Blackett Strait, following this will be an intense air battle where Rabaul Airbase will provide suppot with its' Land Based Planes and Carrier based planes, and then finally a transportation operation to provide support for Buin Anchorage.
It's been noted that while this event will only be 3 maps big, the main difficulty will come for players playing Normal or Hard Difficulty. They also encourage players to train torpedo squadrons and prepare your air forces for this event. Surface Radars will be the key to success to the first map, while having strong LBAS planes are vital for the later maps.
There will be a total of 4 new ships that will be released with this event.
For additional information regarding event-related subjects and content, please refer to the following links:
- Combined Fleet
- Armor Reduction
- Land-Based Air Squadron
- Transport Operation
- Anti-Air Cut-In
- Line of Sight
- Improving Ship Speed (May become a part of event map requirements)
- Vanguard Formation
- Striking Force Fleet
Historical Background
Disclaimer: The following information is based upon a summary of World War II history and may not have any influence on the game itself. This is for historical reference only.
Operation 603 (The Battle over Lingga (Japanese Only)
Information
New Ships
Currently, the devs have noted that there will a total of 4 ships that will be introduced.
Destroyer
Seaplane Tender
- Nisshin - E3 reward
New Equipment
New Enemy Vessels
New Enemy Equipment
Friend Fleet
As of current, E-3 will introduce Friend Fleets during the middle of the event. Exact of release is to be Determined....
Mechanics
Participation requirements
- Must have a 75% sortie win ratio.
- Must have 5 empty ship slots for new ships.
- Must have 20 free equipment slots.
Special Mechanics
- The difficulty system first used in Spring 2015 Event returns: you can choose between Operation A (甲, Hard), Operation B (乙, Medium), Operation C (丙, Easy) or Operation D (丁, Very Easy) .
- Choosing A or B requires certain HQ Level (HQ Lv 35 for B / 80 for A in Spring 2015 Event).
- An important note to all Admirals intending to clear the event on Hard difficulty - further (new) conditions now apply:
- When switching difficulty from any other difficulty to Hard, the map's debuff mechanism (where applicable) will be reset.
- Switching between any other difficulties will not reset the debuff mechanism.
- When switching difficulty from any other difficulty to Hard, the map's debuff mechanism (where applicable) will be reset.
- The debuff system from Summer 2015 Event's final map, where certain nodes had to be killed to reduce boss armor will return.
- Returning this event will allow a fleet with seven ships (Striking Force Fleet) to sortie to certain event maps that allow single fleet operations starting from E-2, and also includes the final map of the event.
- The Striking Force cannot be sortied during exercises or sent on expeditions while it contains seven ships.
- The Striking Force can only be created and used in the third fleet in the menu (out of a total of four fleets).
- A Striking Force with a flagship that carries a new piece of equipment, the Striking Force Fleet Command Facility, will be able to make use of the new Single Ship Evacuation mechanic.
- The new Single Ship Evacuation mechanic that will become available for the Striking Force as of E-4 allowing a single ship in the fleet to retreat from the battlefield after an enemy engagement if she suffered heavy damage.
- It is possible for the damage to become even worse during a Single Ship Evacuation.
- Unlike the Combined Fleet's evacuation mechanic, it does not require an escort destroyer.
- The new Striking Force Fleet Command Facility will become obtainable and useable via the old Fleet Command Facility and the Action Report that can be earned in the upcoming Fall Event. The Fleet Command Facility, as well as the new Action Report item, will be obtainable on all difficulty levels, including Medium and Easy Mode.
- Supplementary information regarding the new Striking Force Fleet Command Facility and the Single Ship Evacuation it allows when carried by the striking force's flagship:
- The evacuation does not require an escort destroyer.
- The evacuation consumes the ship's entire fuel & ammo reserves.
- Only one ship can be evacuated per battle.
- The damage the ship suffered may become worse during the evacuation, but she will never sink.
- The new Single Ship Evacuation mechanic that will become available for the Striking Force as of E-4 allowing a single ship in the fleet to retreat from the battlefield after an enemy engagement if she suffered heavy damage.
- Returning this event, the Vanguard Formation can be used .
- This formation will organize the fleet such that the 3rd-6th/7th ships protect the Flagship and 2nd Ship of the Fleet.
- In addition, the formation allows for ships to become more evasive in combat situations, especially with well-trained Destroyer.
- This formation is also available only during the duration of the event.
- The formation will be usable by both normal fleets as well as the Striking Force Fleet.
- This formation will organize the fleet such that the 3rd-6th/7th ships protect the Flagship and 2nd Ship of the Fleet.
- New: NPC Friend Fleets have been introduced into the game.
- Friend Fleets act as another unit that appears in particular battles to help aid your fleet when attacking the enemy at the start of night battle.
- NPC Friend Fleets are selected from a randomized preset list of ship.
- Depending on who you have in your fleet can also influence who will be arrive to aid you in battle.
- Friend Fleets act as another unit that appears in particular battles to help aid your fleet when attacking the enemy at the start of night battle.
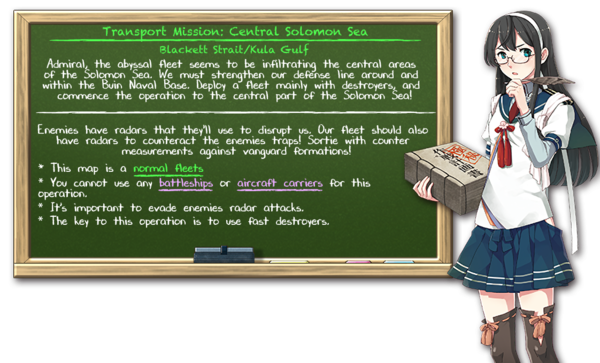
- New: Enemy Radar Ambush Nodes is introduced into the game.
- Entering this node will result in your fleet facing off against an enemy fleet that will ambush and attack your fleet
- Your Fleet will not be able to fight against the enemy Fleet.
- By meeting certain conditions, you can evade these nodes.
- Entering this node will result in your fleet facing off against an enemy fleet that will ambush and attack your fleet
Quick Info Table
Event Maps
E-1
Information (Phase 1 - Transport Phase):
(Phase 2 - Boss: Abyssal Nimbus Princess):
Key Rewards:
|
|||||||||||||||||||||||||||||||||||||||||||||||||||||
|
Branching rules
Branching compositions were reported over the course of the event. | |||||||||||||||||||||||||||||||||||||||||||||||||||||
|
Tips
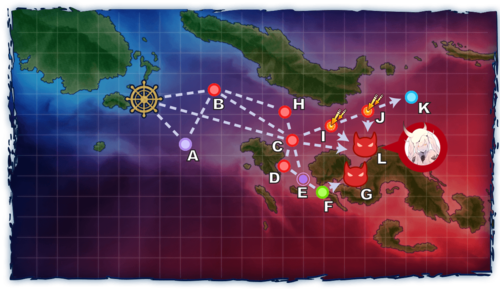
About Ambush Nodes On this event map, player will get to experience a new mechanic known as an Enemy Ambush Node. There nodes are generally encountered only if your fleet meet specific conditions which redirect them along a path to this node. Similar to the way LoS check are done in maps. For this event, Ambush Nodes mainly occur if your fleet does not meet the Surface Radar requirements and if you land on one, you will enter a battle. During these battle, your fleet will not participate in attacking the enemy fleet, but the enemy will attempt to attack your fleet. Your will consume 4% of it's total fuel in the sequence. It's recommended to try to do what you can to avoid hitting these nodes as much as possible. This map is divided into 2 phase, a Transportation phase and a Killing phase. Both objectives will need to be completed in order to complete this map. Most battle in this map mainly consist of simple fights which will pit your fleet up to 4 enemy ships mainly consisting of subs, DDs or CLs mixed with DDs. Most of these fights can be won easily, espcially with an expeirenced fleet. For this guide, the focus will be on the boss nodes and requirements needed for completing the objectives.
Recommended Composition 1 CL, 4 DD or 5 DD Route: B-C-E-F-G Have your fleet drum and Daihatsu, but keep a balance between combat and TP gear to get the best outcome to deplete the TP gauge. The TP phase here is small so completing should only take a short while to do. Boss is a Tsu-class with Destroyers and should be overall easy to S rank if you equip your fleet properly. It is also possible to use a Boss support fleet here and load your fleet with only drums and Daihatsu to maximize your TP gain which cam make it possible to complete it in as short as 2 runs. Phase 2 - Battle Against the Abyssal Nimbus Princess Recommended Composition Casual and Easy - 1 CAV, 1 CLT, 4DD (2 Surface Radars needed to complete the objective) Route: B-H-C-L To be able to reach the boss node, your fleet will need to have radars equipped to each of them, from those radars you will need a certain amount of Surface Radars equipped on your ships along with 1 Surface Radar equipped on the flagship (2 (Easy) /5 (Medium+) Surface Radars overall needed) in order to reach Node L. Players on Easy and Casual will need heavier ships along with a flagship with a surface radar to being directed to the boss and avoid being tossed into the dead end node or getting stuck in ambush nodes. Easy will need 1 CA(V)+CLT while Casual will need 2 CAV+1CLT. Once your fleet reached the boss will battle the Abyssal Nimbus Princess who will consist of herself + 3 CL and 2 other DDs. The fight is simple, but having a Boss Support Fleet will help make it easier to concentrate on attacking the boss herself. As such, a Boss Support Fleet is recommended for this map. In addition to this, ships from the Asashio-class, Shiratsuyu-class , and Yura all can deliver a damage modifier to the Nimbus Princess which consist of a value of 1.3x the normal damage value. Murasame can deliver 1.5x the normal damage value. Bringing a few ships from this group should easily help you win the battle even with double attack shelling. However, if you face complication with the boss, bringing in a DD with Torpedo Cut ins can be an alternative. The event guides are to be constructed through the respective Event map page guide and reviewed by editor staff / collaboration committee before being approved here. Do not under any circumstance update the guides through this page or attempt to fix them through this page. Please only update guides through their respective sandbox pages.
| |||||||||||||||||||||||||||||||||||||||||||||||||||||
|
Ship drops | |||||||||||||||||||||||||||||||||||||||||||||||||||||
E-2
Information Phase 1 Boss:
Phase 2 Boss:
Key Rewards:
|
||||||||||||||||||||||||||||||||||||||||||||||||||||||||||||||||||||||||||||||||||||||||||||||||||||||||||||||||||||||||||||||||||||||||||||||||||||||||||||||||||||||||||||||||||||||||||||||||||||||||||||||||||||||||||||||||||||||||||||||||||||||||||||||||||||||||||||||||||
|
Branching rules
Branching compositions were reported over the course of the event. | ||||||||||||||||||||||||||||||||||||||||||||||||||||||||||||||||||||||||||||||||||||||||||||||||||||||||||||||||||||||||||||||||||||||||||||||||||||||||||||||||||||||||||||||||||||||||||||||||||||||||||||||||||||||||||||||||||||||||||||||||||||||||||||||||||||||||||||||||||
|
Tips
For this map, there will be a large amount of tasks that you need to complete along with an important list of historical ships are have ties to this map that will have an important role in this area. The start of this guide will cover the historical before going into the steps to completing the map and also bring up alternate paths that will not be recommended. Historical Fleets With this map taking place closer to the Solomon Seas, a lot of ships that have connection to the campaign will have additional bonus when entering boss nodes depending on the location they fight at. Overall the known ships to have bonuses on this map includes: E-2 (Phase 1)
E-2 (Phase 2)
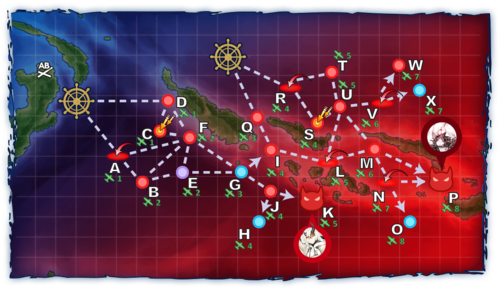
Because of this, many can be useful here, but please weigh your decisions carefully especially if your are playing normal + as you will have 2 tags to deal with and some also have benefits in the final node. Phase 1 - Killing the Heavy Cruiser Princess Recommended Fleet 1FBB, 1 CAV, 1 CA, 1 CVL, 2 DD Path A-B-J-F-K 1CAV, 2-3 CA, 0-1 CL, 2 DD Path D-F-G-J-K Recommended LBAS LBAS 1+2 The first comp (1FBB, 1 CAV, 1 CA, 1 CVL, 2 DD) will have you face off against an air raid, a sub fleet, and 2 torpedo squadrons before reaching the boss. Most of the enemies here are easy to deal with. It's recommended to bring an AACI ship to deal with the air raid but otherwise most nodes are easy to deal with. And to reach the boss node, you will need to bring a sufficient amount of Surface RADARs (0/2/3/4) to go to the boss. The second Comp (1CAV, 2-3 CA, 0-1 CL, 2 DD) will help you avoid the sub node and air strike node all together and only have to deal with a few surface battles against some DD, CL and CAs. Using this fleet may preset some challeges if any DD or CL survives shelling phase so Vangaurd formation may be considered for possible protection along the route. Bringing a single Seaplane fighter should also be more than enough to gain AS+ at boss. Keep in mind however that because you'll use extra CAs that segment, if you choose this comp for Normal or Hard, you may end up locking out potential CAs ships for phase 2. So please weigh your choices carefully before entering this as you will be using a CVL for unlocking the 2nd path either way. You will also need to bring a sufficient amount of Surface RADARs (0/2/3/4) to go to the boss. The boss node itself features a Heavy Cruiser Princess who will be accompanied by a few other CAs, CL and DD. Because she has no air power, it'll be easy for your LBAS using only bombers and can wipe a good number of the enemy units with minimal effort. If you bring in a ship or two that has a modifier bonus to the map, you can clear this segment relatively easily. However place consider who you brig prior to entering the fight as you may consider some for Phase 2. Phase 2 - Killing the Southern War Demon Part 1 - Unlocking the Combined Fleet Path Recommended Fleet 1FBB, 1 CAV, 1 CA, 1 CVL, 2 DD Surface Fleet Path SS(V) path Node A Clearing Node L Clearing Node A & L Clearing LBAS 2 Node N Clearing LBAS 2
Scoring Perfect Defense at Land Base' In this phase, you will need to gain air control over various points in the map (Nodes A, L, and N) along with successfully protecting your Land Base from taking any daamge to gain access to your 2nd starting point in which your Combined fleet can used at. The fleet you can use here can be the same as Phase 1's fleet, but if you didn't use a CVL you may consider bringing one for this segment), but also if you have enough Subs and seaplane carrying subs you can consider bringing them here to help traverse the path to the nodes more easily. On higher difficulties, if you use a surface fleet you may need to use your CVL and CAVs as fighter mules to help secure your AS as the specific nodes mentioned above. Depending on the difficulty the following process will need to be done: Casual - ??? Easy - AS Node A + Perfect Defense on Land Base Air Raid Normal - AS Node A and L + Perfect Defense on Land Base Air Raid Hard - AS Node A, L, and N + Perfect Defense on Land Base Air Raid (1-2 times needed) Keep in mind that you will need to have your LBAS travel to nodes A, N and L and score AS with your LBAS participating at these nodes in order to count to completing the requirements. Perfect defense will simply require you to use Fighters/ Interceptors to wipe out the bombers and take 0 damage from it. On Hard mode, your biggest difficulty will be to over come the Ru-class node (Node I) BB Princess node (Node M), so if necessary bring an LBAS bomber group to Nodes I and M to take out some of the enemies there to improve your chances of passing. If you choose to try to pass requirements by concentrating just on the nodes without bringing LBAS nodes for Node I and M, remember that there nodes will be much harder to pass. Once all conditions are complete the new starting point should appear and you will be able to use your combined fleet. Part 2 - Killing the Southern War Demon Recommended Fleet Path Q-I-L-M-N-P Recommended LBAS Boss Node LBAS
LBAS 1 LBAS 2 For this path, your fleet will have to go through a fleet of PT imps, several raid raids, and some battles against some Battleships (including Battleship Princesses). Depending on the battle a in-route support fleet may be recommended to help clear out the battleships along the way. Alternatively you can also resort to using Nelson and her Nelson Touch or Nagato Kai Ni and her broadside attack to help clear out the Battleship Princesses. If you have both of them carefully consider who you choose to bring for this map as while may be useful for this map, one of them needs to be reserved for E-3 which depending on the comp you choose and who you reserve will greatly affect what you'll do on higher difficulties on E-3. In-route boss support is preferred to ensure your survival along this path. Bringing a AACI ship is highly recommended for the Air Battles. Once you reach the boss node, you will face a considerable amount of air power, if you have enough seaplane fighters (about 6-8 on hard, less on lower difficulties) it will be possible along with you LBAS to score Air Superiority or Air Parity making it much easier to win the battle. If for some reason you lack in seaplane fighters, you may suffer Air Denial which will make things harder, but may be still possible to win. While this would be considered bad in most situations, thanks to the boss and her mostly weak fleet, this battle is much easier to complete. Along with the assistance of LBAS, it should be easy to clear with minimal effort. However if necessary, bring a boss support fleet.
4CVL, 2CAV + 1 CL, 1CA, 2DD, 2 FBB Path: R-U-V-W (If enough surface radars air equipped) Node R and V wit LBAS
LBAS 1 For this alternative step, you will need to complete the following conditions:
Path is is simple to complete but you will face a battle against a Battleship Re-Class which can be problematic especially on higher difficulties. Otherwise using your LBAS to get AS on Node of R and V should be easy and once you get to node W, completing the task shouldn't be too hard as there are mainly transports there. Once complete, you'll unlock the path to from node U to M. Alternative (Part 3) Unlocking M-P (Not Recommended) Most of the requirements to complete this step will required using previous compositions and LBAS set ups to complete certain requirements, however tests to determine the exact way to unlock this path is not fully known. Below are the lists of what has been documented to possibly unlock the path.
Once you complete the conditions, you will unlock the path from M-P Alternative (Part 4) Killing the Southern War Demon via U-M-P shortcut (Not Recommended) 2(F)BB, 2CAV, 2 CVL + 1 CL, 2 CA, 2DD, 1 CLT Pat: R-U-L-M-P Boss Node LBAS
LBAS 1 LBAS 2 This comp will allow you to bring a larger air power to the boss, however you will have to face off against a Re-class node (Node U) and the Battle Princess Node (Node M). Both of these nodes are difficult to over take compared to taking the CAV route through the PT imp nodes. As such we personally don't recommend this comp unless you have a fear of PT imps and would rather be taking on Re-class and BB Princesses. If you do make it to the boss, you will likely get AS at boss making the fight even easier. As a reminder, please consider the normal recommendation before even considering the alternative recommendation as it is more trouble than it's worth.
| ||||||||||||||||||||||||||||||||||||||||||||||||||||||||||||||||||||||||||||||||||||||||||||||||||||||||||||||||||||||||||||||||||||||||||||||||||||||||||||||||||||||||||||||||||||||||||||||||||||||||||||||||||||||||||||||||||||||||||||||||||||||||||||||||||||||||||||||||||
|
Ship drops | ||||||||||||||||||||||||||||||||||||||||||||||||||||||||||||||||||||||||||||||||||||||||||||||||||||||||||||||||||||||||||||||||||||||||||||||||||||||||||||||||||||||||||||||||||||||||||||||||||||||||||||||||||||||||||||||||||||||||||||||||||||||||||||||||||||||||||||||||||
E-3
Information Boss:
Key Rewards:
|
|||||||||||||||||||||||||||||||||||||||||||||||||||||||||||||||||||||||||||||||||||||||||||||||||||||||||||||||||||||||||||||||||||||||||||||||||||||||||||||||||||||||||||||||||||||||||||||||||||||||||||||||||||||||||||||||||||||||||||||||||||||||||||||||||||||||||||||||||||||||||||||||||||||||||||||||||||||||||||||||||||||||||||||||||||||||||||||||||||||||||||||
|
Branching rules
Branching compositions were reported over the course of the event. | |||||||||||||||||||||||||||||||||||||||||||||||||||||||||||||||||||||||||||||||||||||||||||||||||||||||||||||||||||||||||||||||||||||||||||||||||||||||||||||||||||||||||||||||||||||||||||||||||||||||||||||||||||||||||||||||||||||||||||||||||||||||||||||||||||||||||||||||||||||||||||||||||||||||||||||||||||||||||||||||||||||||||||||||||||||||||||||||||||||||||||||
|
Tips
The event guides are to be constructed through the respective Event map page guide and reviewed by editor staff / collaboration committee before being approved here. Do not under any circumstance update the guides through this page or attempt to fix them through this page. Please only update guides through their respective sandbox pages.
| |||||||||||||||||||||||||||||||||||||||||||||||||||||||||||||||||||||||||||||||||||||||||||||||||||||||||||||||||||||||||||||||||||||||||||||||||||||||||||||||||||||||||||||||||||||||||||||||||||||||||||||||||||||||||||||||||||||||||||||||||||||||||||||||||||||||||||||||||||||||||||||||||||||||||||||||||||||||||||||||||||||||||||||||||||||||||||||||||||||||||||||
|
Ship drops | |||||||||||||||||||||||||||||||||||||||||||||||||||||||||||||||||||||||||||||||||||||||||||||||||||||||||||||||||||||||||||||||||||||||||||||||||||||||||||||||||||||||||||||||||||||||||||||||||||||||||||||||||||||||||||||||||||||||||||||||||||||||||||||||||||||||||||||||||||||||||||||||||||||||||||||||||||||||||||||||||||||||||||||||||||||||||||||||||||||||||||||
| ||||||||||||||||||||||||||||||||||||||||||||||||||||||||||

