- Welcome to the Kancolle Wiki!
- If you have any questions regarding site content, account registration, etc., please visit the KanColle Wiki Discord
Difference between revisions of "Combat"
m (→Formation Modifier: Extra ') |
|||
| (8 intermediate revisions by one other user not shown) | |||
| Line 139: | Line 139: | ||
|style="text-align: center; border-style: solid; border-width: 1px; color:#ff0000;" |'''130%''' | |style="text-align: center; border-style: solid; border-width: 1px; color:#ff0000;" |'''130%''' | ||
|style="text-align: center; border-style: solid; border-width: 1px;" |100% | |style="text-align: center; border-style: solid; border-width: 1px;" |100% | ||
| − | |style="text-align: center; border-style: solid; border-width: 1px;" | | + | |style="text-align: center; border-style: solid; border-width: 1px;" |90% |
| − | |style="text-align: center; border-style: solid; border-width: 1px;" | | + | |style="text-align: center; border-style: solid; border-width: 1px;" |130% |
|style="text-align: center; border-style: solid; border-width: 1px;" |100% | |style="text-align: center; border-style: solid; border-width: 1px;" |100% | ||
|style="text-align: center; border-style: solid; border-width: 1px;" |60% | |style="text-align: center; border-style: solid; border-width: 1px;" |60% | ||
| Line 218: | Line 218: | ||
** For ships at the top (slots 1-2 or 1-3): '''Non-destroyers''' get a '''5%''' bonus. '''Destroyers''' get a '''20%''' bonus. | ** For ships at the top (slots 1-2 or 1-3): '''Non-destroyers''' get a '''5%''' bonus. '''Destroyers''' get a '''20%''' bonus. | ||
** For the rest of the ships at the bottom (slots 3-5 or 4-7): '''Non-destroyers''' get a '''20%''' bonus. '''Destroyers''' get a '''40%''' bonus. | ** For the rest of the ships at the bottom (slots 3-5 or 4-7): '''Non-destroyers''' get a '''20%''' bonus. '''Destroyers''' get a '''40%''' bonus. | ||
| − | ** See https://twitter.com/Xe_UCH/status/972244541783793664] for tested values. Valid as of 09/03/2018. | + | ** See [https://twitter.com/Xe_UCH/status/972244541783793664] for tested values. Valid as of 09/03/2018. |
===Choosing a Formation=== | ===Choosing a Formation=== | ||
| Line 229: | Line 229: | ||
: This formation boasts the highest anti-air modifier. It's primary use is for air raid and air battle nodes in order to mitigate airstrike damage. | : This formation boasts the highest anti-air modifier. It's primary use is for air raid and air battle nodes in order to mitigate airstrike damage. | ||
* '''Echelon''' | * '''Echelon''' | ||
| − | : This formation is similar to Double Line in effectiveness. You would not be picking this over double line. | + | : This formation is similar to Double Line in effectiveness. You would not be picking this over double line. Its main purpose is to trigger the special attacks for [[Nagato]], [[Mutsu]] and [[Colorado]] (in single fleets). |
| − | + | :* Echelon was improved in the [[Game Updates/2019/Feburary 27th|February 27th 2019]] update. | |
* '''Line Abreast''' | * '''Line Abreast''' | ||
: This formation has the best anti-submarine multiplier but has the worst surface damage modifiers. It is only to be used for submarine-only nodes. | : This formation has the best anti-submarine multiplier but has the worst surface damage modifiers. It is only to be used for submarine-only nodes. | ||
| Line 239: | Line 239: | ||
==Detection== | ==Detection== | ||
| − | [[File:Successfull_Detection.png|thumb|right| | + | [[File:Successfull_Detection.png|thumb|right|Successful Detection]] |
The detection phase involves your fleet attempting to find the enemy fleet. Success is determined by the {{LOS}} of your fleet. If you fail detection your fleet will be '''unable to participate in the aerial combat phase'''. This will result in automatic Air Incapability. | The detection phase involves your fleet attempting to find the enemy fleet. Success is determined by the {{LOS}} of your fleet. If you fail detection your fleet will be '''unable to participate in the aerial combat phase'''. This will result in automatic Air Incapability. | ||
| Line 263: | Line 263: | ||
* They can be depleted by raids on your air base. | * They can be depleted by raids on your air base. | ||
| − | '''Jet Land Based Bombing''' | + | '''Jet Land Based Bombing:''' |
| + | |||
If you have jets in your land base, they will perform a [[Combat#Jet Assault|jet assault]] before the land based bombing. All the same rules for jet assault apply. | If you have jets in your land base, they will perform a [[Combat#Jet Assault|jet assault]] before the land based bombing. All the same rules for jet assault apply. | ||
| Line 278: | Line 279: | ||
==Support Fleet== | ==Support Fleet== | ||
[[File:Support_Expedition.png|thumb|right|Support Expedition appearing]] | [[File:Support_Expedition.png|thumb|right|Support Expedition appearing]] | ||
| − | In World 5 and events, you will be able to send fleets on support expeditions. If a fleet is on a support expedition, there is a chance they will arrive to assist you with an attack. The damage done and effectiveness depends on the type of support expedition used. Please see [[ | + | In World 5 and events, you will be able to send fleets on support expeditions. If a fleet is on a support expedition, there is a chance they will arrive to assist you with an attack. The damage done and effectiveness depends on the type of support expedition used. Please see [[Support_Expedition|Support Expeditions]] for more details. |
* It is possible to lose planes from Airstrike Support if the enemy has opposing air power. | * It is possible to lose planes from Airstrike Support if the enemy has opposing air power. | ||
Revision as of 04:31, 3 March 2020
Preamble
This page is meant to provide a brief overview of the combat flow for a single fleet in Kantai Collection. It has been truncated due to length. For more detailed explanations on the various combat mechanics, please see the individual pages below.
- Damage Calculations
- Accuracy, Evasion and Criticals
- Aerial Combat
- Combined Fleet
- Land-Based Air Squadron
- Support Expeditions
- Opening Anti-Submarine Warfare
- Anti-Installation
Combat Phases
In normal surface engagements, combat will proceed in the following order.
- Formation Selection
- Detection
- Jet Assault
- Land Based Bombing
- Aerial Combat
- Support Fleet
- Opening Attacks
- Shelling
- Closing Attacks
- Night Battle
Exceptions
The following are exceptions to the usual combat flow:
- Combined Fleet engagements which have their own flow. Please see the page for more details.
- Air Battle nodes that can be found in 1-6 and some event maps that just consists of two airstrikes.
- Air Raid nodes that can be found in 6-5 and some event maps that just consist of a single airstrike.
- Night Battle nodes that can be found in 5-3 and some event maps are just have the night battle stage.
- Night/Day nodes that can be found on some event maps begin with a night battle then proceed to day.
- RADAR Ambush nodes that can be found on some event maps where your fleet takes a support shelling attack. There is no formation selection.
Formation Selection
When you have 4 or more ships in the fleet, you will be required to select a formation before entering combat.
- Fleets with 3 or less ships default to Line Ahead.
- Combined fleets use a different set of formations unless it is a night battle only node. Please see the Combined Fleet page for details.
Formation Modifier
| Formation | Formation Icon | Shelling | Torpedo | Anti-Submarine | Night Battle | Anti-Air | Flagship Protection | ||||||||
|---|---|---|---|---|---|---|---|---|---|---|---|---|---|---|---|
| Damage | Accuracy | Evasion | Damage | Accuracy | Evasion | Damage | Accuracy | Evasion | Damage | Accuracy[1] | Evasion | ||||
| Line Ahead 単縦陣 (Tanjuu-jin?) |
100% | 100% | 100% | 100% | 100% | 100% | 60% | 100% | 100% | 100% | 100% | 100% | 100% | 45% | |
| Double Line 複縦陣 (Fukujuu-jin?) |
80% | 120%[2] | 100% | 80% | 120% | 100% | 80% | 120% | 100% | 100% | 90% | 100% | 120% | 60% | |
| Diamond 輪形陣 (Rinkei-jin?) |
70% | 100% | 110% | 70% | 40% | 110% | 120% | 100% | 100% | 100% | 70% | 110% | 160% | 75% | |
| Echelon 梯形陣 (Teikei-jin?) |
75% | 120% | 120% | 60% | 60% | 130% | 110% | 120% | 130% | 100% | 90% | 130% | 100% | 60% | |
| Line Abreast 単横陣 (Tan'ou-jin?) |
60% | 120% | 130% | 60% | 30% | 140% | 130% | 120% | 110% | 100% | 80% | 120% | 100% | 60% | |
| Vanguard[3] 警戒陣 (Keikai-jin?) |
50% | 80% | ?? | 100% | 100% | ?? | 100% | ?? | ?? | 50% | ?? | ?? | 110% | Medium | |
| 100% | 120% | ?? | 100% | 100% | ?? | 60% | ?? | ?? | 100% | ?? | ?? | 110% | High | ||
- ↑ Source: 艦これ-チラ裏検証- / 夜戦陣形と命中回避 (Jan 1, 2015). Currently the hit rates only apply on nodes starting with night battle (eg. 5-3-C). In addition, please be aware that given limited sample sizes from the exp't, the measured hit rates by using different formations are NOT differing on a large scale, thus using "higher / lower" not simply "high / low".
- ↑ Source: 半製造BSアレコレ雑記帳 / 「艦これ」砲撃命中率について・複縦陣 中間報告 (Dec 5, 2014). If more relevant sources are discovered please add them in.
- ↑ The direct translation of "Keikai" is "alert".
Important Notes:
- The values are datamined from KanColle Kai for the Vita. Testing on the browser version has corroborated these values.
- Values for vanguard are vague because it was never introduced into KanColle Kai.
- The surface firepower modifier applies to only shelling and torpedo attacks.
- Diamond formation is only available when you have 5 or more ships in the fleet.
- Flagship protection is the situation where a non-flagship ship protects the flagship from being damaged by receiving the attack instead.
Vanguard Special Mechanics
- Vanguard is only available during event periods.
- When it is available, it is usable in all maps.
- Vanguard has two values because ships have different bonuses depending on their position in the fleet.
- For a fleet with 6 or 7 ships, the top row applies to ships 1-3 and the bottom row applies to ships 4-6/7.
- For a fleet with 4 or 5 ships, the top row applies to ships 1-2 and the bottom row applies to ships 2-4/5.
- Attacks from support fleets are affected by the top row multipliers.
- Ships at the bottom of a fleet have an increased chance of being targeted by the enemy. See above for how position is determined.
- Ships at the top (slots 1-2 or 1-3) have a ~25% chance of being targeted.
- Ships at the bottom (slots 3-5 or 4-7) have a ~75% chance of being targeted.
- See [1] for tested values. Valid as of 09/03/2018.
- Vanguard has a further evasion modifier that is post-cap depending on the ship's position in the fleet. This is very important because it allows you to hit very high evasion values. See above for how position is determined.
- For ships at the top (slots 1-2 or 1-3): Non-destroyers get a 5% bonus. Destroyers get a 20% bonus.
- For the rest of the ships at the bottom (slots 3-5 or 4-7): Non-destroyers get a 20% bonus. Destroyers get a 40% bonus.
- See [2] for tested values. Valid as of 09/03/2018.
Choosing a Formation
- Line Ahead
- This formation has the highest damage output for surface combat but poor anti-submarine. It will be the default formation you use for any surface combat node.
- Double Line
- This formation has high shelling and anti-submarine accuracy in exchange for lowered damage output. Because of how easy it is to increase accuracy in this game, it's accuracy benefits are negligible. It's main use is for engaging mixed surface and submarine fleets. The other use is for triggering Nelson's special attack.
- Diamond
- This formation boasts the highest anti-air modifier. It's primary use is for air raid and air battle nodes in order to mitigate airstrike damage.
- Echelon
- This formation is similar to Double Line in effectiveness. You would not be picking this over double line. Its main purpose is to trigger the special attacks for Nagato, Mutsu and Colorado (in single fleets).
- Echelon was improved in the February 27th 2019 update.
- Line Abreast
- This formation has the best anti-submarine multiplier but has the worst surface damage modifiers. It is only to be used for submarine-only nodes.
- Vanguard
- This formation is used to help fleets pass through difficult nodes where it is unlikely you are able to sink the enemy before they deal heavy damage to your fleet. The post-cap evasion bonus allows destroyers to hit very high evasion rates. Combined with the preferential targeting, it means destroyers in the bottom slots can function as evasion tanks.
- Care must be taken as this formation has very poor damage multipliers for the top slots. While placing your powerful ships in here means they can be protected by your destroyers, it also means that their combat effectiveness is reduced. This can result in the enemy being given more attacks on your fleet.
- Since the damage multipliers in the top slot affect your support fleet, this can severely reduce the effectiveness of support.
Detection
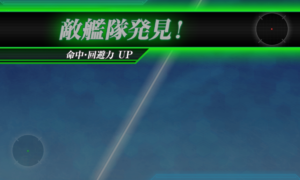
The detection phase involves your fleet attempting to find the enemy fleet. Success is determined by the ![]() of your fleet. If you fail detection your fleet will be unable to participate in the aerial combat phase. This will result in automatic Air Incapability.
of your fleet. If you fail detection your fleet will be unable to participate in the aerial combat phase. This will result in automatic Air Incapability.
- It is possible to succeed without any reconnaissance planes but there will be no recon plane animation.
- It is possible to lose recon planes on failing detection.
- Although the display indicates that
 and
and  has changed on success or failure. Testing has shown that it has no noticeable effect.
Jet Assault
If there are jets in your fleet, you will have a preemptive attack with them. Jets are subject to interception from other jets and anti-air fire from the enemy fleet. For more details please see Aerial Combat and Anti-Air Fire.
- Jets follow the dive bomber rules when calculating damage.
- Jets will attempt to intercept enemy jets.
- Jets will also participate in the regular aerial combat phase. This means they have to pass through interception and anti-air fire twice per battle.
- Currently there are only two jets in game:
Land Based Bombing
In 6-4, 6-5 and some event maps, you will have access to Land-Based Air Squadrons. When active, it will send a number of waves to bomb the enemy fleet. For more details, please see Land-Based Air Squadron.
- The land based planes are subject to interception and anti-air fire.
- They can be depleted by raids on your air base.
Jet Land Based Bombing:
If you have jets in your land base, they will perform a jet assault before the land based bombing. All the same rules for jet assault apply.
Aerial Combat
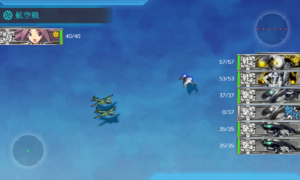
In this phase, both fleets will send out fighters and bombers (if they have any) to contest air control and bomb the opposing fleet. For more details, please see Aerial Combat, Airstrike and Anti-Air Fire.
Aerial combat will proceed in the following order:
- Air combat
- Contact
- Fleet Anti-Air Defense
- Airstrike
Support Fleet
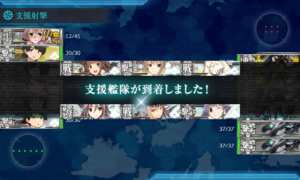
In World 5 and events, you will be able to send fleets on support expeditions. If a fleet is on a support expedition, there is a chance they will arrive to assist you with an attack. The damage done and effectiveness depends on the type of support expedition used. Please see Support Expeditions for more details.
- It is possible to lose planes from Airstrike Support if the enemy has opposing air power.
Opening Attacks
There are two different opening attacks that can be triggered if certain conditions are met; Opening Anti-Submarine Attacks and Opening Torpedo Attacks. For more details on how damage is calculated, please see Damage Calculations.
- Opening attacks are affected by engagement modifiers even though it only appears after this phase.
Opening Anti-Submarine (OASW)
If the fleet possesses ships capable of performing OASW, they will begin attacking submarines in order of range. The firing order will be random among ships with the same range. This phase can disable opening torpedo attacks from enemy submarines if you manage to sink them. For more details, please see Opening Anti-Submarine Warfare.
Opening Torpedo
If the fleet possesses ships capable of opening torpedo attacks, they will launch torpedoes simultaneously.
- Opening torpedoes can be fired by submarines over level 10, any ship equipped with midget submarines and the elite Battleship Re-Class.
- Targets will be picked at random but will prioritise surface ships.
- Opening torpedoes can be launched even at moderate or heavy damage; which would disable closing torpedoes.
Shelling
This phase is where the majority of combat takes place. Surviving ships in both fleets will take turns exchanging fire. The order detailed here only applies to single fleet engagements. For shelling order in combined fleet engagements, please see Combined Fleet.
Engagement Form
Before the shelling phase begins, the game will roll for one of the following 4 engagements.
| Form | Damage Modifier | Chance | Chance with Saiun |
|---|---|---|---|
| Parallel Engagement 同航戦 (Doukousen?) |
100% | 45% | 45% |
| Head-on Engagement 反航戦 (Hankousen?) |
80% | 30% | 40% |
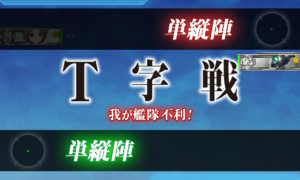
| Crossing the T (Advantage) T字戦有利 (T Ji-sen Yuuri?) |
120% | 15% | 15% |
| Crossing the T (Disadvantage) T字戦不利 (T Ji-sen Furi?) |
60% | 10% | 0% |
- All engagement forms affect both sides equally, including crossing the T (Advantage or Disadvantage).
- Night battle and aerial combat are not affected by engagement.
- OASW and opening torpedoes are affected by engagement even though it is only displayed after those phases.
- Equipping a
 Saiun effectively makes what would have been Crossing the T (Disadvantage) become Head-on engagement.
Shelling
Following the engagement display, ships will begin the shelling phase. This phase is divided into two and involves both surface shelling, aircraft carrier shelling and ASW attacks.
The following general rules apply for both shelling phases:
- Each fleet will take turns shelling.
- It is possible to skip a turn if the ship that is supposed to shell is sunk.
- Aircraft carriers will not attack if they have no bombers.
- ASW capable ships will be forced to attack submarines.
- Exceptions are Suzuya Kai Ni Kou and Kumano Kai Ni Kou.
- Some ships are capable of performing special attacks during shelling. Please see Artillery Spotting, Carrier Cut-In Attack and Touch Special Attack.
1st Shelling Phase
In this phase, both fleets will take turns shelling with the order based off the ship's range. It is possible to modify their range with equipment.
- The order is Very Long → Long → Medium → Short → Very Short.
- Ships with the same range will have their turn chosen randomly.
- Only Abyssal ships have Very Short range.
2nd Shelling Phase
If there is a battleship present in the battle, there will be a 2nd shelling phase. The battleship does not have to be alive for the 2nd shelling phase to trigger. The order is based off fleet position with the 1st ship going 1st.
- Ships that are sunk or unable to participate at all in shelling will have their turn passed on to the next eligible ship.
- Ships normally able to participate in shelling but rendered unable will be counted but do nothing on their turn.
Closing Attacks
In this phase, any ship with a torpedo stat will fire a closing torpedo. Any ship with a base torpedo stat of 0 will not participate.
- It will target surface ships at random.
- It will not trigger if there are no targets available.
- Ships at moderate or heavy damage will not participate in this phase.
- Accuracy, damage and evasion are affected by formation and engagement.
Night Battle
Following the end of day, you will have a choice to participate in night battle. For more details, please see Night Battle and Damage Calculations
- Firing order is based off position in the fleet.
- Turns can be skipped if a ship is sunk or disabled before they can take their turn.
- Heavily damaged ships are unable to participate.
- It is unaffected by engagement.
- Certain equipment setups will allow you to perform special double attacks or cut-ins.
Victory Conditions
The damage gauge that is displayed at the victory screen is displayed using the following calculation:
[math]\displaystyle{ \text{Damage%} = \dfrac{\text{Fleet HP lost}}{\text{Fleet HP}} }[/math]
| Victory State | Conditions |
|---|---|
| Total Victory S (完全勝利S) |
|
| Victory S (勝利S) |
|
| Victory A (勝利A) |
|
| Tactical Victory B (戦術的勝利B) |
|
| Tactical Defeat C (戦術的敗北C) |
|
| Defeat D (敗北D) |
|
| Defeat E (敗北E) |
|
Minimum Kill Requirements
| Fleet Size | Minimum Kill |
|---|---|
| 2 | 1 |
| 3 | 2 |
| 4 | 2 |
| 5 | 3 |
| 6 | 4 |
| 12 | 8 |
Important Notes
- B-ranks are the minimum victory requirements for:
- Obtaining drops.
- Clearing a map without a boss gauge.
- Counting for quest victories (where minimum rank is unspecified).
- A-ranks are the minimum victory requirements for obtaining rare drops in most cases.
- S-ranks are the minimum victory requirements for obtaining the rarest drops.
- It also has the best drop rates out of all the victory conditions.
- Perfect S (Total Victory) ranks count as a regular S-rank. It has no extra bonuses.
MVP
At the end of combat, one ship is picked as the MVP. She gains bonuses to exp and morale. For more details, please see Experience and Rank and Morale and Fatigue.
The following is how the MVP is determined:
- The ship which deals the highest total damage is awarded MVP.
- The damage is not weighted. I.e. 300 damage to a battleship counts the same as 300 damage to a destroyer.
- Even though you cannot reduce enemy below 1 in PvP, overkill damage is counted even though it isn't displayed.
- If multiple ships are tied for damage, the way MVP is determined is unknown.
- In the event where no damage is dealt to the enemy, the flagship automatically becomes MVP.
- It usually happens in air raid and RADAR ambush nodes.
- In the event of an E-rank, MVP is not awarded to anyone.
- In a Combined Fleet, MVP is determined separately for the main and escort fleets.
Other Information
| |||||||||||||||||||||||||||||||||||||

