- Welcome to the Kancolle Wiki!
- If you have any questions regarding site content, account registration, etc., please visit the KanColle Wiki Discord
Difference between revisions of "Anti-Submarine Warfare"
m (Already had a system in place to do this) |
Jigaraphale (talk | contribs) m |
||
| (32 intermediate revisions by 2 users not shown) | |||
| Line 13: | Line 13: | ||
**The exception to this rule is when a battle starts at night, or when attacking with a [[Combined Fleet]]. | **The exception to this rule is when a battle starts at night, or when attacking with a [[Combined Fleet]]. | ||
| − | ===ASW | + | ===ASW Shelling Conditions=== |
| − | + | {{/Shelling Conditions}} | |
| − | |||
| − | |||
| − | |||
| − | |||
| − | |||
| − | |||
| − | |||
| − | |||
| − | |||
| − | |||
| − | |||
| − | |||
| − | |||
| − | |||
| − | |||
| − | |||
| − | |||
| − | |||
| − | |||
| − | |||
| − | |||
| − | |||
| − | |||
| − | |||
| − | |||
| − | |||
| − | |||
| − | |||
| − | |||
| − | |||
| − | |||
| − | |||
| − | |||
| − | ==Damage | + | ==Damage Calculation== |
<onlyinclude>The stats used to calculate damage against submarines is the {{ASW}} ASW. | <onlyinclude>The stats used to calculate damage against submarines is the {{ASW}} ASW. | ||
| − | *When contributing to ASW power, Base {{ASW}} ASW is '''square rooted''', while equipment ASW is '''multiplied by 1.5''' | + | *When contributing to ASW power, Base {{ASW}} ASW is '''square rooted''', while equipment ASW is '''multiplied by 1.5'''. |
**[[:Category:Anti-submarine Weaponry|Anti-submarine weaponry]] is therefore the primary source of ASW damage, with the base ship ASW playing a very minor role damage-wise. | **[[:Category:Anti-submarine Weaponry|Anti-submarine weaponry]] is therefore the primary source of ASW damage, with the base ship ASW playing a very minor role damage-wise. | ||
**However, base ship ASW is the primary determinant of whether a ship can reach 100 total ASW to perform '''"[[#Opening ASW Shelling (OASW)|Opening ASW]]"''' (OASW) attacks. | **However, base ship ASW is the primary determinant of whether a ship can reach 100 total ASW to perform '''"[[#Opening ASW Shelling (OASW)|Opening ASW]]"''' (OASW) attacks. | ||
| − | *Unlike | + | *Unlike shelling, ASW damage is capped at 170. |
ASW attacks have different modifiers gained from [[Formation]]s, | ASW attacks have different modifiers gained from [[Formation]]s, | ||
*{{ToolTip|[[Combat#Formation_Selection|Line Abreast]]|[[File:LineAbreast.png]]}} is the main ASW formation, with a 1.3x damage modifier, | *{{ToolTip|[[Combat#Formation_Selection|Line Abreast]]|[[File:LineAbreast.png]]}} is the main ASW formation, with a 1.3x damage modifier, | ||
*{{ToolTip|[[Combined_Fleet#Formation_Selection|Cruising Formation 1]]|[[File:Formation_1.png]]}} is the main ASW formation for [[Combined Fleet]]s, with a 1.3x damage modifier. | *{{ToolTip|[[Combined_Fleet#Formation_Selection|Cruising Formation 1]]|[[File:Formation_1.png]]}} is the main ASW formation for [[Combined Fleet]]s, with a 1.3x damage modifier. | ||
| − | {| | + | {{Formula |
| − | + | |Title=Anti-Submarine Formula | |
| − | | | + | |Math=\text{Atk}_\text{base ASW} = \left( 2\sqrt{\text{ASW}_\text{ship} } + 1.5\text{ASW}_\text{equip} + \bigstar + \text{Type}_\text{ship} \right) \times \text{Mod}_\text{synergy} |
| − | + | |Var=<math>\text{Type}_\text{ship}</math> a constant depending on the type of the ship performing the attack. See below for details. | |
| − | + | {{{!}}class="wikitable mw-collapsible mw-collapsed" style="text-align:center; margin:auto" | |
| − | + | !colspan=2{{!}}Ship Type Constant | |
| − | + | {{!}}- | |
| − | |||
| − | |||
| − | { | ||
| − | !colspan=2 | ||
| − | |||
!Ship Types | !Ship Types | ||
!<math>\text{Type}_\text{ship}</math> | !<math>\text{Type}_\text{ship}</math> | ||
| − | + | {{!}}- | |
| − | + | {{!}}Coastal Defense Ships ([[DE]])<br>Destroyers ([[DD]])<br>Light Cruisers ([[CL]]/[[CT]])<br>Oilers ([[AO]]) (without carrier bomber) | |
| − | + | {{!}}13 | |
| − | + | {{!}}- | |
| − | + | {{!}}Aviation Cruisers ([[CAV]])<br>Aviation Battleships ([[BBV]])<br>Seaplane Tenders ([[AV]])<br>Light Carriers ([[CVL]])<br>Landing Ships ([[LHA]])<br>Oilers ([[AO]]) (with carrier bomber) | |
| − | + | {{!}}8 | |
| − | + | {{!}}} | |
| − | |||
*<math>\text{Mod}_\text{synergy}</math> the synergy multiplier bonus from using certain combinations of ASW equips (''see below''). | *<math>\text{Mod}_\text{synergy}</math> the synergy multiplier bonus from using certain combinations of ASW equips (''see below''). | ||
| − | + | |Notes=The bonuses do not stack, meaning only the highest possible bonus applies. | |
**The exception is the depth charge '''penetration''' detailed above. | **The exception is the depth charge '''penetration''' detailed above. | ||
*Multiple equipments of the same type still only apply the bonus '''once'''. | *Multiple equipments of the same type still only apply the bonus '''once'''. | ||
*There is an accuracy bonus as well but it is small. Stacking sonars will give a bigger accuracy bonus. | *There is an accuracy bonus as well but it is small. Stacking sonars will give a bigger accuracy bonus. | ||
| − | + | }} | |
| + | </onlyinclude> | ||
{{Equipment/ASW_Synergy|expand=true}} | {{Equipment/ASW_Synergy|expand=true}} | ||
| − | |||
==Opening ASW Shelling (OASW)== | ==Opening ASW Shelling (OASW)== | ||
{{:Combat/Battle Opening}} | {{:Combat/Battle Opening}} | ||
| − | |||
| − | |||
| − | |||
| − | |||
| − | |||
| − | |||
| − | |||
| − | |||
| − | |||
| − | |||
| − | |||
| − | |||
| − | |||
| − | |||
| − | |||
| − | |||
| − | |||
| − | |||
| − | |||
| − | |||
| − | |||
| − | |||
| − | |||
| − | |||
| − | |||
| − | |||
| − | |||
| − | |||
| − | |||
| − | |||
| − | |||
| − | |||
==LBAS== | ==LBAS== | ||
| Line 129: | Line 58: | ||
*Only [[ASW Aircraft|ASW Planes]] (7+ {{ASW}} ASW) can attack submarine during this phase. | *Only [[ASW Aircraft|ASW Planes]] (7+ {{ASW}} ASW) can attack submarine during this phase. | ||
**If submarines are present, those planes will prioritize attacking submarines, while other attackers will only be able to attack surface targets. | **If submarines are present, those planes will prioritize attacking submarines, while other attackers will only be able to attack surface targets. | ||
| − | {{Category:ASW | + | {{Category:ASW Aircraft|expand=1}} |
==ASW Support Expedition== | ==ASW Support Expedition== | ||
| Line 136: | Line 65: | ||
=See Also= | =See Also= | ||
| + | *[[Help:Equipment Setup#Anti-Submarine|Anti-Submarine Setup]] | ||
*[[:Category:Anti-submarine Weaponry|ASW Equipment]] | *[[:Category:Anti-submarine Weaponry|ASW Equipment]] | ||
| + | *[[Modernization#ASW Modernization|ASW Modernization]] | ||
| + | *[[Partials/Opening ASW]] | ||
{{Mechanics}} | {{Mechanics}} | ||
Latest revision as of 19:40, 6 April 2024
Submarines (SS, also including "Aircraft Carrying Submarines" SSV) are characterized by relatively low armor and HP. By contrast, they are difficult to handle using "normal setups", requiring instead specific Anti-Submarine Warfare (ASW) equipment and setups in order to be sunk.
During sorties, submarines are typically found at pre-boss nodes, but some can be boss themselves, see here.
Attack Behavior
Unlike regular surface ships, submarines:
- Cannot be targeted by normal shelling attacks,
- Are immune to air and torpedo attacks,
- Cannot take more than scratch damage during night battle,
- Therefore they cannot be sunk at night,
- The exception to this rule is when a battle starts at night, or when attacking with a Combined Fleet.
ASW Shelling Conditions
Only certain ships meeting certain conditions can attack SS(V).
- Most often, if a ship can attack a submarine, focusing it will take over any other target.
Here, ![]() refers to any
refers to any ![]() /
/![]() .
.
| Ship | Conditions | Day Battle | Night Battle | |
|---|---|---|---|---|
| Stats | Equipment | |||
Taiyou-class Kai Ni   Kaga Kai Ni Go 
|
Not more than moderately damaged (中破) |
Prioritize SS | Night Air Attack will prioritize surface target[3] Night Shelling prioritizes SS | |
Gambier Bay Mk.II
|
Cannot attack SS unless if: setuped for a Night Air Attack, then prioritize SS with a night shelling attack | |||
| All other CVL | Do not attack SS | |||
Mogami-class Kou Kai Ni 
|
Prioritize surface target[4] | |||
| BBV, CAV, AV, LHA | None | Equipped with |
Prioritize SS | |
Fusou-class Kai Ni  No.101 Transport Ship 
|
Equipped with |
Prioritize SS | ||
| Any CV, CVL, BBV, CAV, AV, LHA | Not equipped with the above-mentioned equipment | Do not attack SS | ||
Hayasui Kai Yamashio Maru Kai 
|
Equipped with |
Prioritize SS | Do not attack SS | |
| Not equipped with |
Prioritize SS | |||
| All other ships | At least 1 base |
None | ||
| No base |
Do not attack SS | |||
- ↑ A 0
 attack plane paired with a Rotorcraft
  or a Liaison Aircraft
  do work
- ↑ 2.0 2.1 2.2 If all relevant aircraft are in zero plane slots, the ship cannot attack SS.
- ↑ In absence of surface target will do a night shelling against SS
- ↑ Can still attack SS
- ↑ Here base also include ASW gains from ASW modding (only relevant for Yamato Kai Ni so far), excepted for Kaga Kai Ni/E.
- Notes
- As Abyssals also follow those conditions, SS/V can be used as "Submarine Tanks" (Sub-tanking) on some maps to deviate attacks from the fleet to the submarine.
Damage Calculation
The stats used to calculate damage against submarines is the ![]() ASW.
ASW.
- When contributing to ASW power, Base ASW is square rooted, while equipment ASW is multiplied by 1.5.
- Anti-submarine weaponry is therefore the primary source of ASW damage, with the base ship ASW playing a very minor role damage-wise.
- However, base ship ASW is the primary determinant of whether a ship can reach 100 total ASW to perform "Opening ASW" (OASW) attacks.
- Unlike shelling, ASW damage is capped at 170.
ASW attacks have different modifiers gained from Formations,
- Line Abreast
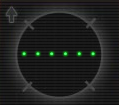 is the main ASW formation, with a 1.3x damage modifier,
 - Cruising Formation 1
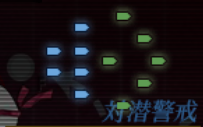 is the main ASW formation for Combined Fleets, with a 1.3x damage modifier.


| Anti-Submarine Formula | |||||||||
|---|---|---|---|---|---|---|---|---|---|
| |||||||||
| |||||||||
| ASW Damage Synergy | |||
|---|---|---|---|
 Type 93 Passive Sonar  Type 4 Passive Sonar  Type 3 Active Sonar  Type 3 Active Sonar Kai  Type124 ASDIC  Type144/147 ASDIC  HF/DF + Type144/147 ASDIC | |||
 Type 0 Passive Sonar | |||
 Type 94 Depth Charge Projector  Type 3 Depth Charge Projector  Type 3 Depth Charge Projector (Concentrated Deployment)  Prototype 15cm 9-tube ASW Rocket Launcher  RUR-4A Weapon Alpha Kai  Mk.32 ASW Torpedo (Mk.2 Thrower) | |||
 Type 95 Depth Charge  Type 2 Depth Charge  Lightweight ASW Torpedo (Initial Test Model)  Hedgehog (Initial Model)  Type 2 Depth Charge Kai Ni | |||
 Type 2 12cm Mortar Kai  Type 2 12cm Mortar Kai (Concentrated Deployment) | |||
| ASW Damage Modifiers: [math]\displaystyle{ \text{Mod}_\text{synergy} = {Mod}_\text{1} \times {Mod}_\text{2} }[/math] | |||
| [math]\displaystyle{ {Mod}_\text{1} }[/math] | (Any Sonar + Any Depth Charge) |
1.15 | |
| [math]\displaystyle{ {Mod}_\text{2} }[/math] | 1.1 | ||
| 1.25 | |||
| Examples | |||
| [math]\displaystyle{ \text{Mod}_\text{synergy} }[/math] | 1.4375[math]\displaystyle{ 1.15 \times 1.25 }[/math] | ||
| 1.265[math]\displaystyle{ 1.15 \times 1.1 }[/math] | |||
| Armor Penetration | |||
Indepentant of synergies, some equipment provides additional armor penetration to ASW attacks.
The flat armor penetration value is calculated as follows:
| |||

Opening ASW Shelling (OASW)
Commonly referred to as OASW (opening ASW). All eligible ships will perform a regular ASW Shelling attack, following range order in the same fashion as the First Shelling Phase. As these opening attacks happen before the Opening Torpedo Salvo, they may disable or even sink enemy submarines before they have a chance to attack.
OASW has the following trigger conditions:
- Only ships listed below can trigger an OASW,
- The ship is not required to be able to perform any ASW Shelling.
- They must meet their specific ASW stat threshold and requirements, listed below,
| OASW Ship | ASW Stat Required[1] | Equipment Required[2][3][4] |
|---|---|---|
| Any DD, CL, CLT, CT, AO[5] | 100+ ASW | |
Sonar + Any Seaplane Bomber, or Rotorcraft, or Liaison Aircraft, or Dive Bomber, with 1+ ASW | ||
Sonar + Seaplane Bomber, or Rotorcraft, or Depth Charge | ||
| Any CVL[6] | Sonar + Any with 1+ ASW | |
| 50+ ASW | Sonar + Any with 7+ ASW | |
| 65+ ASW | Any with 7+ ASW | |
| Any DE | 60+ ASW | |
| 75+ ASW | Total of 4+ ASW from equipment | |
Fletcher-class[7] John C. Butler-class Kai/Mk.II J-class Kai |
Can OASW innately | |
| N/A | Any with 1+ ASW | |
| N/A | 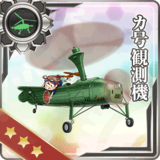 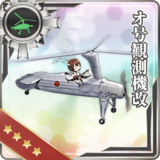 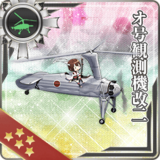 -or-  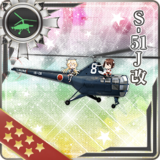
| |
- ↑ The Required ASW Stat does include Visible Bonuses, but does not include Improvements.
- ↑ Visible Bonuses or Improvements do not count as equipment ASW (e.g. a +6 ASW equipment with +1 ASW bonus does not count as a +7 equipment but just as a +6 one).
- ↑ When applicable, if all relevant ASW aircraft are in zero plane slots, and no bomber
 /
/ with 1+ are present in non-zero plane slot, the ship cannot OASW.
- ↑ Regardless of their ASW stat,

 Fighters or
  Carrier Recons cannot trigger any OASW.
- ↑ Other ASW Shelling capable ships may be able to OASW, but cannot reach 100 ASW using currently available equipment.
- ↑ CVE should be used, as they are the only CVL with base ASW stat.
- ↑ Kai only for Heywood L. Edwards.
See the list of Anti-submarine Weaponry and ASW Aircraft to better see what can help achieve OASW on a given ship.
Abyssals
Abyssal ships do not follow these rules. The following may perform OASW unconditionally:
- Destroyer Ha-Class Late Model Elite
- Destroyer Ni-Class Late Model Elite
- Light Cruiser Tsu-Class Flagship
- Light Carrier Nu-Class (Elite III, Elite IV, all Kai Elite, all Kai Flagship)
- Ancient Destroyer Princess II
- Seaplane Tender Water Princess (all variants)
- Abyssal Kuriles Princess (all variants)
- Destroyer Forest Princess (Damaged variants unconfirmed)
Other abyssals cannot perform OASW.
LBAS
See the Land-Based Air Squadron page
- Only ASW Planes (7+ ASW) can attack submarine during this phase.
- If submarines are present, those planes will prioritize attacking submarines, while other attackers will only be able to attack surface targets.
| ASW Aircraft | ||
|---|---|---|
| Autogyros
|
 Ka Type Observation Autogyro  O Type Observation Autogyro Kai  O Type Observation Autogyro Kai Ni | |
| Helicopters
|
 S-51J  S-51J Kai | |
 Type 3 Command Liaison Aircraft (ASW)  Type 3 Command Liaison Aircraft Kai  Type 1 Fighter Hayabusa Model II Kai (20th Squadron)  Type 1 Fighter Hayabusa Model III Kai (Skilled/20th Squadron) | ||
|
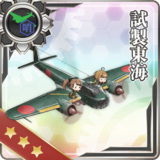
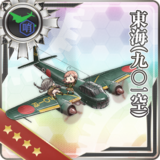
 Prototype Toukai  Toukai (901 Air Group) | |
| +7 ASW |
 Type 97 Torpedo Bomber (931 Air Group)  Type 97 Torpedo Bomber (931 Air Group/Skilled)  Tenzan (931 Air Group)  Prototype Type 97 Torpedo Bomber Kai (Skilled) No. 3 Model E (w/ Type 6 Airborne Radar Kai)  Tenzan Model 12A Kai (Skilled w/ Type 6 Airborne Radar Kai)  Ryuusei Kai (CarDiv 1/Skilled)  Swordfish Mk.III (Skilled)  Barracuda Mk.III  TBM-3D  TBM-3W+3S | |
| +7 ASW |
 Ju 87C Kai Ni (w/ KMX)  Ju 87C Kai Ni (w/ KMX/Skilled)  Type 0 Fighter Model 64 (Two-seat w/ KMX) | |
| +7 ASW |
Recons |  Type 0 Reconnaissance Seaplane Model 11B  Type 0 Reconnaissance Seaplane Model 11B (Skilled) |
| Bombers |  Swordfish Mk.III Kai (Seaplane Model)  Swordfish Mk.III Kai (Seaplane Model/Skilled)  Zuiun Kai Ni (634 Air Group/Skilled) | |
ASW Support Expedition
- If a CVL is present, aircraft with ASW will attack submarines regardless of the ship on which it's equipped.
See Also
| |||||||||||||||||||||||||||||||||||||