- Welcome to the Kancolle Wiki!
- If you have any questions regarding site content, account registration, etc., please visit the KanColle Wiki Discord
Difference between revisions of "Aerial Combat"
Jigaraphale (talk | contribs) |
Jigaraphale (talk | contribs) |
||
| Line 5: | Line 5: | ||
Aerial Combat has the following structure: | Aerial Combat has the following structure: | ||
| − | #LBAS's [[Jet Assault]] | + | #LBAS's [[#Jet Assault Phase|Jet Assault]] |
| − | #Fleet's [[Jet Assault]] | + | #Fleet's [[#Jet Assault Phase|Jet Assault]] |
#[[LBAS|Land-Based Aerial Support]] | #[[LBAS|Land-Based Aerial Support]] | ||
| − | #[[Air | + | #[[#Stage 1 - Battle for Air Superiority|Stage 1 - Battle for Air Superiority]] |
| − | #[[Anti-Air|Stage 2 - Fleet Anti-Air Defense]] | + | #[[#Stage 2 - Fleet Anti-Air Defense|Stage 2 - Fleet Anti-Air Defense]] |
| − | #[[Airstrike|Stage 3 - Airstrike]] | + | #[[#Stage 3 - Airstrike|Stage 3 - Airstrike]] |
If an [[LBAS]] phase happens before the Aerial Combat phase, the enemy fleet state, such as plane slots and Fighter Power used for the subsequent Aerial Combat, is carried over. This can be used to tamper with the Enemy's Aerial Combat initial conditions. | If an [[LBAS]] phase happens before the Aerial Combat phase, the enemy fleet state, such as plane slots and Fighter Power used for the subsequent Aerial Combat, is carried over. This can be used to tamper with the Enemy's Aerial Combat initial conditions. | ||
Revision as of 14:54, 20 March 2023
Aerial Combat Breakdown
Aerial Combat is one of the Day Battle intermediary phases. In this phase, allied and enemy fleets indirectly fight each other for aerial dominance and airstrike potential, granting either fleet some substantial advantages in the subsequent combat phases.
Aerial Combat has the following structure:
- LBAS's Jet Assault
- Fleet's Jet Assault
- Land-Based Aerial Support
- Stage 1 - Battle for Air Superiority
- Stage 2 - Fleet Anti-Air Defense
- Stage 3 - Airstrike
If an LBAS phase happens before the Aerial Combat phase, the enemy fleet state, such as plane slots and Fighter Power used for the subsequent Aerial Combat, is carried over. This can be used to tamper with the Enemy's Aerial Combat initial conditions.
- See LBAS for more details.
In case neither fleets meet the requirements, the sub-phase will be skipped.
| Planes in combat phases | ||||||
|---|---|---|---|---|---|---|
| Plane type | Detection | Contact | Airpower | Opening airstrike | Day Cut-in | ASW |
| ❌ | ❌ | ✔️ | ❌ | ✔️ | ❌ | |
| ❌ | ✔️ | ✔️ | ✔️ | ✔️ | ✔️ | |
| ❌ | ❌ | ✔️ | ✔️ | ✔️ | ✔️ | |
| ❌ | ❌ | ✔️ | ✔️ | ❌ | ❌ | |
| ✔️ | ✔️ | ❌ | ❌ | ❌ | ❌ | |
| ✔️ | ✔️ | ❌ | ❌ | ✔️ | ❌ | |
| ✔️ | ❌ | ✔️ | ✔️ | ✔️ | ✔️ | |
| ❌ | ❌ | ✔️ | ❌ | ❌ | ❌ | |
| ✔️ | ✔️ | ❌ | ❌ | ❌ | ✔️ | |
| ❌ | ❌ | ✔️ | ❌ | ❌ | ✔️ | |
| ❌ | ❌ | ✔️ | ❌ | ❌ | ✔️ | |
Jet Assault Phase
Planes that participate in this phase:
 ,
, "Jets" (turbojet propelled fighter-bombers)
If any carrier on either side is equipped with Jets, the "Jet Assault" (JA) Phase will commence first of all. The JA Phase may only commence during battles where Airstrikes can be performed. The JA follows the same rules as Stage 3.
The defending side is allowed to defend against the Jets following the same rules as Stage 2, however, Jets possess great Anti-Air Resistance, specifically during the JA, and enemy AACI cannot be triggered during this phase either.
Jets also take part in the regular Stage 3, but in exchange, they are subject to enemy Anti-Air prior to the JA, and again during Stage 2.
Steel Cost: every time the Jet Assault Phase is triggered, ![]() is automatically subtracted from the stockpile.
is automatically subtracted from the stockpile.
[math]\displaystyle{ \text{Jet Phase Cost} = \sum^{\text{All Jets}} \lceil \text{Plane}_\text{Count} \times \text{Steel Cost} \rceil }[/math]
- [math]\displaystyle{ \text{Plane}_\text{Count} }[/math] is the current plane count at the start of the battle.
- [math]\displaystyle{ \text{Steel Cost} }[/math] is the steel cost per plane.
- Kikka Kai: 2.6
- Jet Keiun Kai: 2.8
Stage 1 - Battle for Air Superiority

Planes that participate in this phase:
- Fighters:
 /
/ carrier-based,
 seaplanes.
 Hayabusa ASW Hayabusa
- Bombers
 /
/ /
/ // carrier-based,
 Bomber seaplanes.
Following a possible Jet Phase, the fight for Air Supremacy will begin. The main objective of this phase is to define the Air State imposed on each fleet, by comparing each fleet's Air Power, more commonly referred to as Fighter Power (FP).
- The Air State achieved can be critical, especially to trigger certain mechanics like Artillery Spotting/CVCI, Contact, or Night Contact.
Fighter Power is defined by each plane equipped in the fleet that participates in this phase.
| Fighter Power |
|---|
|
[math]\displaystyle{ \text{Fighter Power} = \sum^{\text{All planes}} \left[ \left(\text{AA}_\text{Plane} \times \sqrt{\text{Plane}_\text{Count}} \right) + \text{Mod}_\text{proficiency} \right] }[/math] Where:
|

After Fighter Power is calculated for each fleet (FP and EFP for allied and enemy fleets, respectively), the values are compared, and Air State is determined, based on the following:
| Air State | Fighter Power Range | Allied Planes Shot Down | Enemy Planes Shot Down | Airstrike Contact | Artillery Spotting | Night Contact |
|---|---|---|---|---|---|---|
| Air Supremacy (AS+) 制空権確保! |
[math]\displaystyle{ \text{FP} \ge 3\text{EFP} }[/math] | 3/120 - 7/120 | 0% - 100% | Allied Only | Allied Only | Allied Only |
| Air Superiority (AS) 航空優勢! |
[math]\displaystyle{ 3\text{EFP} \gt \text{FP} \ge 1.5\text{EFP} }[/math] | 9/120 - 21/120 | 0% - 80% | Allied & Enemy | Allied Only | Allied & Enemy |
| Air Parity (AP) No text |
[math]\displaystyle{ 1.5\text{EFP} \gt \text{FP} \gt \frac{2}{3}\text{EFP} }[/math] | 15/120 - 35/120 | 0% - 60% | Neither | Neither | Neither |
| Air Denial (AD) No text |
[math]\displaystyle{ \frac{2}{3}\text{EFP} \ge \text{FP} \gt \frac{1}{3}\text{EFP} }[/math] | 21/120 - 49/120 | 0% - 40% | Allied & Enemy | Enemy Only | Allied & Enemy |
| Air Incapability (AI) 制空権喪失! |
[math]\displaystyle{ \frac{1}{3}\text{EFP} \ge \text{FP} }[/math] | 30/120 - 70/120 | 0% - 10% | Enemy Only | Enemy Only | Enemy Only |
After determining it, each fleet will lose a random number of planes across all slots based on the imposed Air State.
| Proportional Air State Shootdown Formulas |
|---|
|
For each slot of the Allied Fleet: [math]\displaystyle{ \text{Plane Loss} = \left \lfloor \text{Plane}_\text{Count} \times \left( \text{random} \left[ 0 ; \frac{\text{Mod}_\text{Air State}}{3} \right] + \frac{\text{Mod}_\text{Air State}}{4} \right) \times 0.1 \times \text{Mod}_\text{Jet} \right \rfloor }[/math] For each slot of the Enemy Fleet: [math]\displaystyle{ \text{Plane Loss} = \Big\lfloor \text{Plane}_\text{Count} \times \big( 0.035 \times \text{random} \left[ 0 ; \text{Mod}_\text{Air State} \right] + 0.065 \times \text{random} \left[ 0 ; \text{Mod}_\text{Air State} \right] \big) \Big\rfloor }[/math] Where:
|


- Notes
- Aircraft will be launched regardless of the carrier's state (except Sunk).
- The Air States between the allied and enemy fleets are mirrored. For example, attaining AS+ imposes AI to the enemy fleet.
- If both sides launch no planes, the Air State will be Air Parity.
- By solely using planes with no
 AA stat, an enemy fleet might start Air Supremacy Combat with 0 total Fighter Power.
- In such case, the allied fleet will attain AS+ even if no planes are launched.
Stage 2 - Fleet Anti-Air Defense
Planes that participate in this phase:
- Bombers
- //// carrier-based,
- Bomber seaplanes.
- Liaison Aircraft with
 Dive Bombing stat.
Following Stage 1, the Fleet AA Defense phase allows each fleet to reduce the incoming Airstrike damage by shooting down enemy planes.
- Each bomber is assigned to a random enemy ship.
- Ships are picked regardless of damage state, ship class, and position in the fleet have no influence.
- Even ships that cannot be targeted by airstrikes such as submarines can be chosen to defend against a given bomber.
- Sunk ships cannot be chosen to defend[1], but sunk enemy ships can still activate Anti-Air Cut-in for the fleet[2]
- Ships are picked regardless of damage state, ship class, and position in the fleet have no influence.
- When a ship defends against a bomber, it rolls two concurrent but independent events, each with 50% chance of success:
- The first roll, denominated Proportional Shootdown, or Prop for short, reduces the slot size by a given % value.
- The second roll, denominated Fixed Shootdown, or Fixed for short, reduces the slot size by a given X value.
- There is therefore a chance of 25% to trigger both effects, 25% to trigger only Prop, 25% to trigger only Fixed, and 25% to trigger neither, for each bomber.
- Player-side ships are also guaranteed to shoot down at least +1 plane in addition to this, see Anti-Air Cut-in for details.
Adjusted Anti-Air
Adjusted Anti-Air is a set of values derived from each ship and the entire fleet. For a single ship, this value Ship Adjusted AA applies weights on different pieces of equipment to further increase its effectiveness against enemy air threats. For the fleet, this value Fleet Adjusted AA has the objective of further increasing the influence of particularly high Anti-Air ships on either side by strengthening the entire fleet's air defense performance.
| Adjusted Anti-Air Formulas | ||||||||||||||||||||||
|---|---|---|---|---|---|---|---|---|---|---|---|---|---|---|---|---|---|---|---|---|---|---|
|
Allied Fleet:
|
Proportional and Fixed shootdowns
- Ship Adjusted AA is used to calculate Proportional shootdown.
- Ship Adjusted AA and Fleet Adjusted AA are used to calculate Fixed shootdown.
| Prop/Fixed Shootdown Formulas |
|---|
|
Allied Fleet's ship:
With:
|
| Guaranteed Shootdown Formula |
|---|
With:
|
Anti-Air Resistance
Specific planes, in particular skilled variants, remarkable aces or state-of-the-art aircraft may present a special AA resistance property. AA resistance is presented in form of "Ship AA Resistance/Fleet AA Resistance", with each value being used in the respective above formulas.
This property is arbitrary to each aircraft, but loosely fit in the following categories:
- Extremely high resistance: Aircraft that presents a resistance of 0.5/0.5
- High resistance: Aircraft that presents a resistance of 0.5/0.7
- Average resistance: Aircraft that presents a resistance of 0.6/0.7
- Low resistance: Aircraft that presents a resistance of 0.6/1.0


Anti-Air Cut-in

Using special equipment setups, ships may perform one of multiple special anti-air maneuvers during Stage 2. These moves are often referred to as AA Cut-ins, or AACI due to the way the equipment is displayed in the screen before they are performed. Particular AACI are often referred to by their acronym, such as BBR for AACI 5.
AACI grants a multiplier to the Fixed Shootdown of all Allied Fleet ships regardless of what ship uses it, referred to as K-value. On top of that effect, AACI will remove a fixed number of planes from each enemy bomber slot. These effects make depleting the entirety of enemy bombers much more feasible.
Although several ships can be equipped with a proper AACI setup, only one ship can perform an AACI. If Stage 2 happens multiple times, like in an Air Battle node, then each Air Phase's Stage 2 might roll an AACI.
If the enemy fleet has a valid setup, it may as well activate an AACI. If that happens, an animation will not be shown, but the effects will function normally. It can activate during the regular airstrike phase, but not during LBAS phases.
- There is a bug that allows enemy ships to activate AACI even if they were sunk[1].
The trigger chance of a given AACI is solely determined by its API value, and is arbitrary. Fleet AA, Ship AA, Adjusted AA, Air State, or any other parameter like Luck and LoS have no bearing in AACI trigger rates. Most trigger chances were datamined from KanColle Vita, and tests in the Browser version corroborated the results.
 is used to indicate any High-Angle Gun (dual-purpose guns/HA guns), including Main HA Guns and Secondary HA Guns
 is used to indicate any AA Fire Directors
 .
.
 is used to indicate any AA Gun.
 Air is used to indicate an Air Radar.
- Any Radar with AA stat of 2 or higher is considered an Air Radar, even if not explicitly stated by the game.
- Any Radar with
| AACI Patterns | ||||||
|---|---|---|---|---|---|---|
| API value | Type | Shot down per slot |
K-value | Rate | User | Notes |
| None | - | +1A = 1, B = 0 | 1.0 | N/A | Player's fleet only | Triggers if no other AACI is activated |
| 1 | HHR |
+8A = 3, B = 5 | 1.7 | 65% | Akizuki-class    
|
HA guns x2 + Air Radar |
| 2 | HR |
+7A = 3, B = 4 | 1.7 | 58% | HA guns + Air Radar | |
| 3 | HH |
+5A = 2, B = 3 | 1.6 | 50% | HA guns x2 | |
| 4 | MSAR |
+7A = 5, B = 2 | 1.5 | 52% | Battleships | Large Main Gun + AA Shell + AAFD + Air Radar |
| 5 | BBR |
+5A = 2, B = 3 | 1.5 | 55% | All | HA guns (≥8 AA) x2 + Air Radar |
| 6 | MSA |
+5A = 4, B = 1 | 1.45 | 40% | Battleships | Large Main Gun + AA Shell + AAFD |
| 7 | HAR |
+4A = 2, B = 2 | 1.35 | 45% | All | HA guns + AAFD + Air Radar |
| 8 | BR |
+5A = 2, B = 3 | 1.4 | 50% | HA guns (≥8 AA) + Air Radar | |
| 9 | HA |
+3A = 1, B = 2 | 1.3 | 40% | HA guns + AAFD | |
| 10 | HCR |
+9A = 3, B = 6 | 1.65 | 60% | Maya Kai Ni
|
HA guns + AA Gun (≥9 AA) + Air Radar |
| 11 | HC |
+7A = 2, B = 5 | 1.5 | 55% | HA guns + AA Gun (≥9 AA) | |
| 12 | CGR |
+4A = 1, B = 3 | 1.25 | 45% | All | AA Gun (≥9 AA) + AA Gun (≥3 AA) + Air Radar |
| 13 | Cannot be activated: |
+5A = 1, B = 4 | 1.35 | 35% | All except Maya Kai Ni
|
HA guns (≥8 AA) + AA Gun (≥9 AA) + Air Radar |
| 14 | HGR |
+5 | 1.45 | 62% | Isuzu Kai Ni
|
HA guns + AA Gun + Air Radar |
| 15 | HG |
+4 | 1.3 | 55% | HA guns + AA Gun | |
| 16 | HGR |
+5 | 1.4 | 62% | Kasumi Kai Ni B & &Yuubari Kai Ni  (not Toku/D (not Toku/D  ) )
|
HA guns + AA Gun + Air Radar |
| 17 | HG |
+3 | 1.25 | 55% | Kasumi Kai Ni B
|
HA guns + AA Gun |
| 18 | C |
+3 | 1.2 | 60% | Satsuki Kai Ni
|
AA Gun (≥9 AA) |
| 19 | HC |
+6 | 1.45 | 58% | Kinu Kai Ni
|
HA guns (≤7 AA) + AA Gun (≥9 AA) |
| 20 | C |
+4 | 1.25 | 65% | AA Gun (≥9 AA) | |
| 21 | HR |
+6 | 1.45 | 60% | Yura Kai Ni
|
HA guns + Air Radar |
| 22 | C |
+3 | 1.2 | 60% | Fumizuki Kai Ni
|
AA Gun (≥9 AA) |
| 23 | G |
+2 | 1.05 | 80% | UIT-25/I-504 
|
AA Gun (3 to 8 AA) |
| 24 | HG |
+4 | 1.25 | 40% | Tenryuu-class Kai Ni 
|
HA guns + AA Gun (3 to 8 AA) |
| 25 |  |
+8 | 1.55 | 60% | Ise-class Kai/Ni   
|
RLK2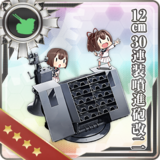 + Air Radar + AA Shell + Air Radar + AA Shell
|
| 26 |  |
+7 | 1.4 | 55% | Yamato-class Kai Ni  
|
10cm Twin HA Mount Kai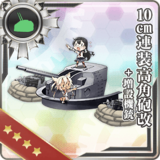 + Air Radar + Air Radar
|
| 27 | |
+6 | 1.55 | 55% (5%)when accounting for API 8 rate | Ooyodo Kai
|
10cm Twin HA Mount Kai + RLK2 + Air Radar
|
| 28 | |
+5 | 1.4 | 55% | Ise-class Kai/Ni & Musashi Kai/Ni 
|
RLK2 + Air Radar
|
| 29 | HR |
+6 | 1.55 | 60% | Hamakaze B Kai & &Isokaze B Kai 
|
HA guns + Air Radar Using HA guns (≥8 AA) has a high chance to proc AACI 5/8 instead. |
| 30 | HHH |
+4 | 1.3 | 45% | Tenryuu Kai Ni & Gotland Kai/Andra  
|
HA guns x3 |
| 31 | HH |
+3 | 1.2 | 52% | Tenryuu Kai Ni
|
HA guns x2 |
| 32 |   OR  OR
|
+4 | 1.2 | 50% | Royal Navy Ships & Kongou-class Kai Ni/C      
|
16inch Mk.I Triple + FCR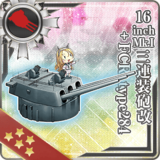 + QF 2-pounder + QF 2-pounder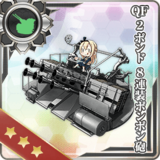 OR 20-tube 7inch UP 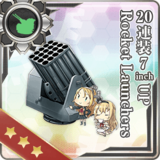 + 20-tube 7inch UP / QF 2-pounder + 20-tube 7inch UP / QF 2-pounder
|
| 33 | HG |
+4 | 1.35 | 45% | Gotland Kai/Andra
|
HA guns + AA Gun (≥4 AA) |
| 34 | 
|
+8 | 1.6 | 55% | Fletcher-class | 2 5inch Mk.30 + GFCS Mk.37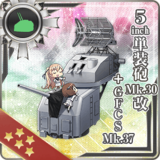
|
| 35 |  OR 
|
+7 | 1.55 | 55% | 5inch Mk.30 + GFCS Mk.37 + 5inch Single Gun Mount Mk.30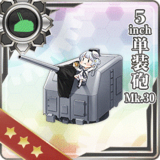 / Kai / Kai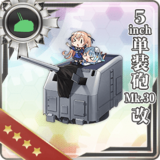
| |
| 36 |  OR OR
|
+7 | 1.55 | 50% | 2 5inch Single Gun Mount Mk.30 / Kai + GFCS Mk.37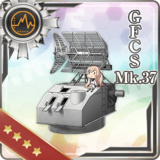
| |
| 37 |
|
+5 | 1.45 | 40% | 2 5inch Single Gun Mount Mk.30 Kai (not base)
| |
| 38 | 
|
+11 | 1.85 | 57% | Atlanta-class
|
2 GFCS Mk.37 + 5inch Twin CD
|
| 39 | 
|
+11 | 1.7 | 57% | GFCS Mk.37 + 5inch Twin CD + 5inch Twin CD
| |
| 40 | OR OR
|
+11 | 1.7 | 56% | 2 5inch Twin CD / GFCS Mk.37 + 5inch Twin CD + GFCS Mk.37
| |
| 41 | OR OR
|
+10 | 1.65 | 55% | 2 5inch Twin CD / GFCS Mk.37 + 5inch Twin CD
| |
| 42 |  |
+11 | 1.65 | ?% | Yamato-class Kai Ni
|
Very large radar  + 1 or 2 10cm Twin HA Gun CD + 1 or 2 10cm Twin HA Gun CD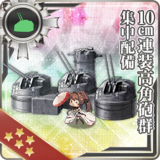 + 0 or 1 AA Gun (≥6 AA) + 0 or 1 AA Gun (≥6 AA)
|
| 43 | |
+9 | 1.6 | ?% | ||
| 44 | |
+7 | 1.6 | ?% | ||
| 45 | |
+6 | 1.55 | ?% | ||
- Notes
- If multiple ships can trigger AACI, the ship that rolls the highest API number takes priority.
- If API numbers are tied, priority goes by fleet slot order from top to bottom.
- If a single ship fulfills multiple AACI requirements:
- A single roll is done to check for all AACIs.
- This means that an AACI with higher priority and higher trigger rate completely blocks lower priority AACI from activating.
- For example, Akizuki with a 8+ AA8+ AAAir setup fulfills the requirements of the AACIs with API values 1, 2, 3, 5, and 8, with 1 being the highest priority. Due to this, the only API that Akizuki can trigger is 1, because a success will activate it, and a failure implies that the roll wouldn't meet the 58%, 50%, 55%, and 50% trigger rates as it has failed to meet a 65% rate roll.
- For example, Akizuki with a
- Conversely, an AACI with lower priority but higher trigger rate has a chance of occurring, if the roll fails to pass the higher priority AACI.
- For example, Isokaze B Kai with 8+ AA8+ AAAir fulfils 5 (55% rate) and 29 (60% rate), with 5 having priority. This means that in total, 5 will occur 55% of the time, and 29 will occur the leftover 5% of the time (60% - 55%).
- For example, Isokaze B Kai with
- Priority is: (1 > 2 > 3, 10 > 11, 14 > 15, 16 > 17, 19, 21, 25, 42 > 43 > 44 > 45) > 4 > 5 > 6 > 8 > 7 > (26 > 27 > 28, 29) > 9 > (33) > 12 > 13 > (18, 20, 22, 23, 30 > 31 > 24, 32)[2][3]
- Examples:
- Kinu Kai Ni can trigger both API 20 and 19.
- The same ship can activate APIs 20, 5, and 29.
- Note: At some point during 2018-2019(?), priority was changed from 7 > 8 to 8 > 7. Prior to this, both 7 and 8 could be triggered with 8+ AAAir[4], whereas now only 8 can be triggered.
- Examples:
Sequential AACIs
The Sequential AACIs are the Cut-ins introduced with the implementation of Johnston onwards. So far, they are exclusive to the Fletcher-class
 and Atlanta-class
 . Different from Original AACIs, each eligible AACI will be rolled independently if the previous roll has failed. If all Sequential rolls fail, an additional Original Type roll is performed. This grants the specific ships with access to Sequential AACIs extremely high combined trigger rates.
- Example: Atlanta with 5inch Twin CD + 5inch Twin CD + GFCS fulfils 39, 40, 41, and 5. Rolled independently, this gives 57% for 39, ~24% for 40, ~10.4% for 41, ~4.7% for 5, for a total of ~96% chance of some AACI occurring.
Sequential AACIs are, in order of priority: (34 > 35 > 37 > 36, 38 > 39 > 40 > 41) > (Original AACI)[2]
Stage 3 - Airstrike
Planes that participate in this phase:
- Reconnaissance Seaplanes
 Carrier-based Reconnaissance Aircraft
- Carrier-based Bombers
- Seaplane Bombers
- Liaison Aircraft with Dive Bombing stat.
With both preliminary phases executed, the final Aerial Combat Stage, Airstrike, is performed. In this phase, each bomber from the Allied Fleet and Enemy Fleet that still possess a slot size higher than 0 selects a ship to attack. The attack target is randomly picked following the same rules as Shelling target selection. The targeted ship is not necessarily the ship that has defended against said bomber during Stage 2.
See Damage Calculations for details on airstrike damage.
- Notes
- Each bomber is assigned to a single ship and performs exactly one attack. The same ship may be selected to be attacked by multiple different bombers.
- The attack is unaffected by the battle's Engagement and the Fleet's Formation, as well as the Carrier's morale and damage state.
- Submarines are untargetable by Airstrike
Contact

Contact is a special mechanic that increases the damage of all bombers participating in the Airstrike Phase. Specifically, it may be triggered during Stage 1, but has no effects until Stage 3. When successful, the Squadron performing Contact will be shown on top of the opposing fleet's "Radar", together with the text Making contact! (触接中!, shokusetsu-chū!).
- Contact may be triggered only under AS+, AS, and AD. It cannot trigger under AP and AI.
- At least one Carrier Recon, / Torpedo Bomber, Recon/
 Seaplane Recon, or
  Large Flying Boat must be present.
- Bomber Seaplane Bombers cannot perform contact.
Step 1: Contact Trigger
This step determines if any contact can trigger at all. Each plane that can perform Contact except ![]() /
/![]() Torpedo Bombers contributes an independent trigger rate based on the plane's
Torpedo Bombers contributes an independent trigger rate based on the plane's ![]() LoS stat and slot size. The Final Trigger Rate is determined using the sum of all independent trigger rates, and is also affected by Air State.
LoS stat and slot size. The Final Trigger Rate is determined using the sum of all independent trigger rates, and is also affected by Air State.
- If only / Torpedo Bombers are present, there is still a very small chance Contact Trigger can succeed.
| Contact Trigger Rate Formula[1] |
|---|
|
[math]\displaystyle{ \text{Contact Rate}= \frac{1 + \sum^{\text{All Planes}} \left( \lfloor \sqrt{\text{Plane}_\text{Count}} \times \text{LoS}_\text{Plane} \rfloor \right)} {\text{Mod}_\text{Air State}} }[/math] Where:
|
A single roll is performed using the Final Trigger Rate. If successful, Contact advances to Step 2.
Step 2: Aircraft Selection
After a successful Step 1, each plane will roll a Selection rate to be allowed to perform contact. The rolls are performed for each plane independently following a set priority, from highest to lowest. The priority for Aircraft Selection is:
 Accuracy stat, starting from highest.
- The Carrier's position in the fleet, starting from Flagship.
- The Equipment slot position, starting from the first.
| Aircraft Selection Formula[1] |
|---|
|
[math]\displaystyle{ \text{Selection Rate}= \frac{\text{LoS}_\text{Plane}} {\text{Mod}_\text{Air State}} }[/math] Where:
|
The first Squadron that succeeds to be selected will perform Contact. If all planes fail to be selected, Contact will not trigger, even if Step 1 was successful.
If successful, then Contact will grant an additional damage multiplier based on the selected aircraft's ![]() stat.
stat.
| Accuracy |
Damage Modifier |
|---|---|
| 0 | 112% |
| 1 | 112% |
| 2 | 117% |
| 3+ | 120% |
- ↑ 1.0 1.1 KanColle Kai decompile
Anti-Air Rocket Barrage
Certain ship types have the ability to trigger an "Anti-Air Rocket Barrage" (AARB), completely negating any airstrike damage.
- The only ships types able to trigger this mechanic are:
- The ship must be equipped with a 12cm 30-tube Rocket Launcher Kai Ni.
- It is often referred to as "RLK2" or "Rosa Kai Ni" for short.
| AARB Trigger Rate Formula |
|---|
|
The trigger rate for a given ship is: [math]\displaystyle{ \text{AARB %} = 100 \times \frac{\text{AdjAA}_\text{ship} + {0.9} \times \text{Luck}}{400 - \left( 40 \times \text{N}_\text{rocket} + \text{AdjAA}_\text{RLK2} + 30 + \text{Mod}_\text{Ise-class} \right)} }[/math] With:
|

If the AARB triggers on a ship, the ship will slide forward, and Rocket Barrage Successful (噴進弾幕成功, funshindan maku seikō) will be displayed over its card.
- If the ship does not take any damage during the airstrike, the same animation will also be played, even if the AARB failed to trigger or the ship was not targeted by any bomber.
- Generally when a ship is targeted by any bomber and takes no damage, the text "miss" will be displayed over the ship's card, but if the AARB actually triggered, nothing will be displayed instead.
- Notes
- It is possible to achieve more than 100% activation rate.
- There is another anti-air barrage animation in-game for only
 AA Shells. No effects were found for it.
- The combination of a AA Shells and the RLK2 is also supposed to have extra effects. No effects were found for it.
- The uselessness/cosmetic-only role of AA Shells in this mechanic might be an historical reference to the real T3 shells, being extremely ineffective in their AA role, and being compared to simple "fireworks".
- The combination of a AA Shells and the RLK2
See Also
| |||||||||||||||||||||||||||||||||||||