- Welcome to the Kancolle Wiki!
- If you have any questions regarding site content, account registration, etc., please visit the KanColle Wiki Discord
Difference between revisions of "User:Minhfongboy/KC Phase 2 Ranking"
Minhfongboy (talk | contribs) |
|||
| Line 112: | Line 112: | ||
|6.746 | |6.746 | ||
|style="text-align: left"| | |style="text-align: left"| | ||
| − | #{{Ship/Link|Yahagi Kai Ni B|text=Yahagi}} (The CL with Night | + | #{{Ship/Link|Yahagi Kai Ni B|text=Yahagi}} (The CL with {{Night SPB}}) is set to be '''85 morale''' as she is likely to score MVP throughout the run. |
#<font color="green">'''Best map to kill transport ships as you will meet 4 of them in one sortie.'''</font> | #<font color="green">'''Best map to kill transport ships as you will meet 4 of them in one sortie.'''</font> | ||
#Like Phase 1, boss node still <font color="green">'''contains a lot of old {{Ship/Link|Naganami|Zuikaku|Shoukaku|Mutsu|Agano|Ariake|text=rare ships}}, making it ideal to farm for their equipment'''</font> if the player desires. | #Like Phase 1, boss node still <font color="green">'''contains a lot of old {{Ship/Link|Naganami|Zuikaku|Shoukaku|Mutsu|Agano|Ariake|text=rare ships}}, making it ideal to farm for their equipment'''</font> if the player desires. | ||
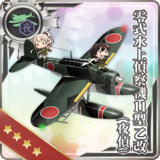
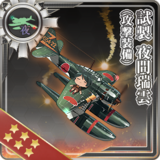
| − | #However, the <font color="red">{{EquipmentLink|Elite Torpedo Squadron Command Facility}} '''is the absolutely minimum requirement'''</font> for this fleet to work, and '''possibly the | + | #However, the <font color="red">{{EquipmentLink|Elite Torpedo Squadron Command Facility}} '''is the absolutely minimum requirement'''</font> for this fleet to work, and '''possibly the <span class="tooltip">[[Type 0 Reconnaissance Seaplane Model 11B Kai (Night Recon)]]<span class="tooltiptext">[[File:Equipment Card Type 0 Reconnaissance Seaplane Model 11B Kai (Night Recon).png|160px|link=Type 0 Reconnaissance Seaplane Model 11B Kai (Night Recon)]]<br>Lvl 125 = 100% trigger</span></span> with {{EquipmentLink|Prototype Night Zuiun (Attack Equipment)}}''' as well to maintain the high pass rate. |
#Each run in average supposed to consume '''189''' ammo, not '''131'''. But 5-4 south route also consists of one ammo node that will alway give you '''60 ammo''' (No DLC equipped). Assuming 97.8% of the time you will not retreat and go through this node, you will gain back the ammo you used, which is around '''60 x 97.8% = 58 ammo''', hence the ammo usage became '''189 - 58 = 131'''. | #Each run in average supposed to consume '''189''' ammo, not '''131'''. But 5-4 south route also consists of one ammo node that will alway give you '''60 ammo''' (No DLC equipped). Assuming 97.8% of the time you will not retreat and go through this node, you will gain back the ammo you used, which is around '''60 x 97.8% = 58 ammo''', hence the ammo usage became '''189 - 58 = 131'''. | ||
#If you managed to tweak the fleet setup to allow 3-slot CL or weaker DD with low luck while maintaining reasonable pass rate, <font color="green">'''this map can be one of the best options for leveling. A ship that is in non-flagship position and never get MVP will gain at least 1700 - 1850 EXP per boss runs (2500 - 2800 if flagship, more with MVP)'''</font>. Theoretically, if the flagship always becomes MVP and you finished the boss battle, she can gain up to '''4500 EXP''' per runs. | #If you managed to tweak the fleet setup to allow 3-slot CL or weaker DD with low luck while maintaining reasonable pass rate, <font color="green">'''this map can be one of the best options for leveling. A ship that is in non-flagship position and never get MVP will gain at least 1700 - 1850 EXP per boss runs (2500 - 2800 if flagship, more with MVP)'''</font>. Theoretically, if the flagship always becomes MVP and you finished the boss battle, she can gain up to '''4500 EXP''' per runs. | ||
| Line 204: | Line 204: | ||
|[[File:World 3 3-2 Map.png|300px|thumb]] | |[[File:World 3 3-2 Map.png|300px|thumb]] | ||
|[[File:MFB_RC32.png|300px|thumb]] | |[[File:MFB_RC32.png|300px|thumb]] | ||
| − | |{{MapRoute|C|red|G| | + | |{{MapRoute|C|red|G|violet|L|red}}<br>Surface: 1<br>Boss: 1<br>Maelstrom: 0-1 |
! | ! | ||
! | ! | ||
| Line 222: | Line 222: | ||
|- | |- | ||
|[[File:MFB_RC34_2N.png|300px|thumb]] | |[[File:MFB_RC34_2N.png|300px|thumb]] | ||
| − | |{{MapRoute|D| | + | |{{MapRoute|D|violet|H|red|P|red}}<br>Surface: 1<br>Boss: 1<br>Maelstrom: 1 |
|84 for AS | |84 for AS | ||
! | ! | ||
Revision as of 18:02, 28 May 2023
VERSION 2.7
General

Looking for a ranking comp that is efficient? I guess this blog can help you pick one.
Table record for Hashirajima and Brunei server
| Server | T500 Record | T100 Record |
|---|---|---|
| Brunei | 4015 (1/2021) | 5011 (2/2022) |
| Hashi | 4755 (6/2021) | 5866 (5/2020) |
Efficiency Summary
To judge whether the comp is good for ranking, and to measure the efficiency, the KC simulator will be used to gauge the value and put in the following table as reference data. While it is true that the simulator code is not 100% correct as the game code, simulator code might miss some modifier here and there, this is still the closest data to the game that we players can reference to. After all, having some close numbers that we can base our comps on is still better than measuring a comp efficiency without any numbers to back it up.
- Due to this reason, some of the numbers down here might not reflect the true rate in the game, but since they are the closest rate to the game we can get, it is still a good reference that we can use to estimate the true reality rate around the expected range in the table below.
All the simulations are done with 50K samples. Probability variance might cause the rate to be a little off, but eventually they will end up at the expected value in the table with more samples.
- To test the comp in the simulator yourself, please do as the following:
- Step 1. Download the kcsim file provided in the external link of any comp in the Map & Comp column.
- Step 2. Go to KC simulator site [11], select Save/Load Simulator Backup.
- Step 3. A dialog box will pop up, select Choose File, navigate to the kcsim file you just downloaded and open it.
- Step 4. Select Import All (Refresh page) to load it up.
- To see the details of equipment setup without downloading the file, please check out the second tab, Comp setup, routing and Misc. Notes.
| Color code: Outstanding > Good > Average > Bad | ||||||||
|---|---|---|---|---|---|---|---|---|
| Map & Comp | Morale Drain | Boss Sunk / Victory Rate [1][2] | Retreat Rate [2] | Average Resource per run [2] | Average Bucket per run [2] | Ranking Points per run (per 100 runs) [3] [4] | Rpt gained per resource used ratio [5] | Notes |
| 3-2 1CL 5DD 1CL 4DD 1AO Fast+ fleet, 4 radar [1] |
High | 98.6% / 98.7% | 1.3% | 66 72 17 0 |
0.21 |
1.3 (128.31) | 8.387 |
|
| 3-4 2CV 2CVL 1CL 1AV [2] |
Low | 92.7% / 93% | 7% | 265 227 111 177 |
0.66 |
2.66 (247.38) | 3.410 |
|
| 3-4 2CL 1CAV 3DD [3] |
High | 93.2% / 93.7% | 6.3% | 156 111 120 4 |
1.47 |
2.43 (227.69) | 6.215 |
|
| 4-4 3CVL 1CL 2DD 5 OASW [4] |
Medium | 96.8% / 97.1% | 2.8% | 152 125 50 45 |
0.586 |
1.99 (193.23) | 5.349 |
|
| 5-4 1CL 3DD 2CLT ETSCF fleet [5] |
Medium | 97.4% / 97.8% | 2.2% | 140 131 101 6 |
1.63 |
2.55 (249.39) | 6.746 |
|
| 6-3 1CL 4DD 1AV Opening Torpedo + 3 SPB + 4 OASW [6] |
Medium | 93.5% / 95.6% | 4.2% | 125 93 112 11 |
1.71 |
2.18 (208.41) | 6.393 |
|
| 7-1 1CL 4DD Damegami RE [7] |
Medium | 99.7% / 99.7% | 0.3% | 59 54 7 0 |
0.08 |
1.47 (146.56) | 12.25 |
|
| 7-1 1CL 4DD Lv 99 & 0 RE [8] |
Medium | 94.1% / 94.1% | 5.9% | 48 50 7 0 |
0.19 |
1.47 (138.33) | 14 |
|
| 7-3 1CL 1CAV Kamikaze  Haguro Haguro [9] [9]
|
High | 99.7% / 99.9% | 0.1% | 130 139 65 5 |
0.41 |
1.56 (155.84) | 4.601 | |
| 7-4 1CL 1BBV 1CVL 3DD 4/5 OASW & Atlanta  AACI [10] AACI [10]
|
Low | 92.8% / 96.7% | 3.3% | 191 242 39 54 |
0.214 |
1.97 (190.5) | 3.745 |
|
| ||||||||


| Map | Image | Comp Setup | Route | Air Power | LoS | Recommended Formations |
Notes |
|---|---|---|---|---|---|---|---|
| 3-2 | C G L Surface: 1 Boss: 1 Maelstrom: 0-1 |
||||||
| 3-4 | A C E G P Surface: 3 Boss: 1 Resource: 1 |
168 for AS+ | Node E gives 25-150
| ||||
| D H P Surface: 1 Boss: 1 Maelstrom: 1 |
84 for AS | ||||||
| 4-4 | A E I K Surface: 2 Submarine: 1 Boss: 1 |
144 for AS+ | |||||
| 5-4 | E H J P Surface: 1 Night: 2 Boss: 1 |
Cn2 45 | Boss node is fixed to the comp consisting of CL Tsu-Class and DD Ro-Class and DD Ro-Class once the map is cleared and you approach the boss node from south route. once the map is cleared and you approach the boss node from south route.
| ||||
| 6-3 | C E G H J Surface: 1 Submarine: 1 Boss: 1 Resource: 2 |
Cn3 38 | Air recon nodes G and H give one of the following resources each:
| ||||
| 7-1 | D E G H K Surface: 1 Submarine: 2 Boss: 1 Resource: 1 |
Node E gives 10-20
| |||||
| 7-3 | C D P Surface: 2 Boss: 1 |
6-ship enemy comp will disappear once the map is cleared. HP gauge resets every month. | |||||
| 7-4 | B E J L P Surface: 2 Submarine: 1 Air Raid: 1 Boss: 1 |
360+
|
Cn4 37 | Hi Convoy Princess Damaged II (225 Armor) comp will disappear once the map is cleared. comp will disappear once the map is cleared.HP gauge resets every month. |


Managing quarterly sortie quests ranking points
Credit to Keshak#7576 (discord). This is one of the recommended strategies to shoot ranking cannons.
As of current, there are 7 quarterly quests giving ranking points, known as cannon. A total of 2050 point can be obtained by completing all of those.
The following is the list of quarterly sortie quests. Bold indicates cannon quests
- At the beginning of the quarterly (unlocked by default): Bq3 and Bq13
- Unlocked by weekly or monthly quests:
- Bq1 needs Bm6 (Monthly 4-2)
- Bq2 needs Bw2 (Weekly carriers)
- Bq5 needs D11 (Tokyo Express 2)
- Bq7 needs Bw9: (Weekly 5-2)
- Bq8 needs D11 (Tokyo Express 2)
- Bq9 needs D11: (Tokyo Express 2)
- Bq11 needs Bm8 (Monthly supply lines)
- Unlocked by other quarterlies:
- Bq4 needs Bq3
- Bq6 needs Bq5
- Bq10 needs Bq2
- Bq12 needs Bq11
Recommended course of actions
- 1. Do all weeklies
- 2. Do Bm1: “Monthly Myoukou 2-5”
- 3. Do Bm5: “Monthly 1-5”
- 4. Do Bm8: “Monthly supply lines”
- 5. Do Bq11: “Newbie cannon” (80 rpt must be “sacrificed”)
- 6. At this point 5 big cannons are unlocked
- 6.1. Bq2 do everything but 6-3 run
- 6.2. Bq7 do everything but 5-4 run
- 6.3. Bq8 do everything but one 1-5 run
- 6.4. Bq12 do everything but 4-2 run
- 6.5. Bq13 do everything but 5-4 run
- 7. Bq10 remains locked until Bq2 is done
- 8. Clear all EOs and farm ranking points as usual
- 9. When the end of the month is close, calculate how many rpt you need to reach your desired position and fire the cannons you need.
Alternatively, if you want to try ranking all 3 months:
- Month 1. Do Bm1, Bm5, Bm8, Bq2, Bq8, 7-2-2 run of Bq10 (so you don't have to open it again) and everything but one run of Bq7, Bq11 and Bq13 (350+300 rpt with 200+80+390 rpt ready in case of need)
- Month 2. Do Bq7, Bq10 and Bq11 (200+400+80 rpt)
- Month 3. Do Bq12 and Bq13 (330+390 rpt)
Also, remember that some requirement of these quests are shared with other quests and can be done together (e.g. 5-4 of Bq7 and Bq13 with 2CL 3CA 1CV, 6-4 of Bq2 and Bq13, 6-3 of Bq2 and Bq4, etc.)
Trivia
Ranking plan
- As of September 2020, many quarterly quests that give ranking points have been released. This has directly affected the ranking pressure across all servers as nowaday T500 may requires as much effort as Phase 1 T100. However, this can also be a good thing as if you do all those quarterlies and EO in one single month, you can stack up to 3000 points pretty easily. With a couple of more sortie, you are guaranteed to hit T500 as well. So my advice is If your life is very busy, just focus all quarterlies in one month and clear all the EO that month too, this way, at least you will get ranking rewards every 3 months
- Of course it is still possible to rank every month and spread out quarterlies to get enough point buff (i.e each month you only do 2-3 quarterlies for around 600 points), but will require much more points from daily sortie for T500 nowaday if you wanna catch up. Plan your schedule accordingly to your server if you spam daily. You are gonna need like 3500 for T500 (Hashi will need more obviously)
Regarding the EO and Quest cannon
- For EO cannon, you can shoot anytime in a month to gain rpt, but note that if you shoot in the last day of the month, between 22:00 - 00:00 JST of the next month, it will not be counted for anything !
- For quest cannon
- Shooting it anytime before 14:00 JST of the last day of any month will give rpt to that month
- Shooting it after 14:00 JST of the last day of any month, as long as that month is NOT the last month of the quarter, will give rpt to the following month
- Shooting it after 14:00 JST of the last day of the last month in a quarter will just simply waste it, not counted for anything
- For reference, 4 quarters in KC are month 12-1-2 / 3-4-5 / 6-7-8 / 9-10-11
Example:
- Right now it's July, it belongs to quarter 6-7-8. I have the Z cannon available giving 350 points.
- If I shoot it anytime in July before 7/31 14:00 JST, I will have 350 points for July
- If I shoot it after 7/31 14:00 JST, but before August coming, I will have 350 points for August
- If I shoot it after 8/31 14:00 JST, I will get nothing out of it, as August is already the last month of the quarter
What is considered as a good ranking comp to be listed on the table?
A comp is considered to be good for ranking if it meets all of the following conditions when testing on the simulator:
- Victory rate > 93%
- Fuel and ammo used per run < 500
- Bauxite used per run < 100
- Bucket used per run < 2
- 4 battles maximum, including boss. If there is a 5th battle, that battle has to be air raid in order to save time.
- Efficiency higher than 3.410 (3-4 heavy comp efficiency threshold).
How to decide the best comp for a map if there are many variants?
If there are multiple comps that can do the ranking well in a map, a tiebreaker system will be used to determine the best comp to display on the table. Tiebreaker rules are as the following:
- Victory rate
- Fuel and ammo used
- Bauxite used
- Bucket used
- Whether the fleet detecting enemy using seaplane, or having air power.